Portland Guitar Co. | Portland Oregon | Contact Jay Dickinson-503.245.3276 | jay@portlandguitar.com
Portland Guitar Pretty Good Intonation (PGPG) System
Finished Build
Orchestral Model Cutaway
Serial # OMC 1.6.41
- Body:.......................... Philippine Ebony
- Top:............................ Sitka Spruce
- Neck:.......................... Khaya (Mahogany)
- Binding:...................... High Figure Snakewood
- Purfling:...................... Fine Herringbone with Green Pinstriping
- Appointments:............ Amboyna Burl, Brazilian Rosewood
- Fretboard & Bridge:.... 24 Nickel-Silver Frets Macassar Ebony with Snakewood Binding
- Tuners:........................Waverly, Nickel Plated with Ebony Knobs
Page 4
 ( 80 ) 7-Jan-2011
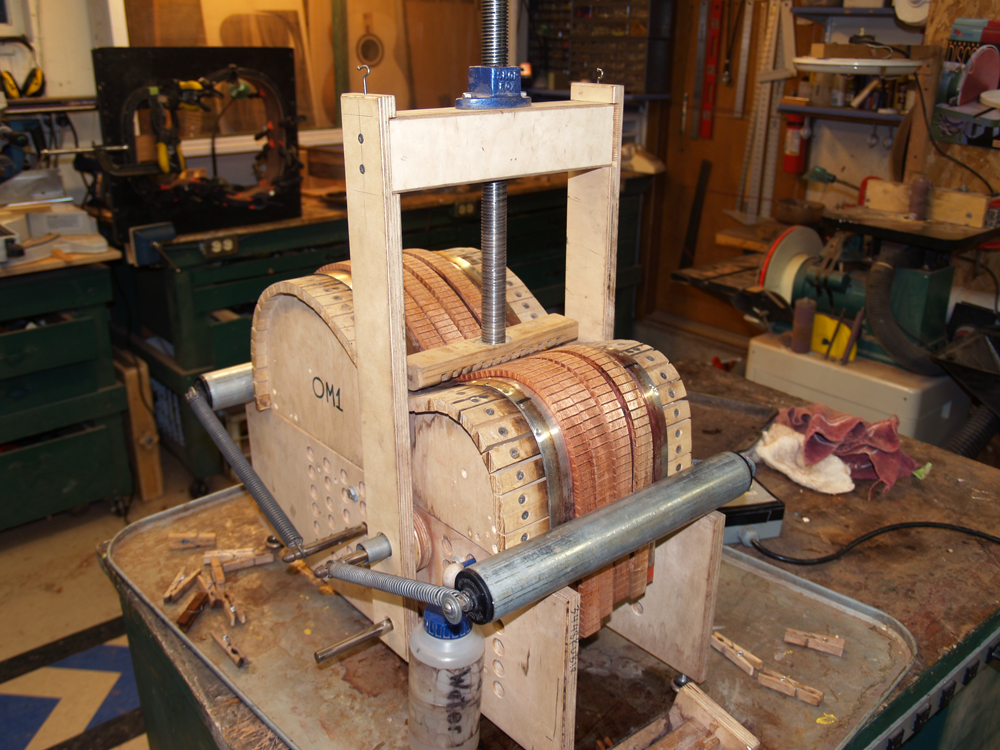
I use my universal bendalator machine to shape the kerfing. The kerfing will be glued to the inside of the sides to provide a shelf that the top and bottom will be glued to. The sides are too thin to provide a good gluing surface and the kerfing will also add rigidity to the sides and provide a substrate for the binding and purfling to be glued to.
 ( 81 ) 7-Jan-2011
I use the band saw to separate the cutaway portion of the kerfing
 ( 82 ) 7-Jan-2011
A little heat and pressure and the kerfing takes on the shape of the cutaway section.
 ( 83 ) 7-Jan-2011
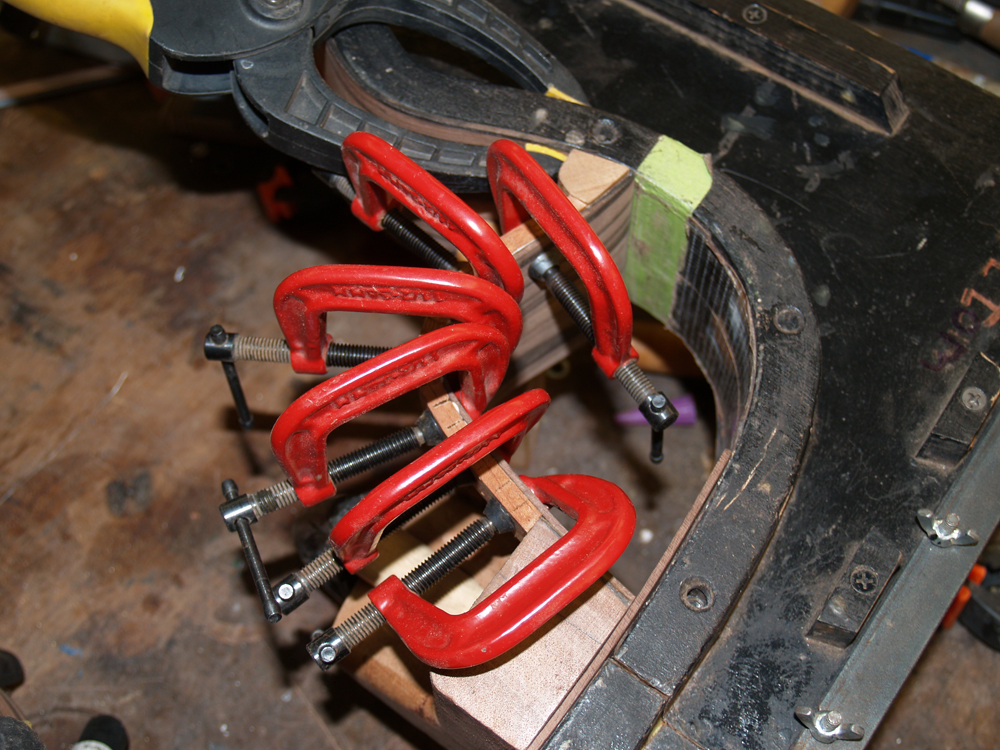
I use these small C-clamps to ensure the kerfing makes a good glue joint with the cutaway side.
 ( 84 ) 7-Jan-2011
Here is a look at the interior area of the cutaway.
 ( 85 ) 7-Jan-2011
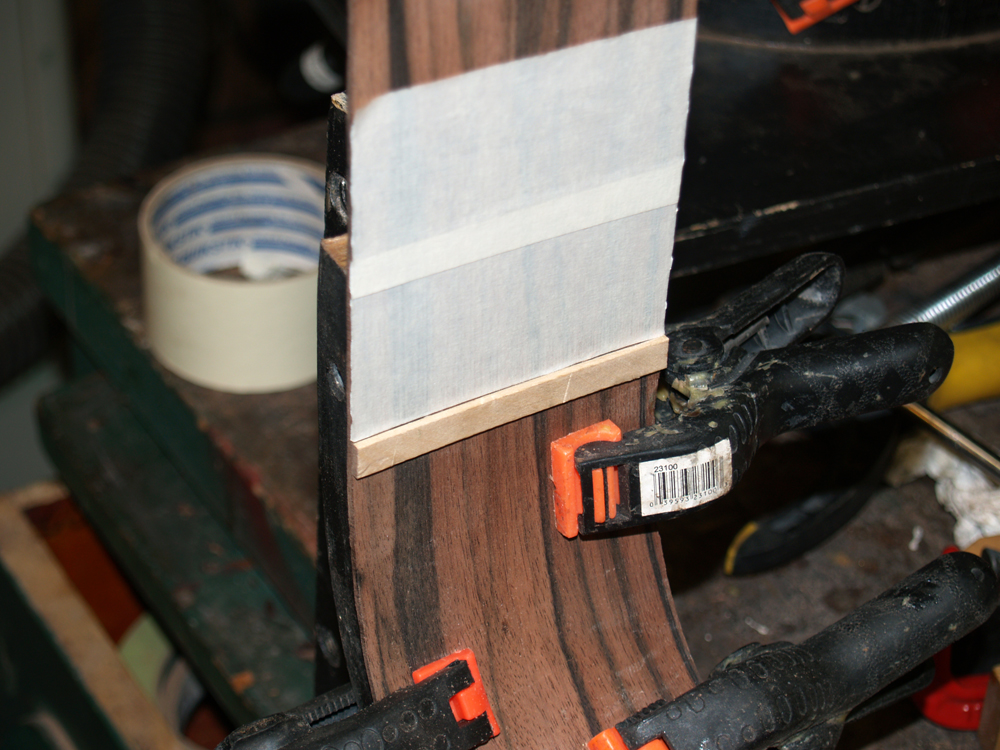
Before I glue the rest of the kerfing into place I use tape to mask off the portion of the side where the heel and tail blocks will be glued in place. The masking tape makes it easy to remove the kerfing in these areas.
 ( 86 ) 7-Jan-2011
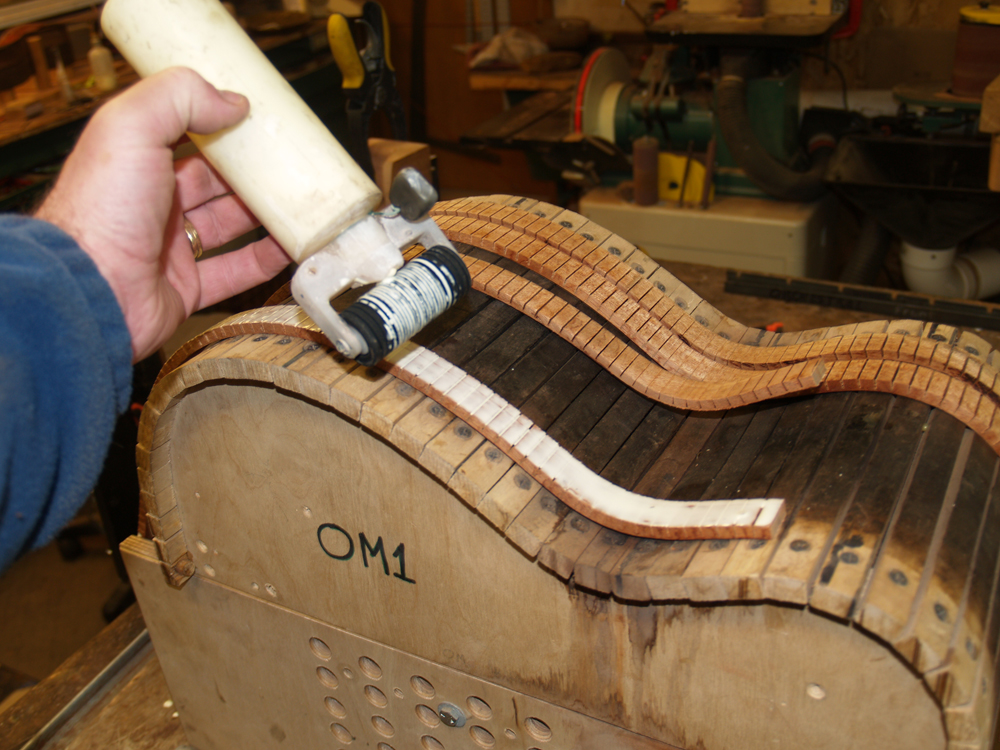
I spread an thin layer of glue on the inside of the kerfing.
 ( 87 ) 7-Jan-2011
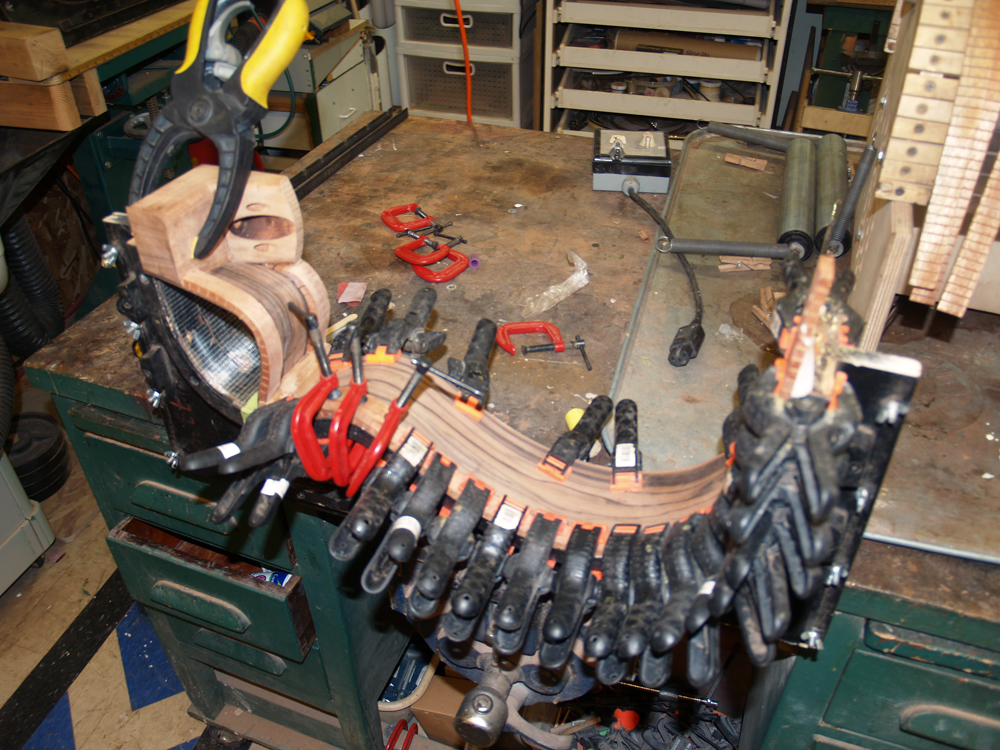
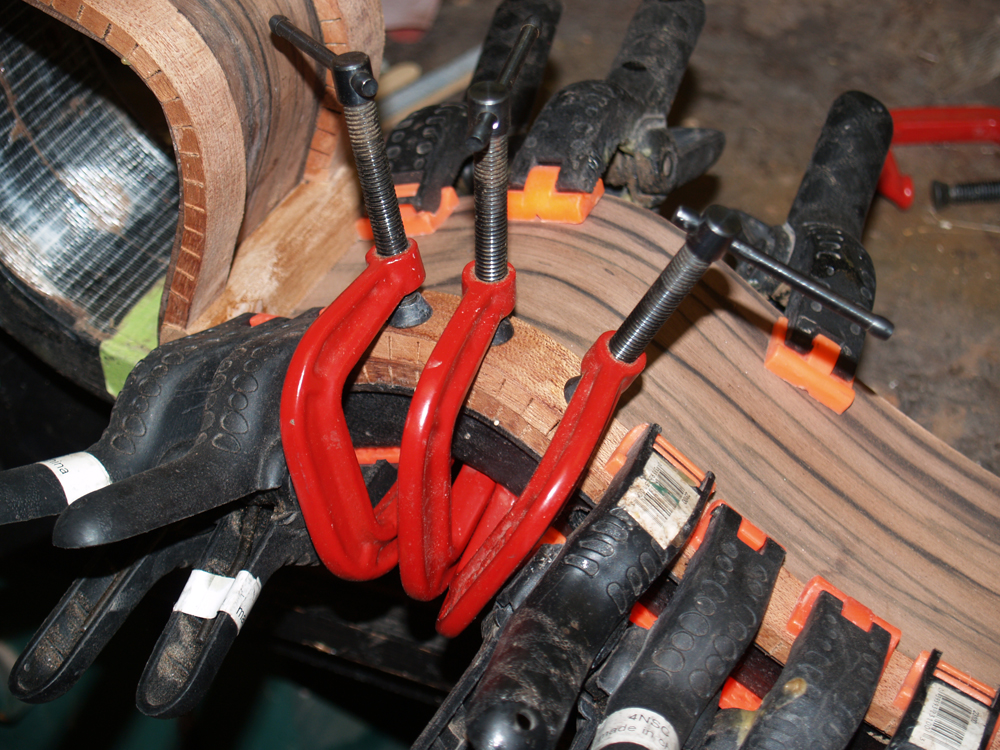
And then I glue the kerfing to the interior of the sides. Since I glue the kerfing on with the sides in their forms, when I clamp the kerfing down, the sides precisely take on the shape of the form. I use a reverse kerfing system, i.e., the kerfing slots face the wood and a gunnel strip is suspended away from the sides by about 1/4 inch. This will ultimately produce a very rigid side piece that has the exact shape of the form.
 ( 88 ) 7-Jan-2011
In high curvature areas I use a little extra clamping force to insure a good bond. I am fastidious in ensuring that there are no gaps between the kerfing and the sides. This is both an aesthetic as well as structural consideration.
 ( 89 ) 7-Jan-2011
Once the kerfing is clamped into place I clean up the excess glue and use my air gun to blow any residual glue out of the kerfing slots.
 ( 90 ) 7-Jan-2011
The second strip of kerfing is glued in just like the first. It is a good thing that I buy clamps by the gross.
 ( 91 ) 7-Jan-2011
And the other side gets the same treatment.
 ( 92 ) 7-Jan-2011
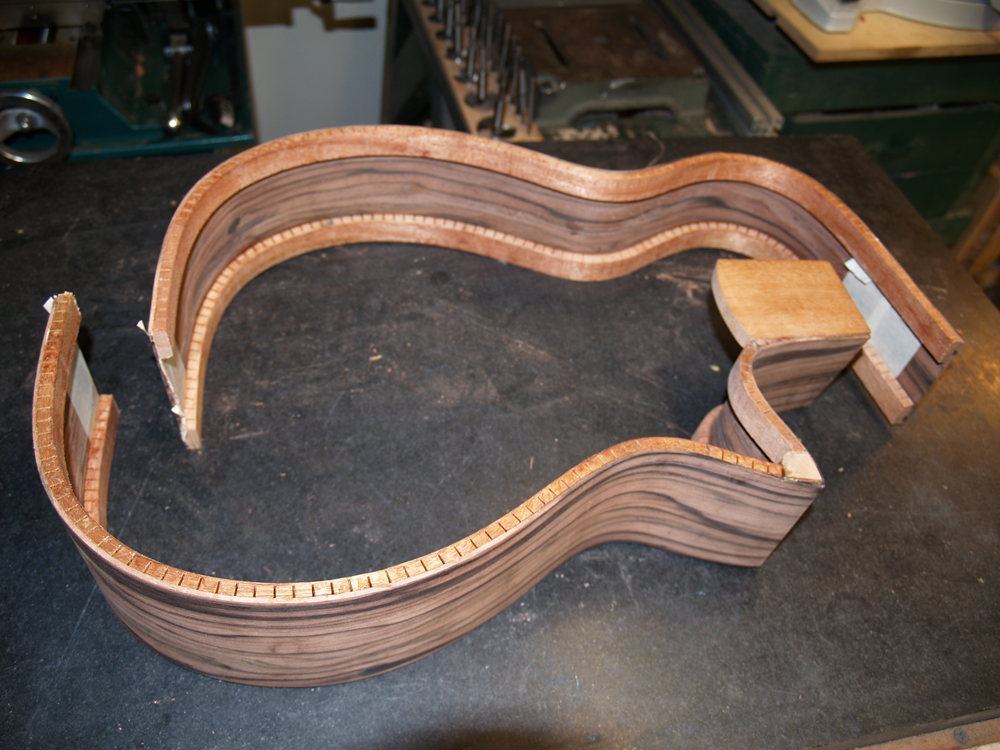
After a day of drying, the two sides come out of their forms and we have two well formed and very stiff pieces of wood.
 ( 93 ) 7-Jan-2011
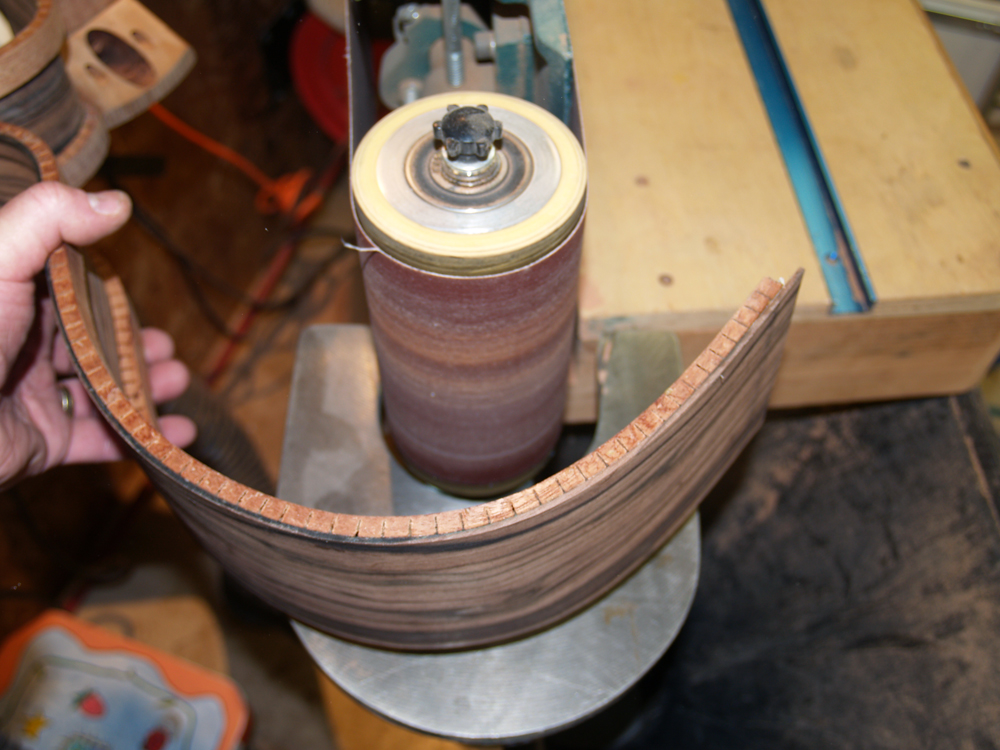
I use the idler pulley of my belt sander to sand the kerfing smooth. I follow up with hand sanding to perfect the kerfing surfaces.
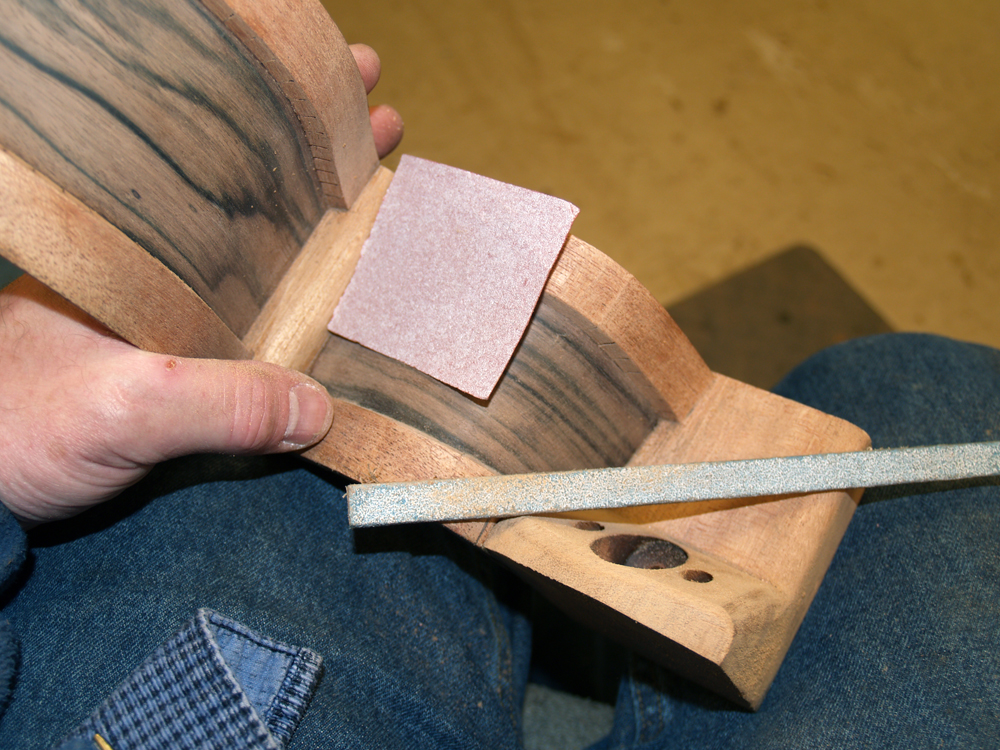 A little hand sanding in the tight spots is necessary. I strive to create a very clean interior to my guitars.
 ( 95 ) 7-Jan-2011
Here I am positioning the heel block to mark where I will remove the excess kerfing. I clamp in place a straight popsicle stick to mark the position of the heel block.
 ( 96 ) 7-Jan-2011
Then I use a small saw to cut the kerfing. The popsicle stick ensured that the cut will exactly match the edge of the heel block, and there will be no gap between the end of the kerfing and the heel.
 ( 97 ) 7-Jan-2011
When I make this cut I have to be very careful that I don't cut into the side. The masking tape made for easy removal of the excess kerfing.
 ( 98 ) 7-Jan-2011
Here I am positioning the tail block.
 ( 99 ) 7-Jan-2011
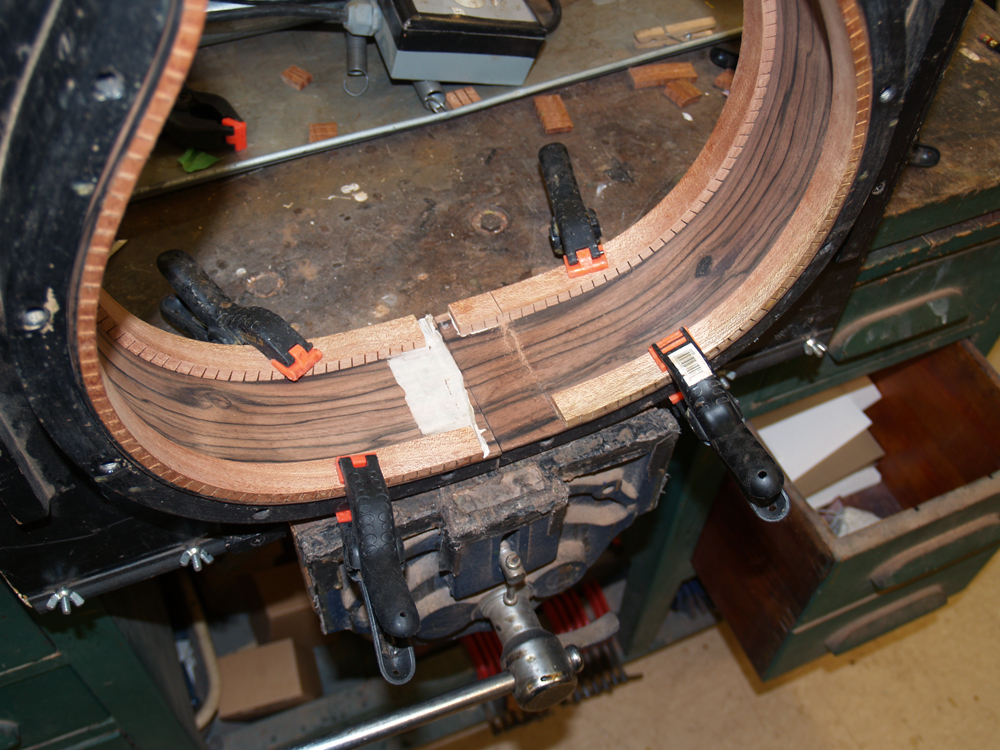
I use the same technique with the popsicle sticks to mark the position of the tail block.
 ( 100 ) 7-Jan-2011
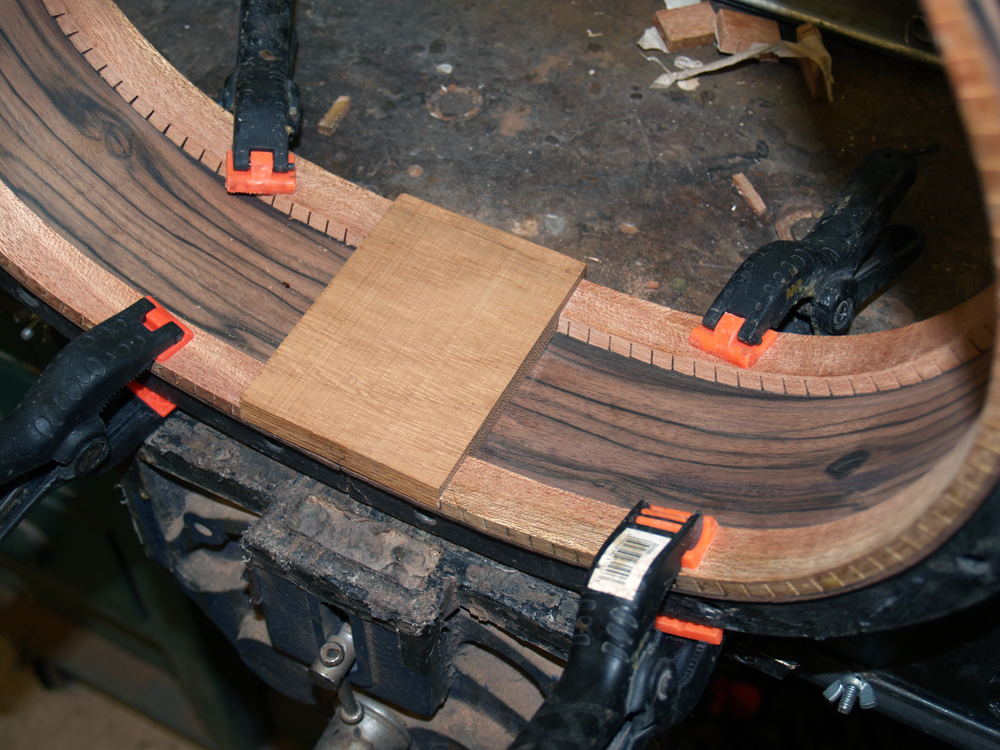
A few quick but careful pulls of the saw an the kerfing is cut away.
 ( 101 ) 7-Jan-2011
A perfect fit with no gaps.
 ( 102 ) 7-Jan-2011
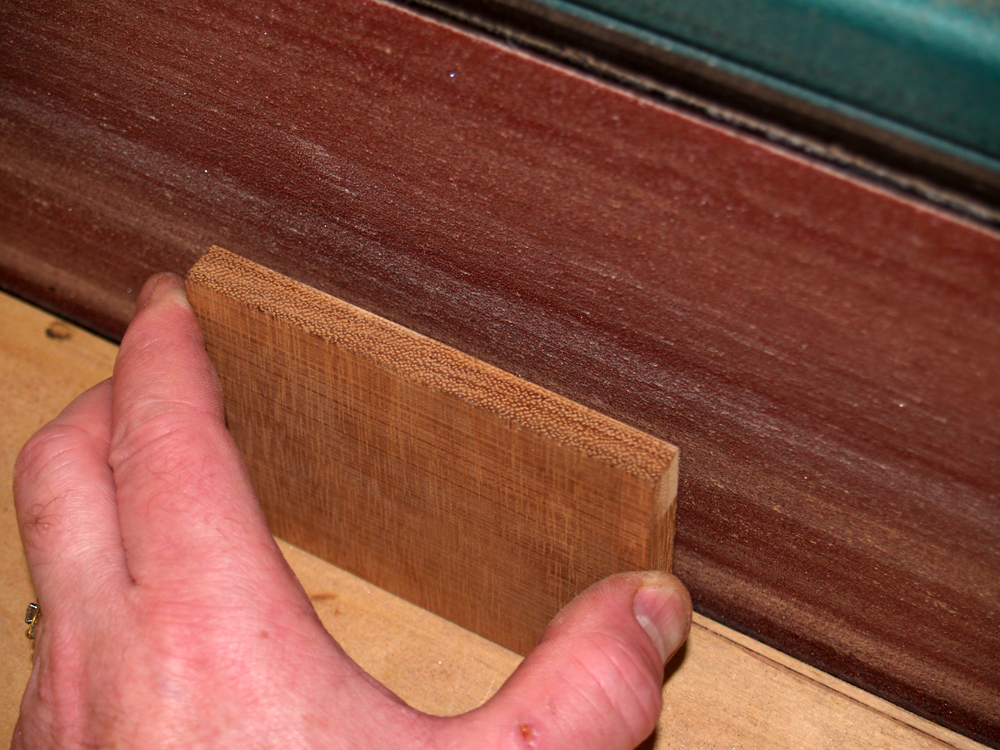
The bottom of the the guitar is not flat, but rather has a slight curve to it. At this point the tail block is flat. To make a good glue joint and to prevent warping the shape of the sides I have to match the shape of the tail block to the curve of the back. By firmly pressing the tail block into place and using a pencil that is off set to match the bottom of the gap, I can perfectly trace the shape of the bottom curve onto the tail block.
 ( 103 ) 7-Jan-2011
I then use the belt sander to shape the heel block. I have to very careful that I don't sand my finger tips off doing this kind of thing. So far I still have ten digits.
 ( 104 ) 7-Jan-2011
With a little bit of tweaking I get a good fit.
 ( 105 ) 7-Jan-2011
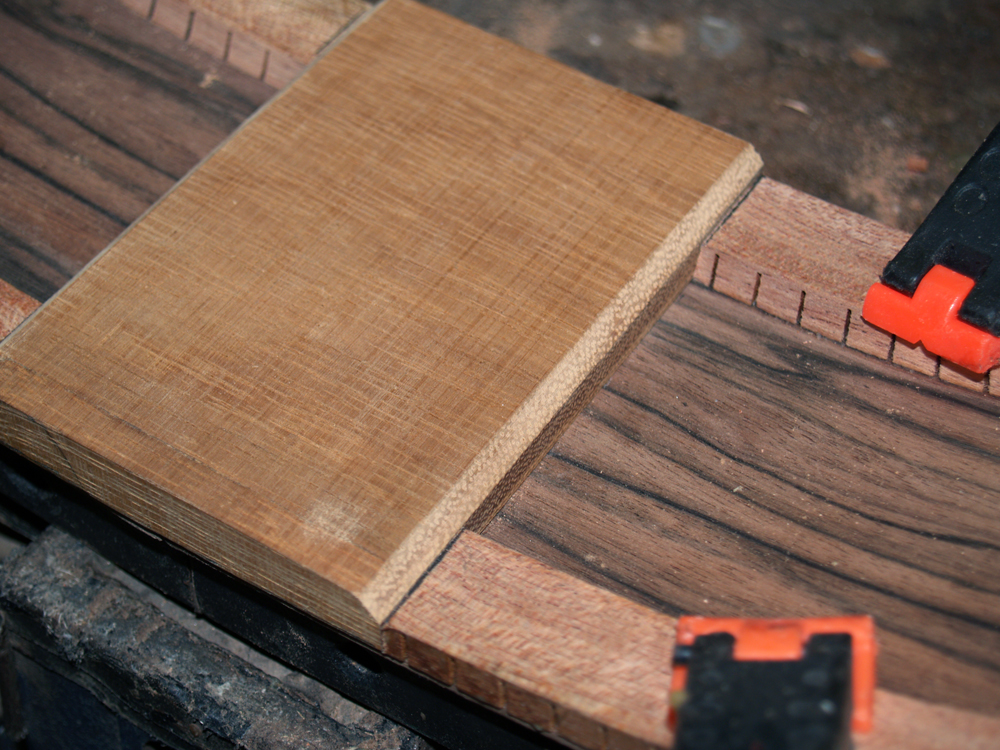
Because I think it looks better, I sand a bevel onto the edge of the tail block. The only person that will ever see it though is a repair person... if I do everything right there will never need to be a repair person. Wayne Henderson says in the book Clapton's Guitar by Allen St. John , (a great read by the way) that he likes to sand everything smooth pretty on the inside because it makes it easier for the notes to get out. Goofy I'm sure, but this is part of the 10% of magic in my opinion that goes into making a great guitar... 50% the design, 25% the wood, 20% excellence in execution, 5% magic.
 ( 106 ) 7-Jan-2011
A look at the tail block in place, a perfect fit.
 ( 107 ) 7-Jan-2011
Now I am getting ready to glue the two halves of the guitar together. I have spread a thin layer of glue on the heel block. I have learned over time to use just enough glue to do the job, but not so much that I make a mess when the pieces are clamped together. I call this a stoichiometric glue joint. From chemistry: the quantity that produces a balanced equation, i.e., nothing left over. In addition I make sure that the glue has wetted the whole surface. I do not depend on the squeeze to spread the glue into place.
 ( 108 ) 7-Jan-2011
While the left side of the guitar is sitting in its form, and I put the right side in place.
 ( 109 ) 7-Jan-2011
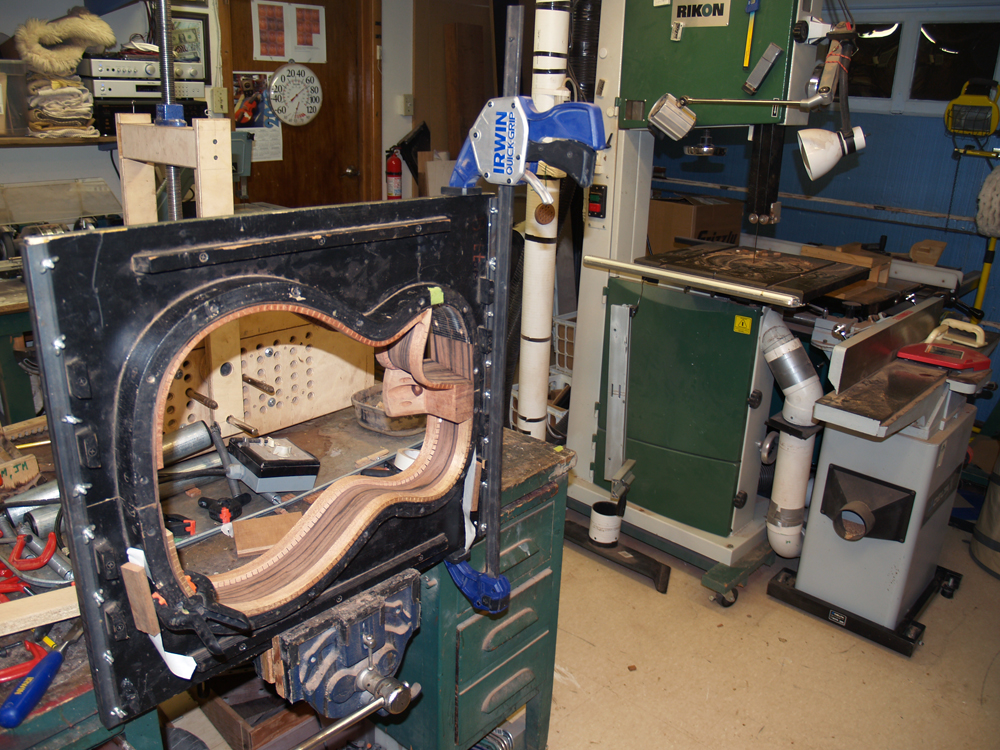
Then the right side form gets put in place and locked down. I use one of my huge pistol clamps to press the two halves of the form together. The angle iron on either end holds everything together.
 ( 110 ) 7-Jan-2011
A few taps with a rubber mallet perfectly lines up the two halves of the guitar. Don't you love it when I take a hammer to your guitar.
 ( 111 ) 7-Jan-2011
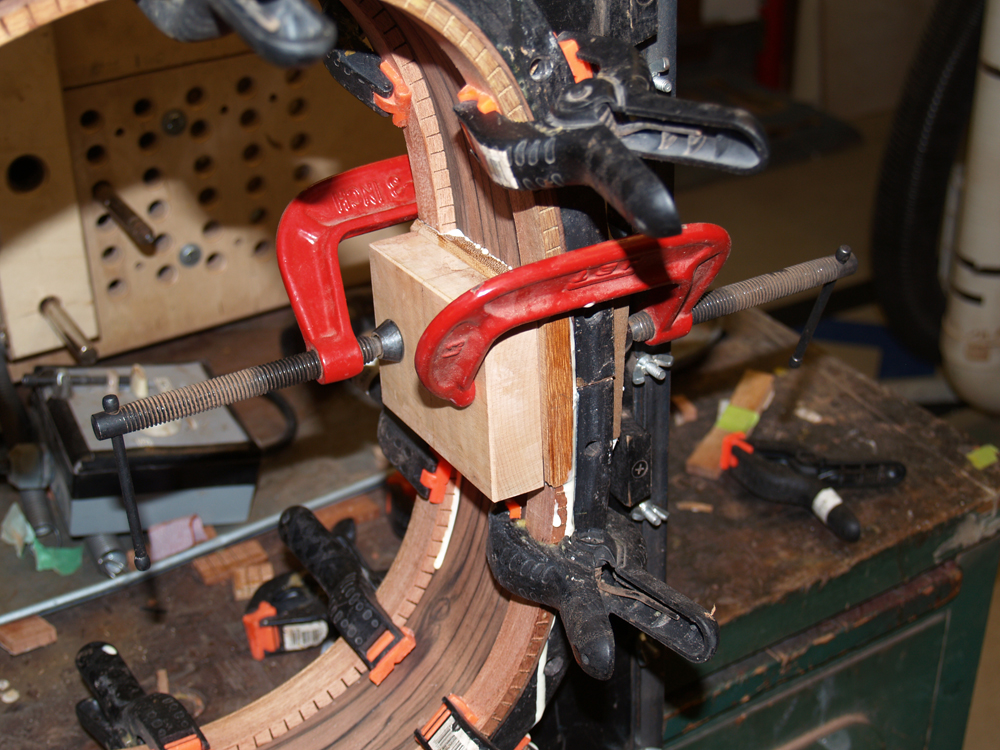
I use two C-clamps to press the heel block into place and then a little water to clean up the glue squeeze out. I then use my air gun to quickly dry the wood. I don't want to leave the wood wet for any length of time in that the wood might expand and warp.
 ( 112 ) 7-Jan-2011
The tail block is then glued into place with two more C-clamps. I use a large maple caul to evenly spread the pressure.
 ( 113 ) 7-Jan-2011
The assembly then gets to set up and dry over night.
 ( 114 ) 7-Jan-2011
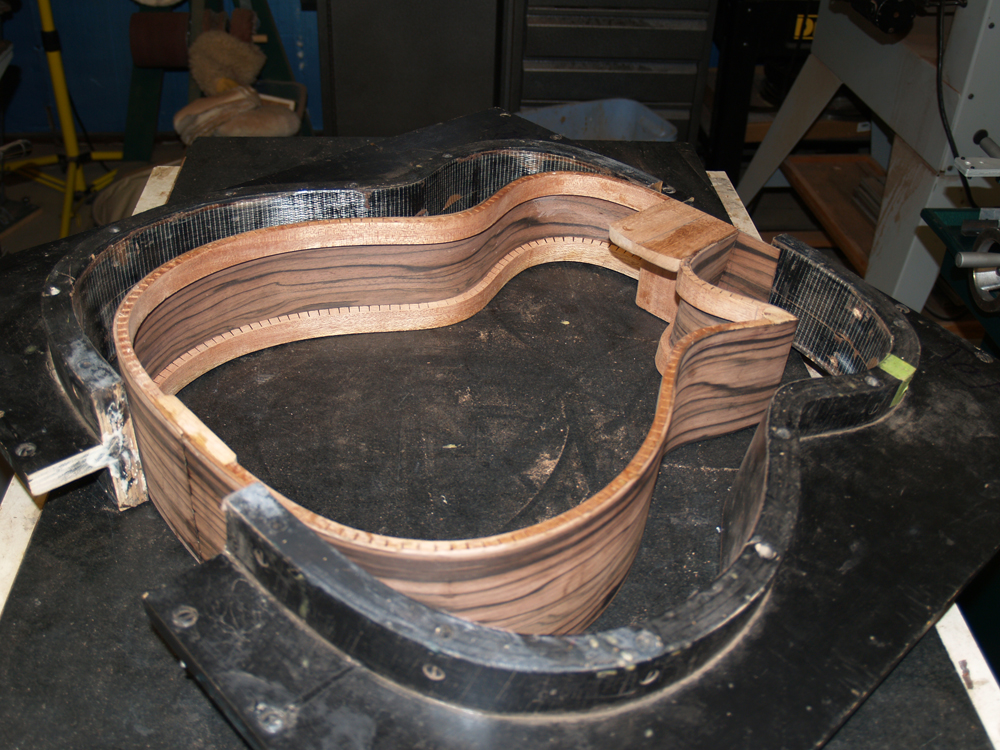
In the morning I crack the form apart.
 ( 115 ) 7-Jan-2011
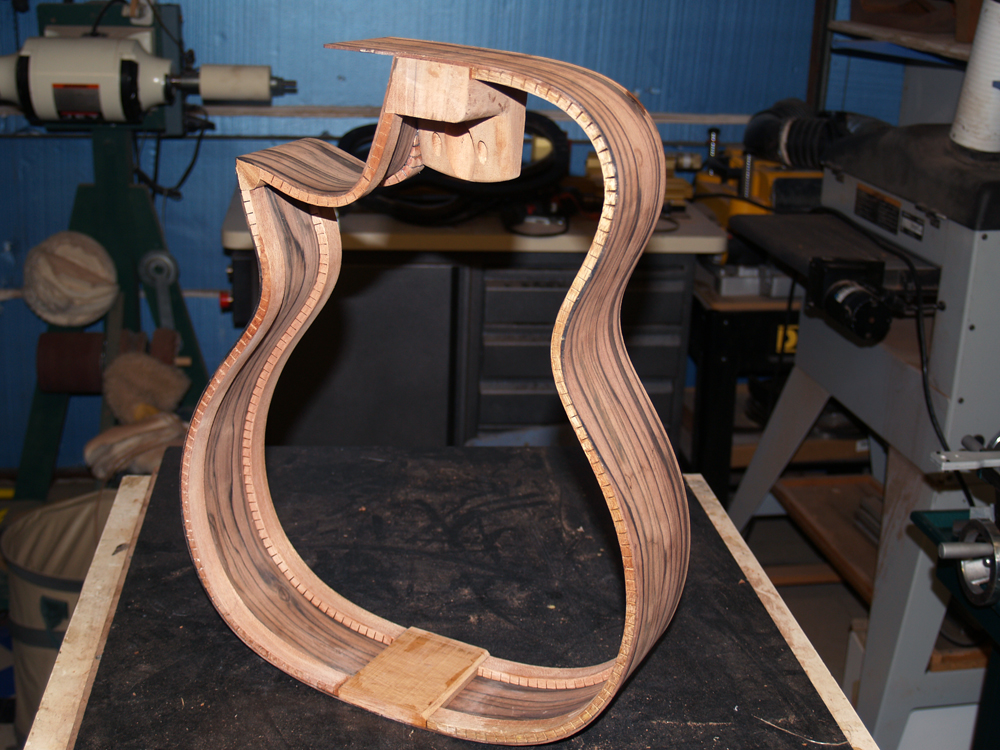
And voila... it look-a-like a guitar.
 ( 116 ) 7-Jan-2011
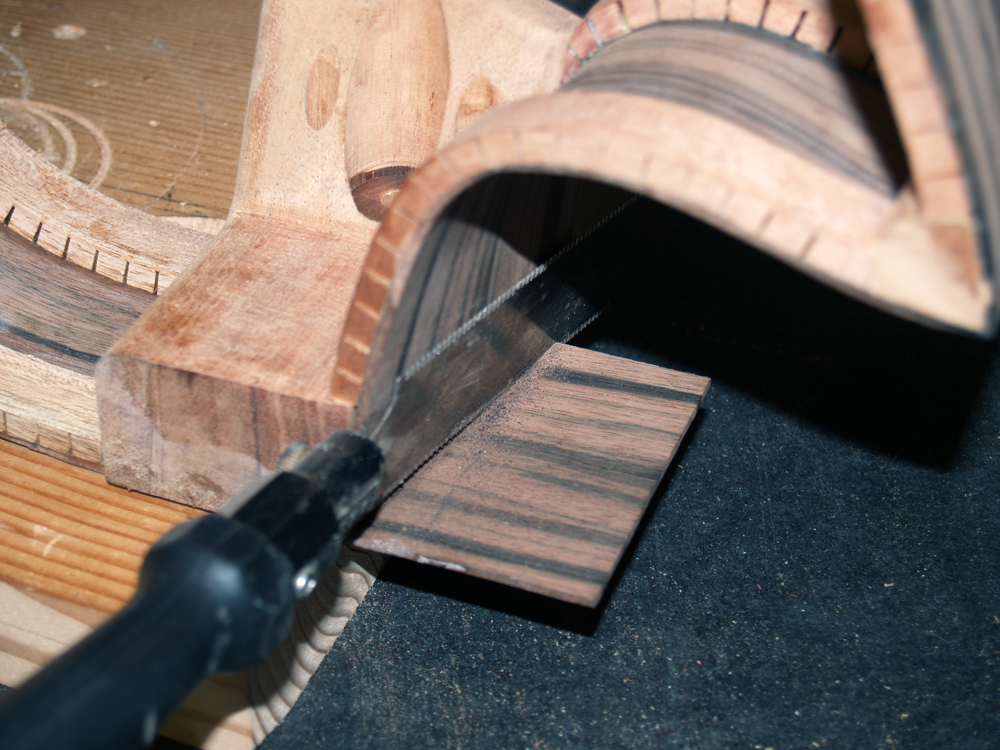
I use this flexible saw to cut of the excess tab from the left side.
 ( 117 ) 7-Jan-2011
And I end up with a nice clean jiont.
 ( 118 ) 7-Jan-2011
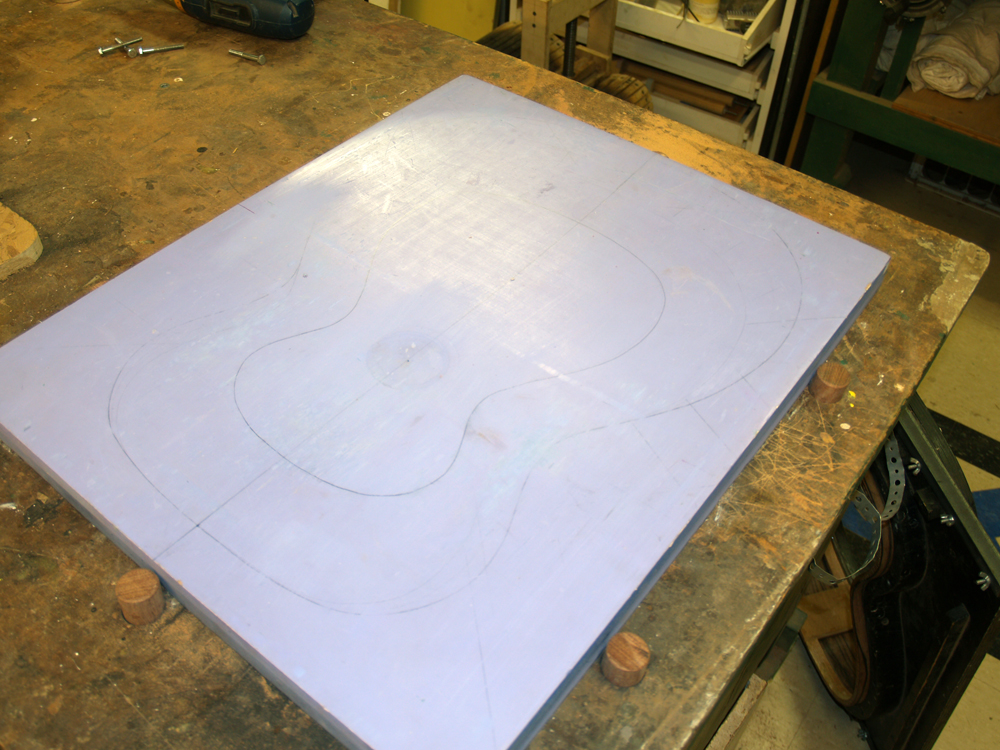
In this picture and the next I am showing the forms that I use to construct the top and the back. These are large plates that have been sanded into the profile of the final shape of the top and back.
 ( 119 ) 7-Jan-2011
I will use these forms for several different operations during the construction of the guitar.
 ( 120 ) 7-Jan-2011
The back form has the shape of a spherical bowl with a radius of about twelve feet. You can clearly see the curvature of the bowl in this picture. The top plate has a somewhat more complex shape to it with a nominal bowl radius of about thirteen feet. From the heel block to the bridge, the top is a conical section with a straight chord from the heel to the saddle. From the saddle to the bottom of the guitar the top has a hemispherical shape. If there is any secret sauce in my guitars, here is where you will find it. I guess its not a secret any more.
 ( 121 ) 7-Jan-2011
I will use the top and bottom forms to sand the rim into its final shape. Here I am marking the rim with a felt tip pen so I can see where I have sanded.
 ( 122 ) 7-Jan-2011
I mount the rim in the form with the edge well exposed.
 ( 123 ) 7-Jan-2011
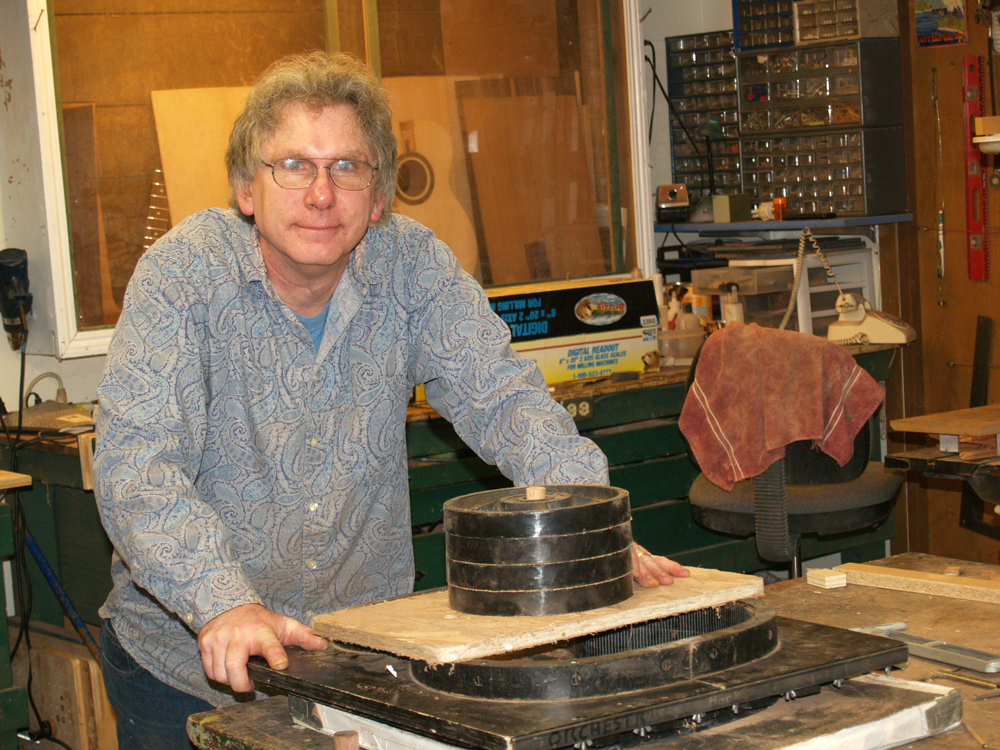
I put a sheet of sand paper over the form and then I place the assembly on the form with forty pounds of weight on top to press it into place. I can move the weight around a bit to emphasize the sanding action in different areas.
 ( 124 ) 7-Jan-2011
A use bit of elbow grease to sand the rim of the guitar into shape. I actually get a bit of a work out doing this. I periodically check the rim, and when all of the marker is gone I am done.
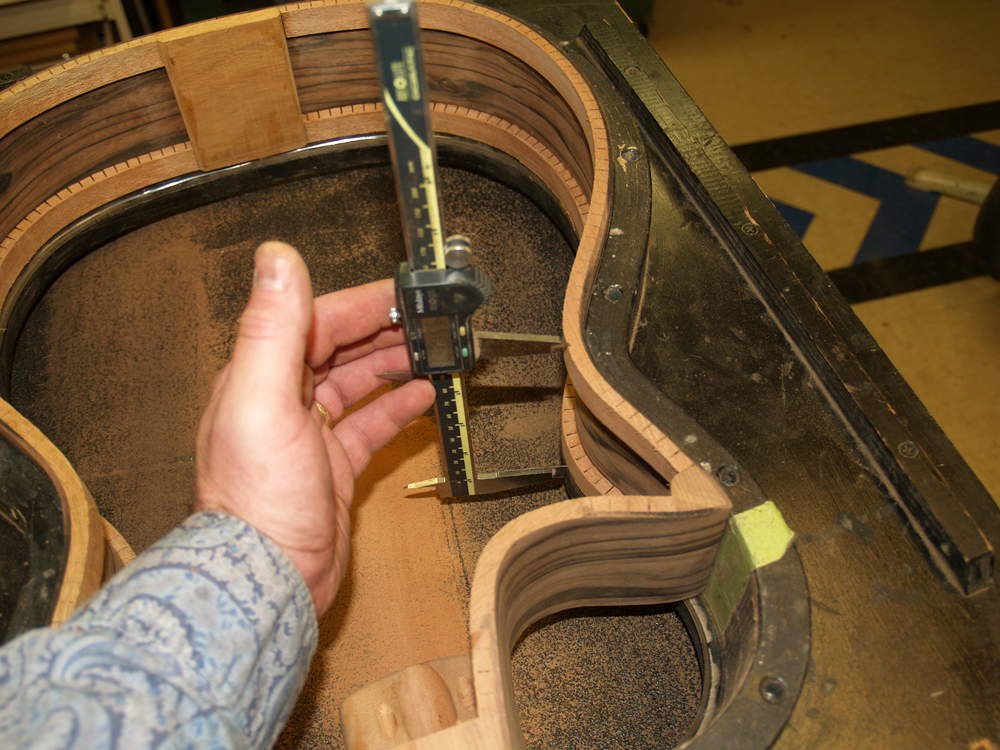 ( 125 ) 7-Jan-2011
When I am sanding the back side of the rim I also check the rim depth to ensure that the right and left sides of the guitar are equal.
 ( 126 ) 7-Jan-2011
Once the rim is sanded into shape I bevel the top and back side of the tail block so that the contact width of the tail block will be the same as the kerfing width. This ensures that there are no discontinuities in the top and back in this area.
 ( 127 ) 7-Jan-2011
Here is a picture of me holding up the back and the rim. Now that I have the shape of the rim defined I can trim away the cutaway portion of the top and back.
 ( 80 ) 7-Jan-2011
 ( 81 ) 7-Jan-2011
 ( 82 ) 7-Jan-2011
 ( 83 ) 7-Jan-2011
 ( 84 ) 7-Jan-2011
 ( 85 ) 7-Jan-2011
 ( 86 ) 7-Jan-2011
 ( 87 ) 7-Jan-2011
 ( 88 ) 7-Jan-2011
 ( 89 ) 7-Jan-2011
 ( 90 ) 7-Jan-2011
 ( 91 ) 7-Jan-2011
 ( 92 ) 7-Jan-2011
 ( 93 ) 7-Jan-2011
 A little hand sanding in the tight spots is necessary. I strive to create a very clean interior to my guitars.
 ( 95 ) 7-Jan-2011
 ( 96 ) 7-Jan-2011
 ( 97 ) 7-Jan-2011
 ( 98 ) 7-Jan-2011
 ( 99 ) 7-Jan-2011
 ( 100 ) 7-Jan-2011
 ( 101 ) 7-Jan-2011
 ( 102 ) 7-Jan-2011
 ( 103 ) 7-Jan-2011
 ( 104 ) 7-Jan-2011
 ( 105 ) 7-Jan-2011
 ( 106 ) 7-Jan-2011
 ( 107 ) 7-Jan-2011
 ( 108 ) 7-Jan-2011
 ( 109 ) 7-Jan-2011
 ( 110 ) 7-Jan-2011
 ( 111 ) 7-Jan-2011
 ( 112 ) 7-Jan-2011
 ( 113 ) 7-Jan-2011
 ( 114 ) 7-Jan-2011
 ( 115 ) 7-Jan-2011
 ( 116 ) 7-Jan-2011
 ( 117 ) 7-Jan-2011
 ( 118 ) 7-Jan-2011
 ( 119 ) 7-Jan-2011
 ( 120 ) 7-Jan-2011
 ( 121 ) 7-Jan-2011
 ( 122 ) 7-Jan-2011
 ( 123 ) 7-Jan-2011
 ( 124 ) 7-Jan-2011
 ( 125 ) 7-Jan-2011
 ( 126 ) 7-Jan-2011
 ( 127 ) 7-Jan-2011