 ( 358 ) 8-June-2011
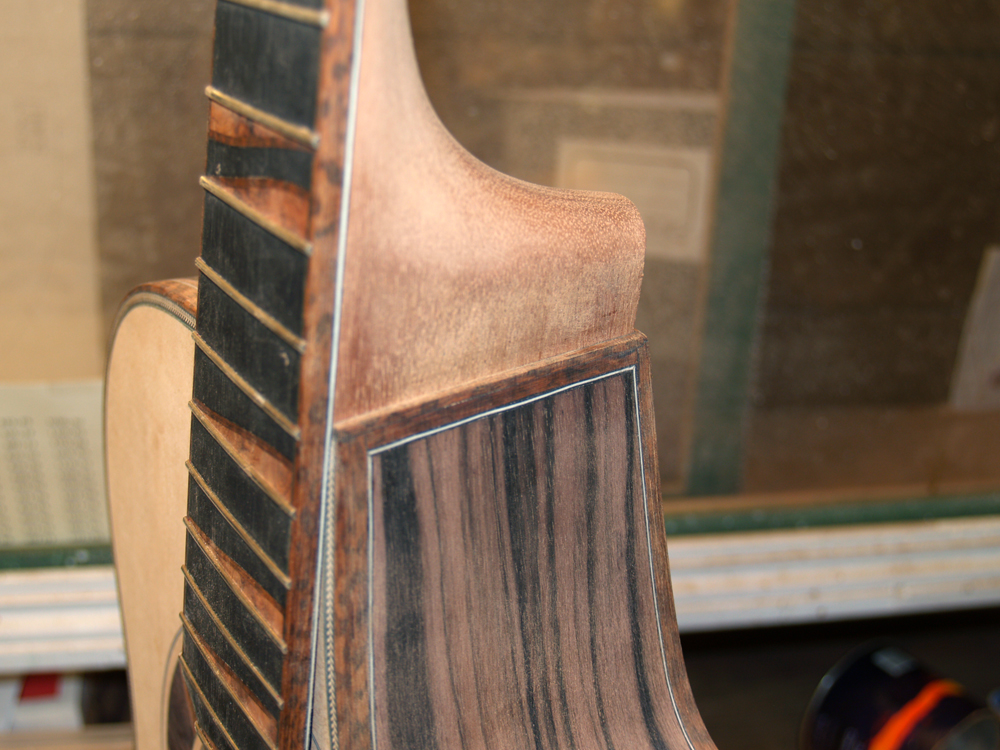
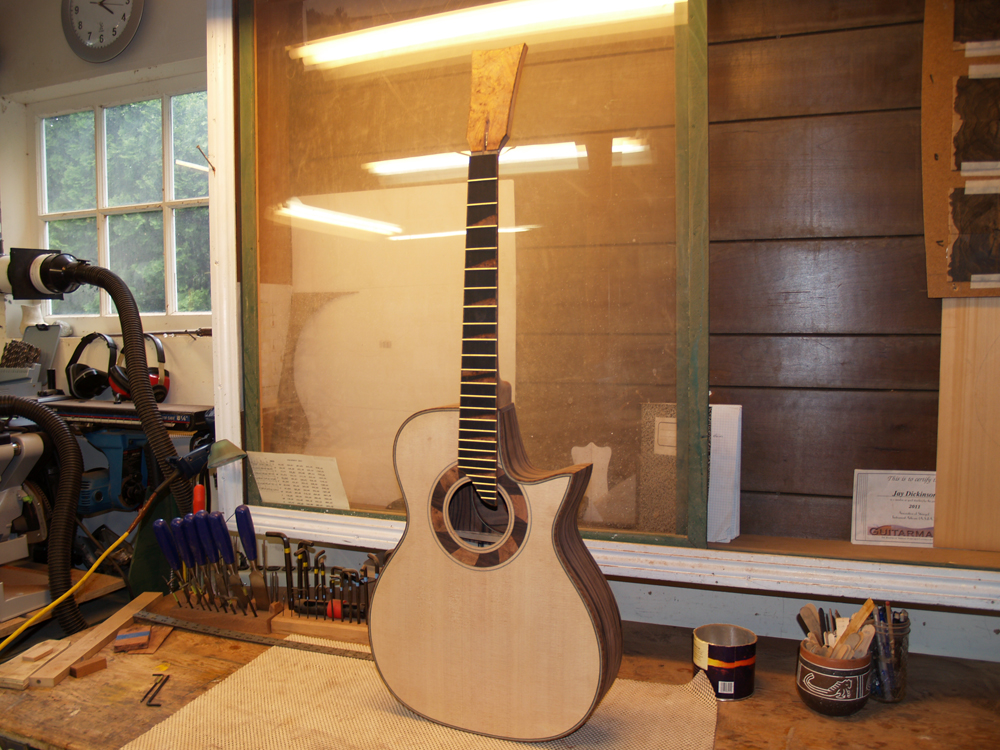
Before working on assembling the neck, I am doing a little touch up to the volute.
( 358 ) 8-June-2011
Before working on assembling the neck, I am doing a little touch up to the volute.
 ( 359 ) 8-June-2011
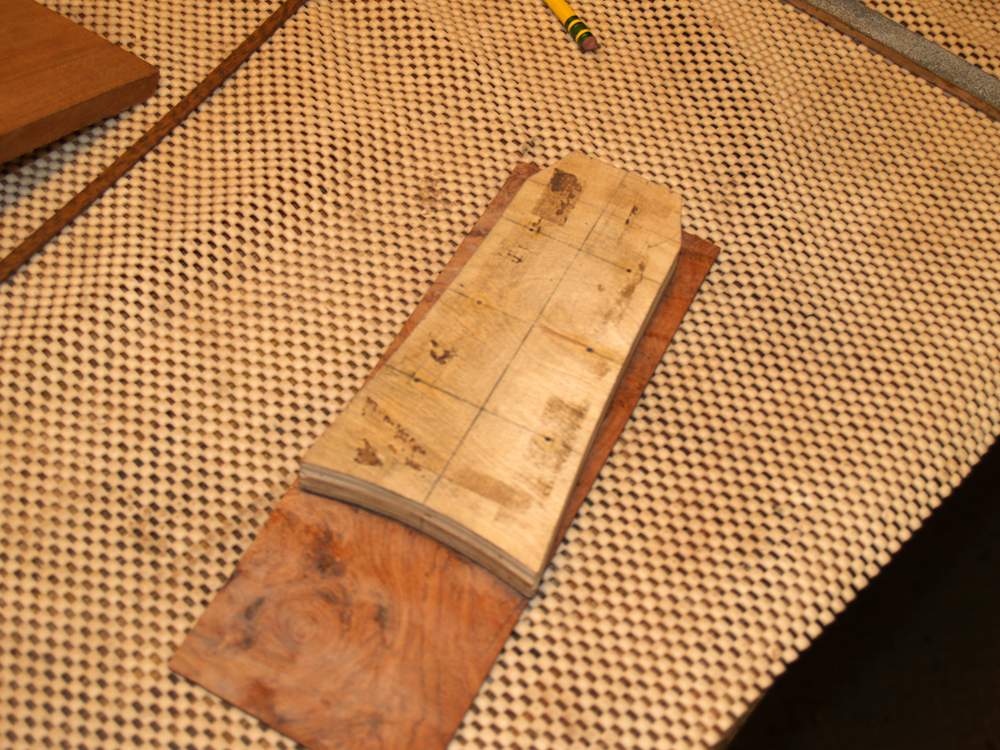
I have previously cut a piece of Amboyna Burl veneer for the head stock. Here I am tracing the shape of the headstock onto the veneer.
 ( 360 ) 8-June-2011
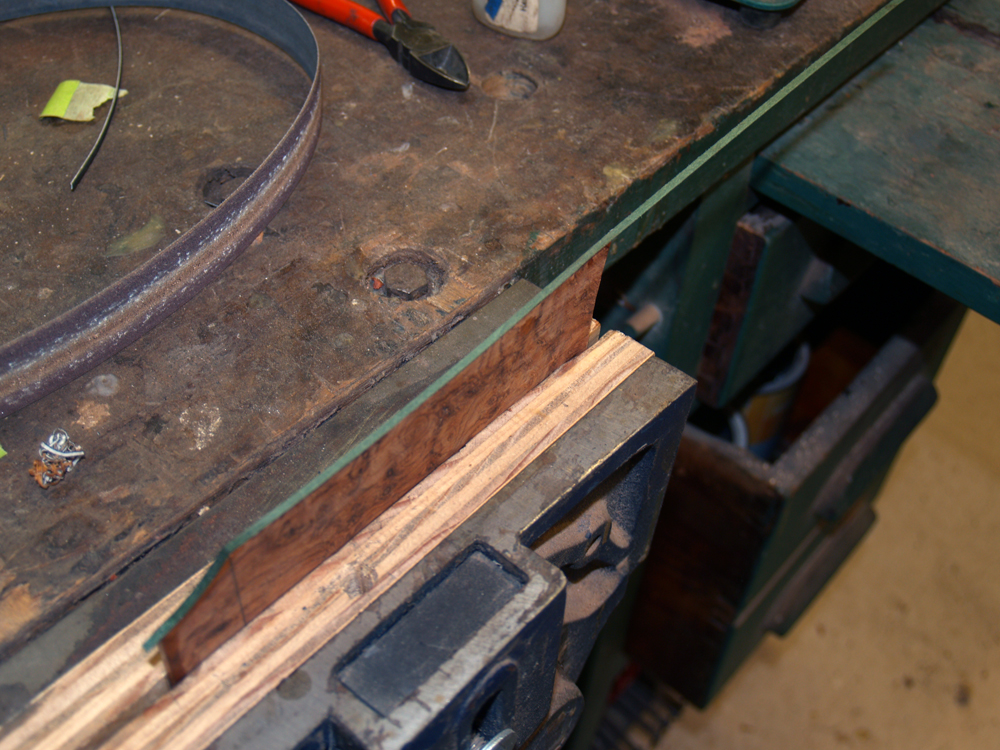
After removing the width of the binding from the veneer I first glue the green pin stripe on to the edge..
 ( 361 ) 8-June-2011
And then I glue on the Snakewood binding.
 ( 362 ) 8-June-2011
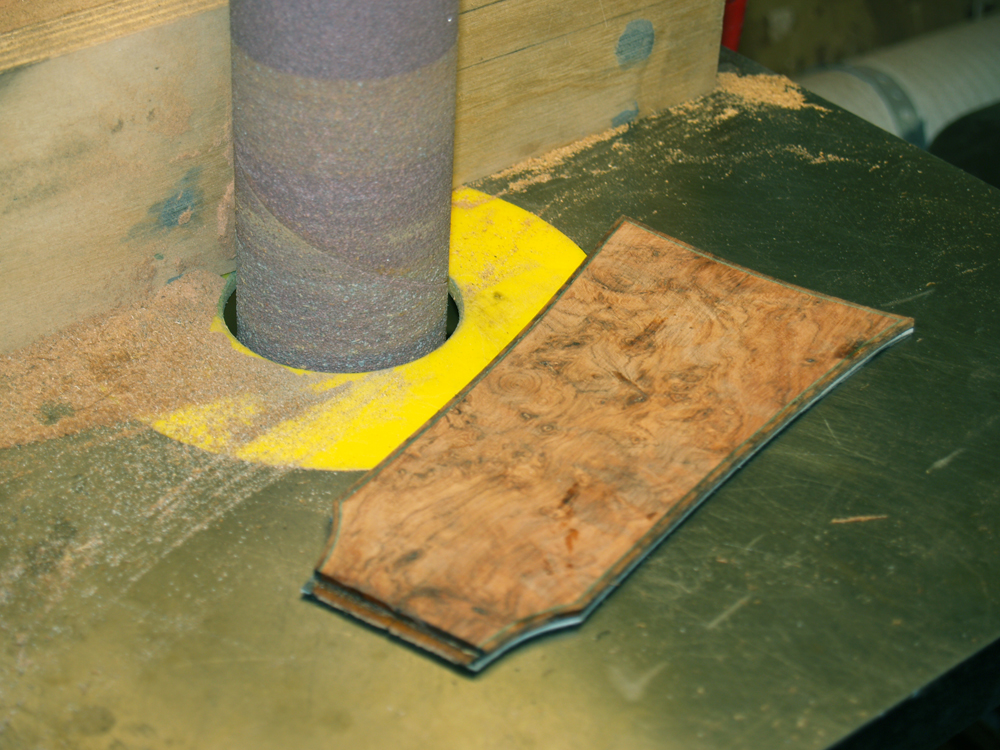
And finally I sand everything flush.
 ( 363 ) 8-June-2011
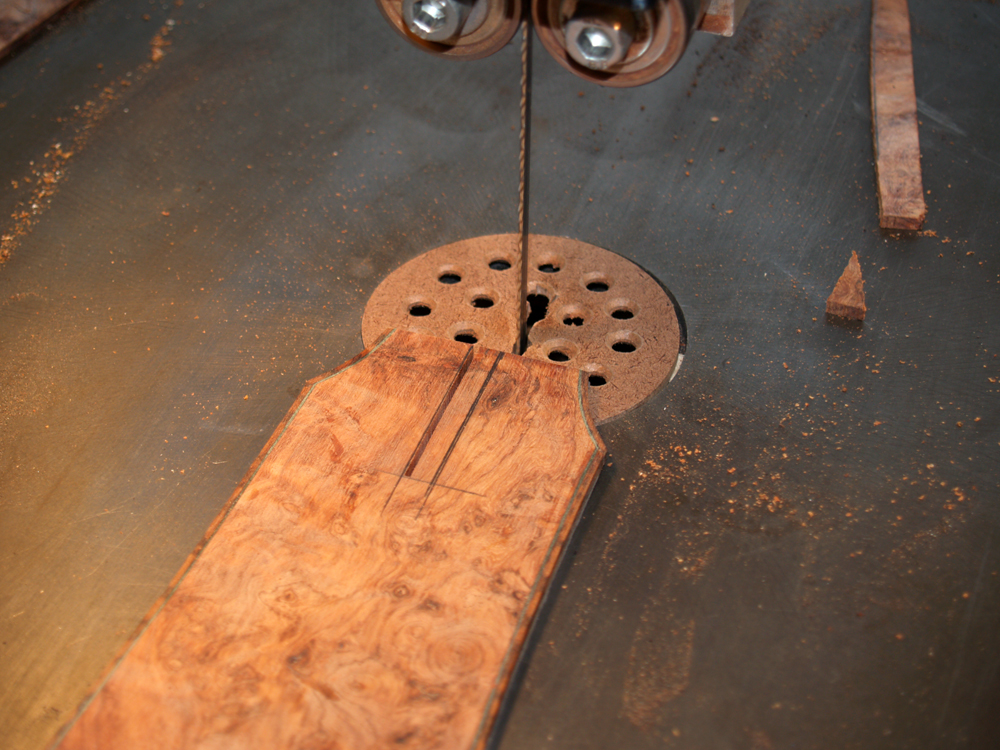
Before I can glue the veneer to the headstock I cut a slot to allow access to the truss rod.
 ( 364 ) 8-June-2011
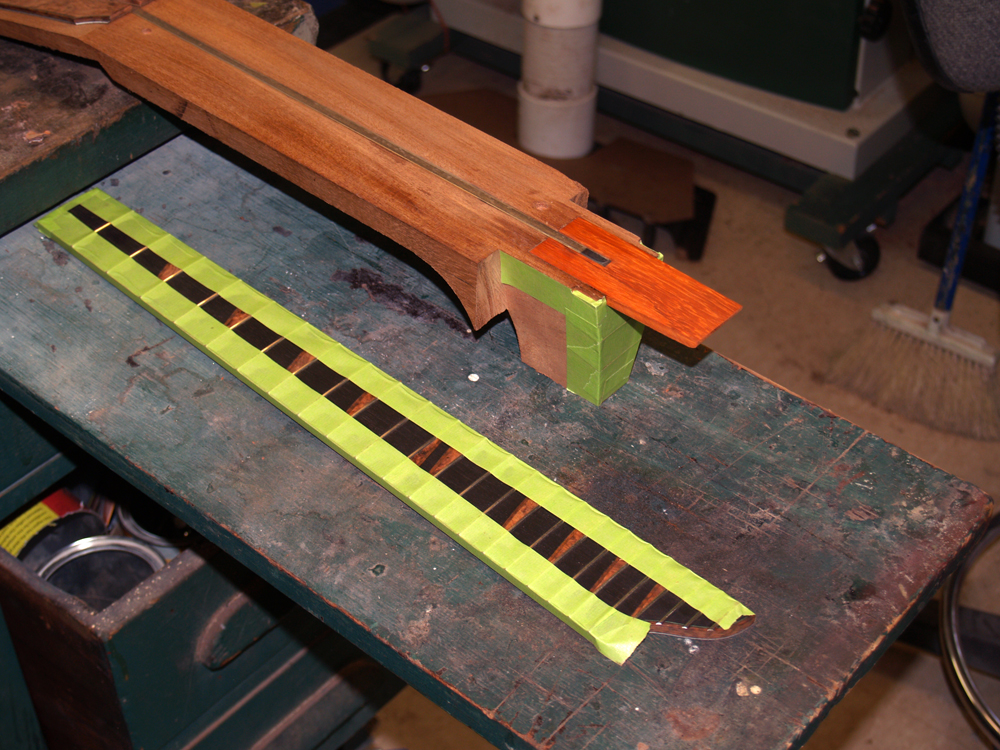
Next I lay out the fretboard and the headstock veneer and mark their positions with some fiducial blocks.
 ( 365 ) 8-June-2011
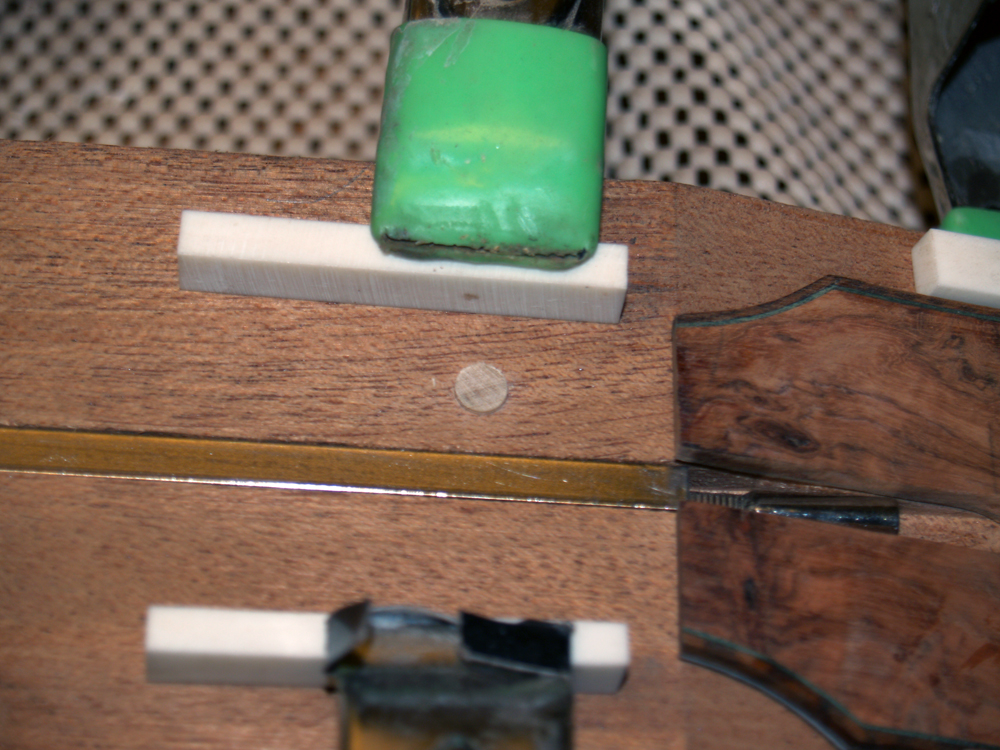
When I glue the fretboard in place I want it to remain in position within a tight tolerance. Since glue is slippery until it sets up, I like to use a set of fiducial buttons to hold the fretboard in place. If I don't use something to hold its position the fretboard will inevitable slide around as it is being glued down. To set the position of of the fiducial button I drill a 1/4 inch hole about 1/8 inch deep. I cut a 1/4 inch dowel so it sits proud of the surface. Then I put a tiny drop of CA glue in the top of the dowel. I next press the fretboard into the place defined by the carefully positioned temporary fiducial blocks.
 ( 366 ) 8-June-2011
When the glue sets I pull the fretboard up and the fiducial button is attached to the bottom of the fretboard. After the the button is sanded down a bit the fretboard will lay flush to the surface of the neck and I can repeatably remove and replace it with great accuracy, and it won't slide around when I glue it down.
 ( 367 ) 8-June-2011
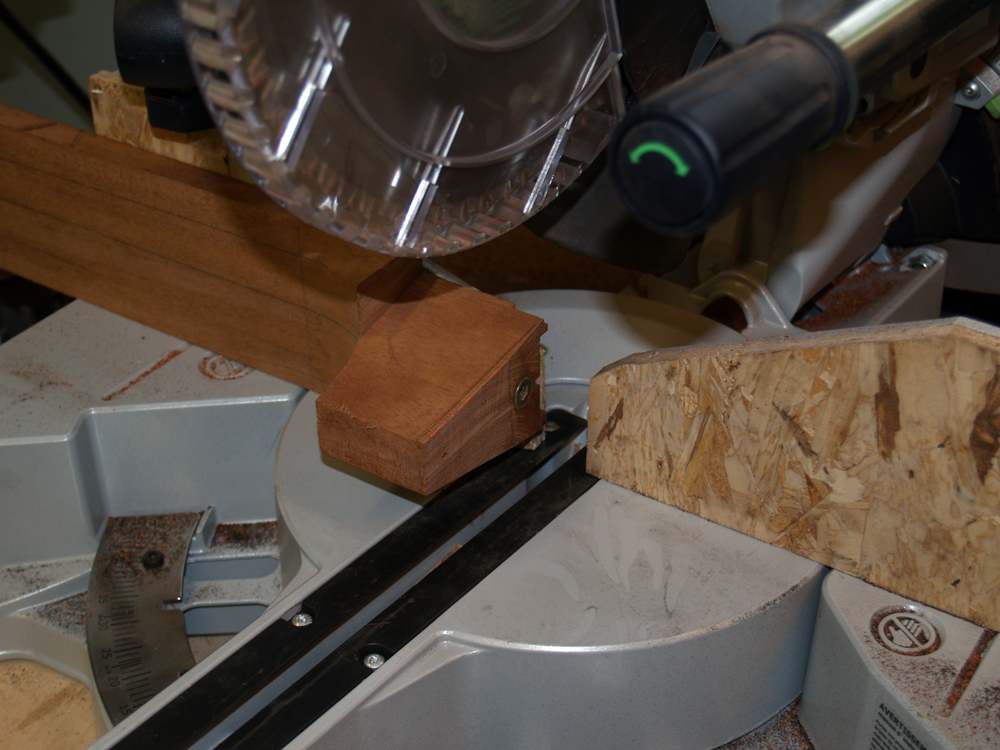
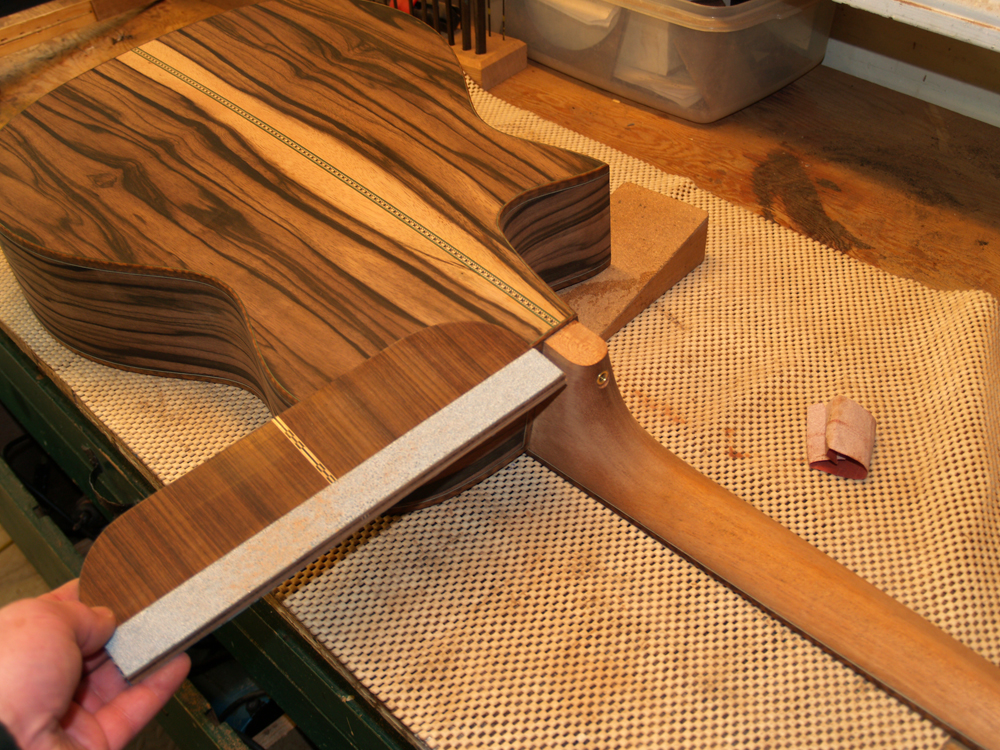
Before I glue the fretboard down I trim the end off the heel so it will fit into the heel block channel and then I use my compound miter saw to trim the end of the heel at about 3 degrees. The will create clearance in the heel channel when the neck is tilted forward.
 ( 368 ) 8-June-2011
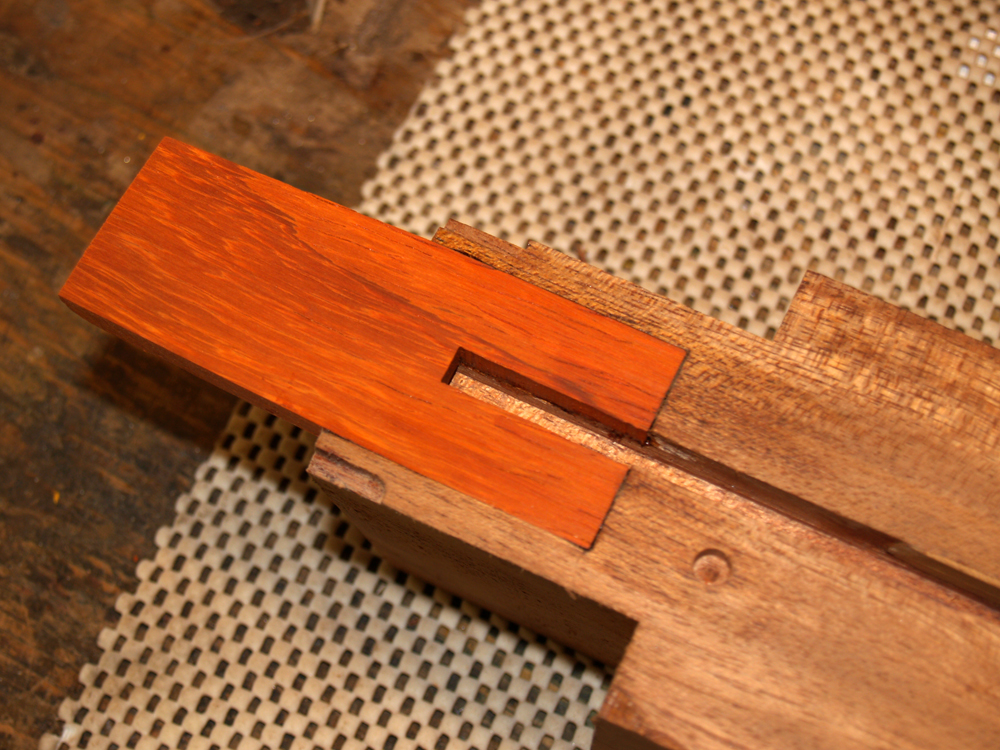
I use a stiff cantilevered plate to reinforce the floating end of the fretboard. Here you see the plate in place ready to be glued down. The truss rod will go into the 1/4 inch channel.
 ( 369 ) 8-June-2011
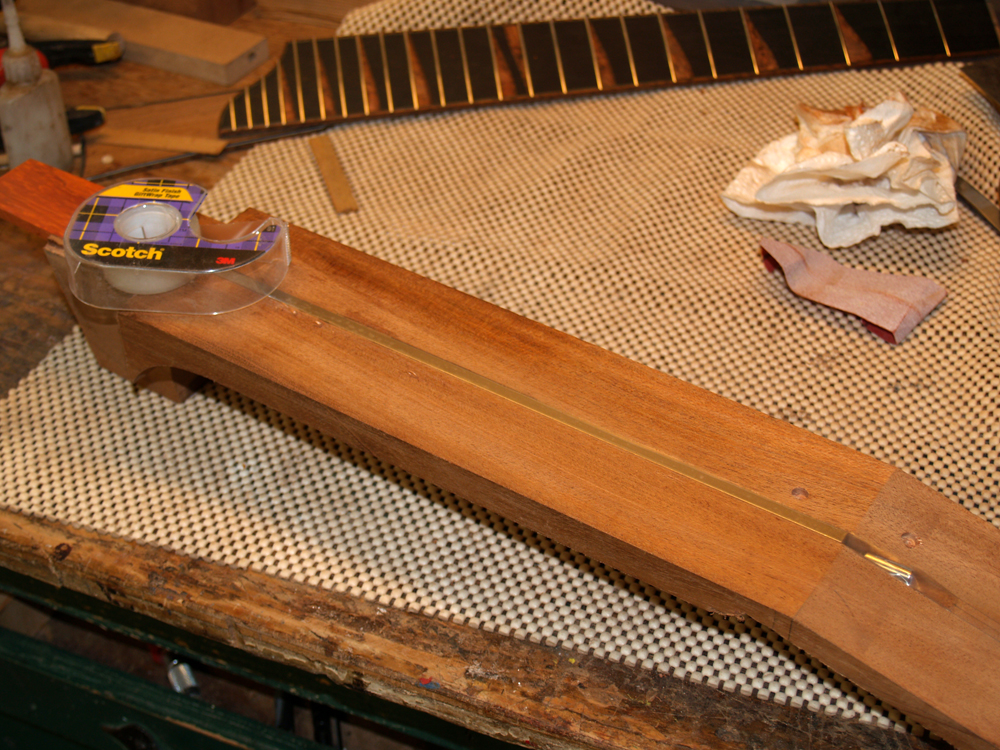
I use a thin mask of tape to cover the truss rod and keep the glue out of the mechanism.
 ( 370 ) 8-June-2011
I also use masking tape in any place I might make a mess as I am gluing the fretboard on to the neck blank.
 ( 371 ) 8-June-2011
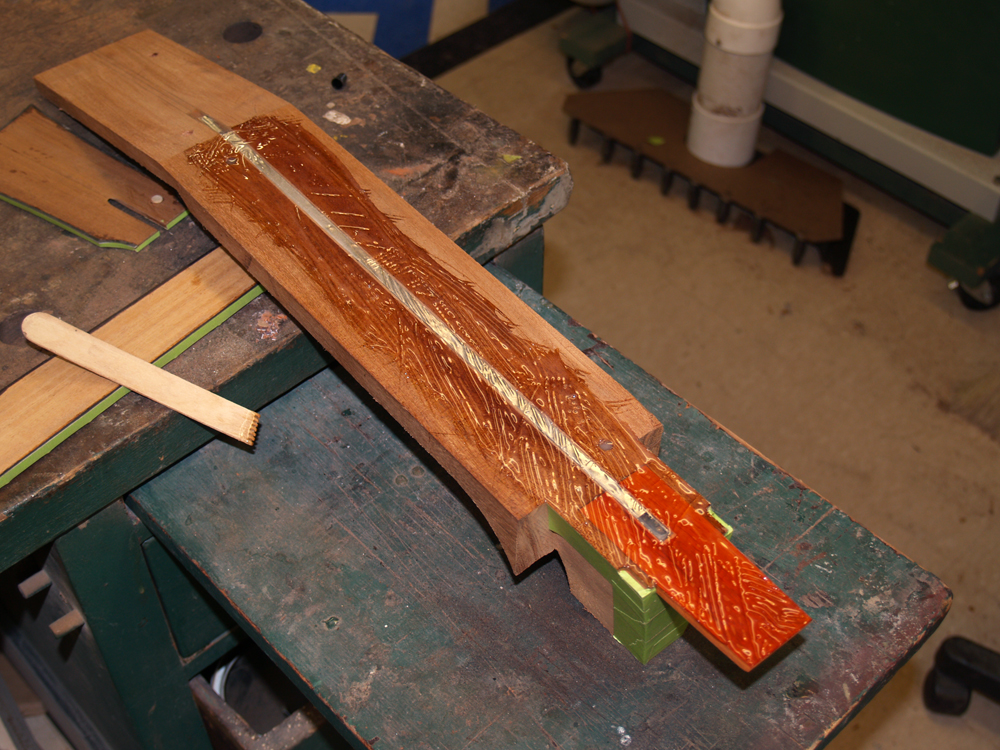
I made myself a serrated squeegee from a tongue depressor to help evenly spread the epoxy glue.
 ( 372 ) 8-June-2011
And the big moment happens with the help of lots of clamps. I let the glue set up and cure over night. Since I use the fiducial buttons to position the neck and head stock veneer, I don't have to worry about them slipping out of place.
 ( 373 ) 8-June-2011
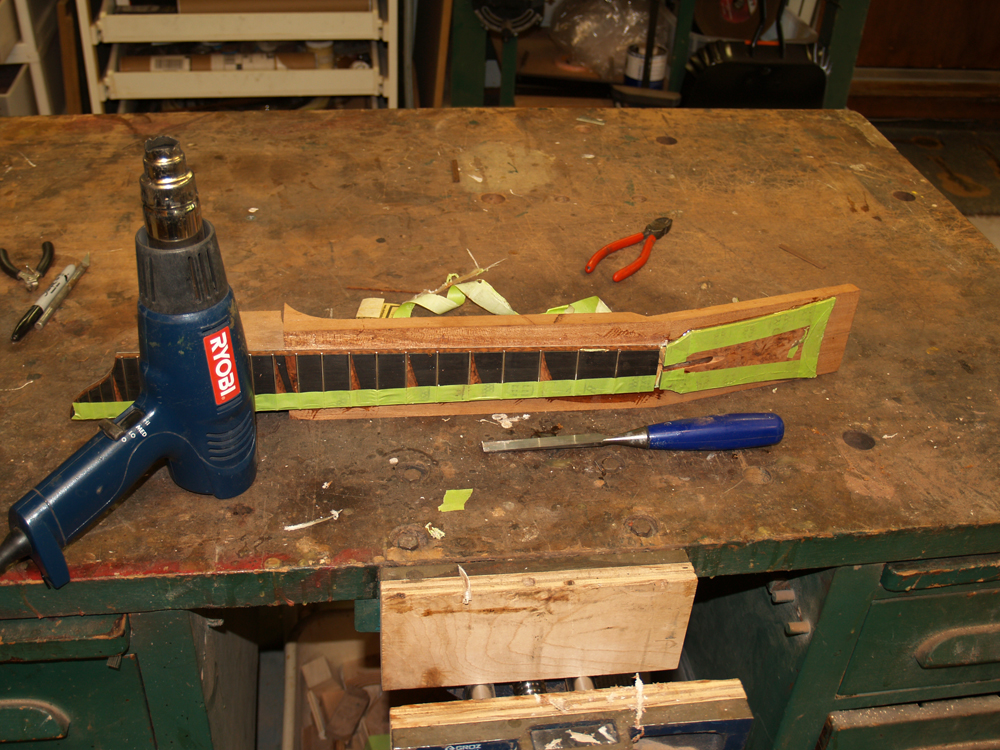
After I pull the clamps off I then use a little heat to soften the glue squeeze out and a chisel to scrape it off.
 ( 274 ) 8-June-2011
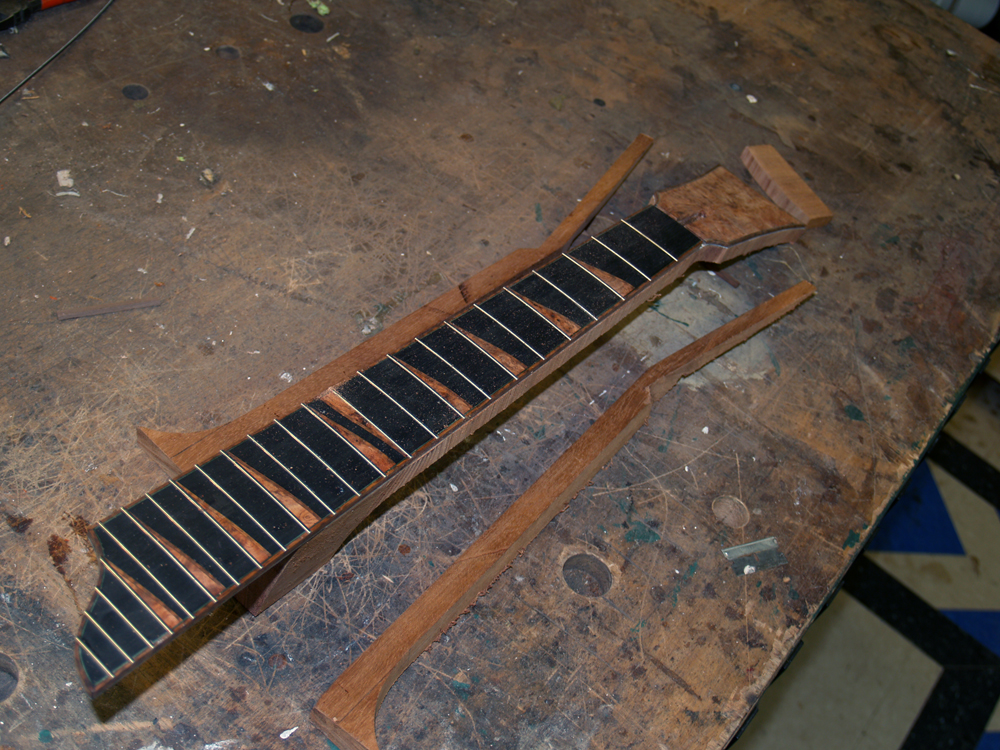
Using my bandsaw - did I mention I love my bandsaws - I trim the excess wood from the neck blank. It turns out these make great push sticks for my table saw.
 ( 375 ) 8-June-2011
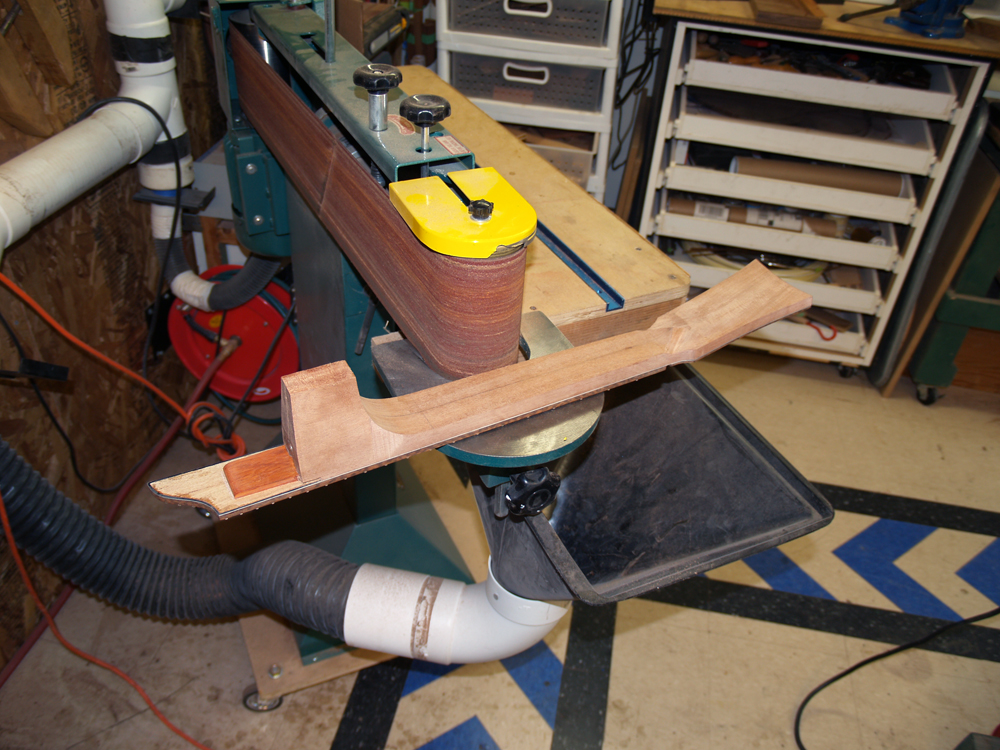
I use the idler pulley on the belt sander to start shaping the neck. This process is a little bit like sculpture. I am trying to find the inner essence of the neck; somewhere in there is the neck I am after and all I have to do is cut away anything that doesn't look like the neck I want. A serious procedural issue arises in that it is a whole lot easier to take wood away than it is to put it back. So, I have to go slow; this is not a race.
 ( 376 ) 8-June-2011
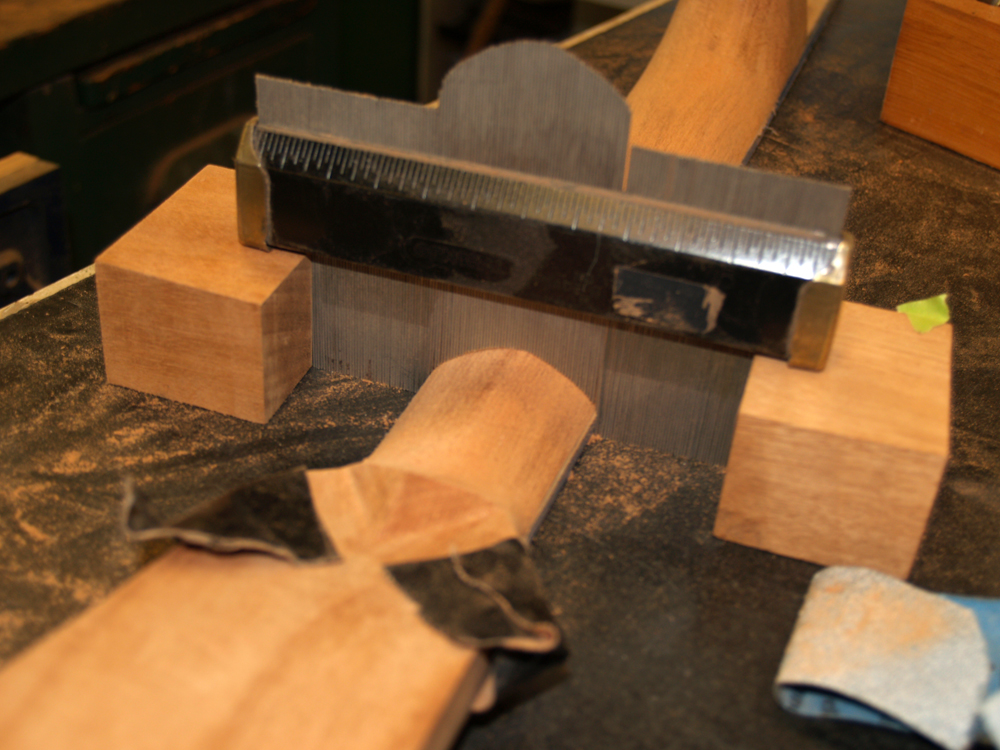
I use this contour gauge to help me measure the cross section of the neck as I am working it.
 ( 377 ) 8-June-2011
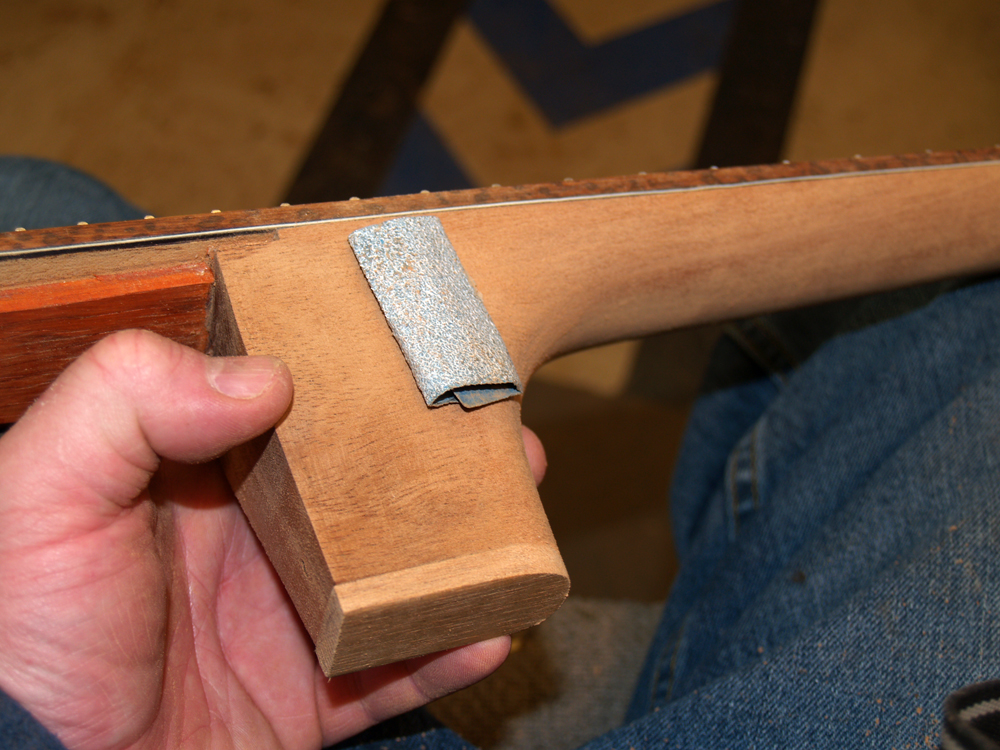
I use a combination of power tools and hand tools to work the neck. I have taped a sacrificial block to the bottom of the heel to take up the roll over that inevitably happens when sanding over an edge.
 ( 378 ) 8-June-2011
I trim the end of the binding so that the neck will slide into place with the 14th fret at the edge of the body. If everything goes as planned and the universe smiles on me this day the seams between the neck and the body will be all but invisible.
 ( 379 ) 8-June-2011
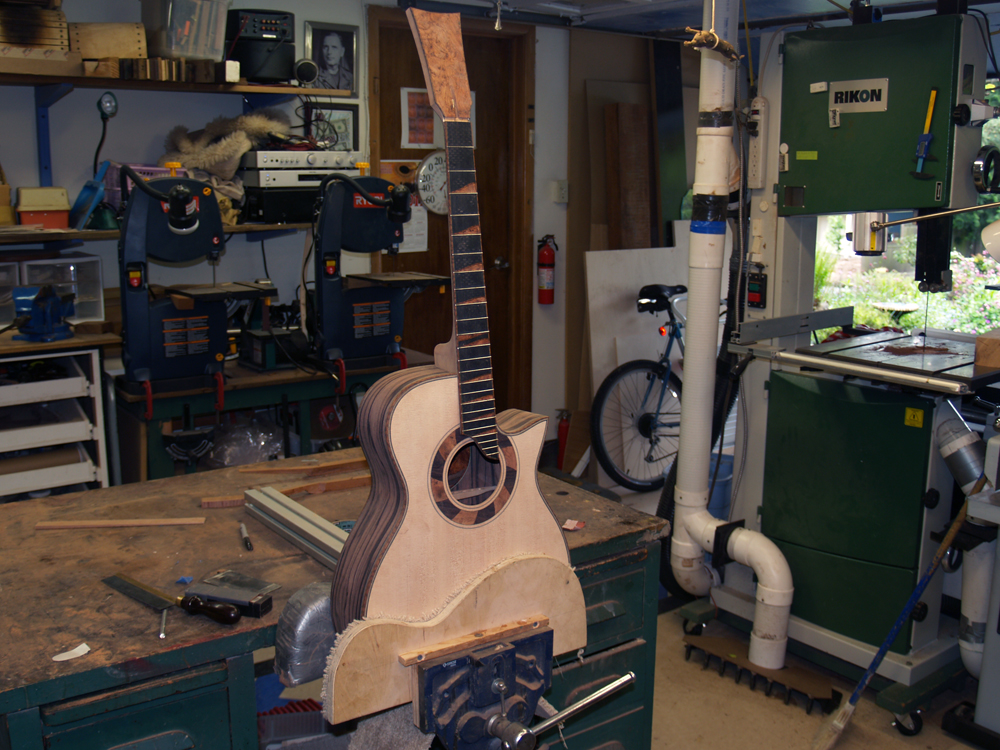
And here is the first time the neck and body have been joined together. Starting to look like a guitar. Do you like it when I put your guitar in a vice?
 ( 380 ) 8-June-2011
I glue the last bits of binding that go around the heel.
 ( 381 ) 8-June-2011
Ta da!
 ( 382 ) 8-June-2011
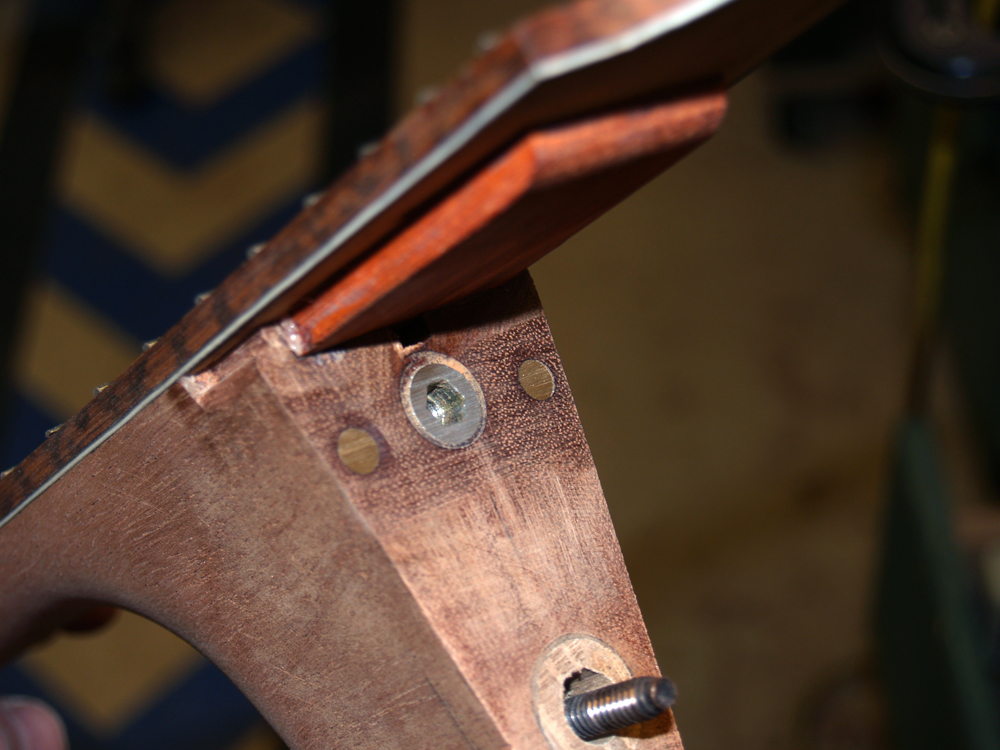
Now that the neck comfortably fits in the heel channel I install the two set screw assemblies. These set screws will allow me to adjust the angle of the neck left and right, and fine tune the scale length and intonation of the guitar.
 ( 383 ) 8-June-2011
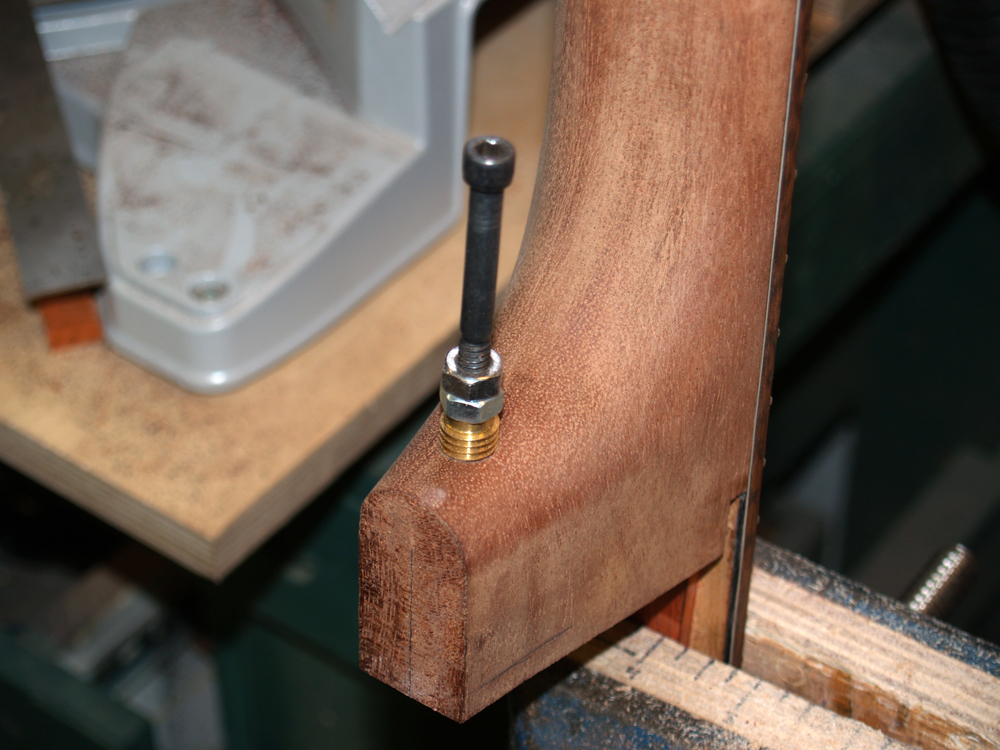
I use a connector bolt for the neck angle adjustment. I drill a hole into the heel for the bolt and then a smaller access hole goes through to the front of the heel.
 ( 384 ) 8-June-2011
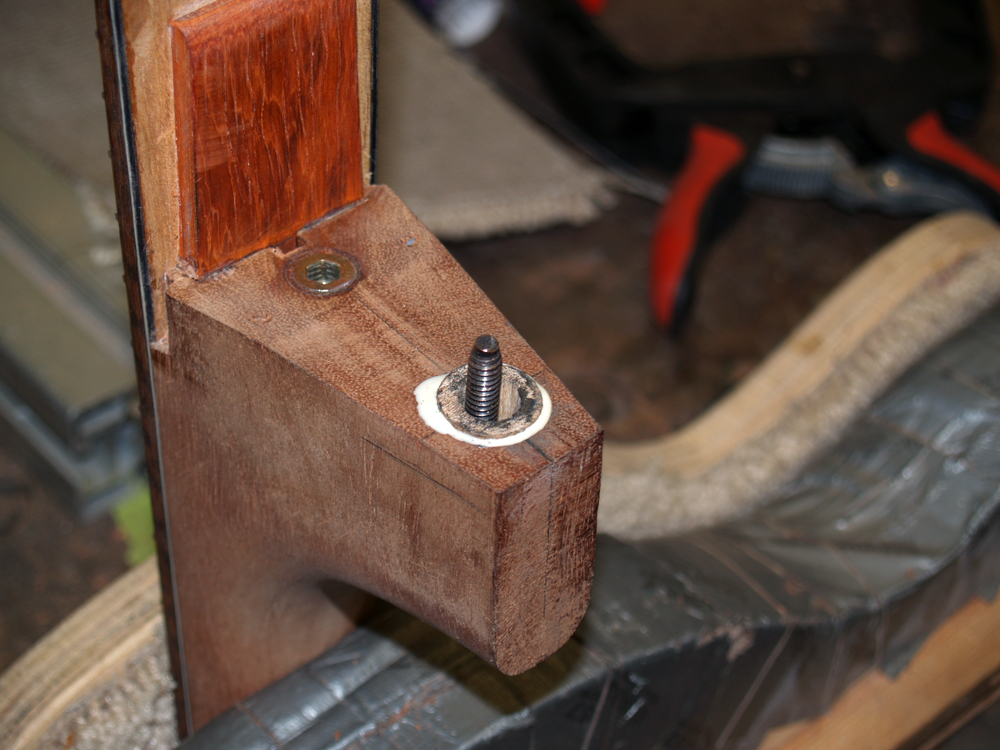
I use this hole to access the adjustment for the neck angle, and to hold the strap button bolt. Here I am installing a 1/4 x 20 wood insert for the strap button bolt.
 ( 385 ) 8-June-2011
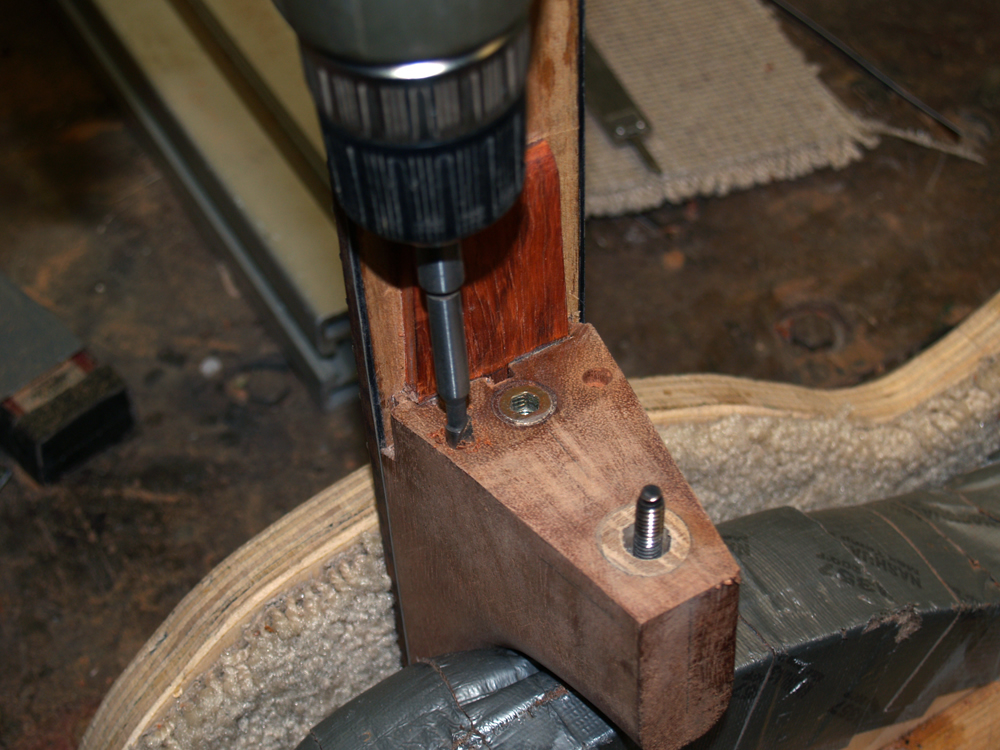
To hold the tilt action adjustment bolt in place I use a hardwood retainer plug.
 ( 386 ) 8-June-2011
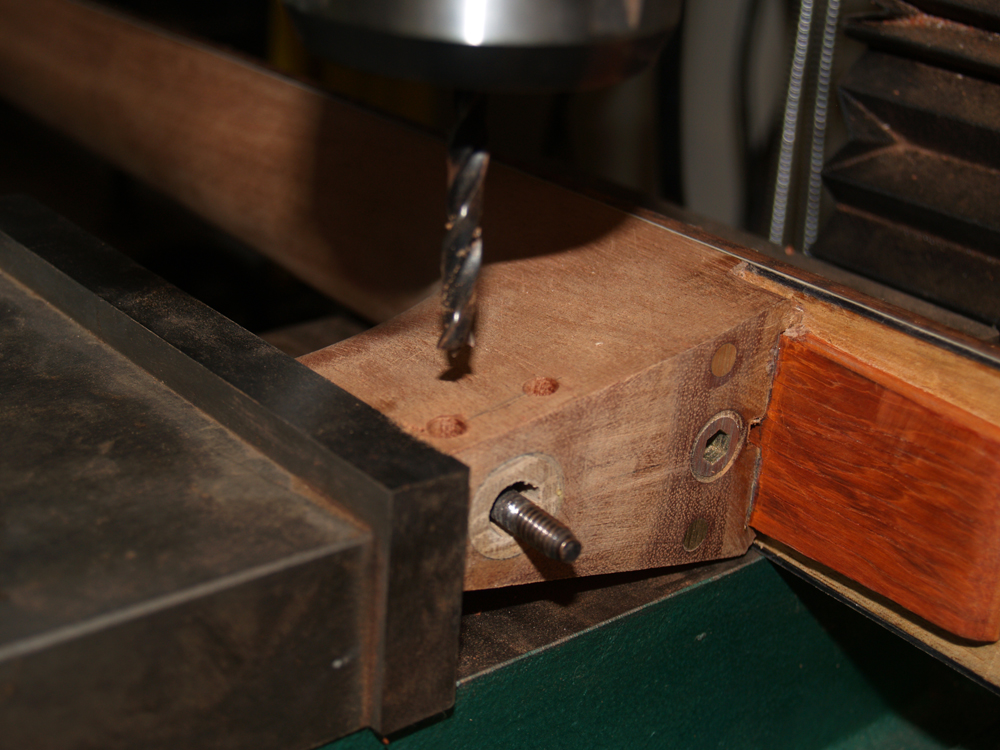
Here you can see the retainer has been sanded flush with the back of the heel. I am drilling holes for the set screw posts.
 ( 387 ) 8-June-2011
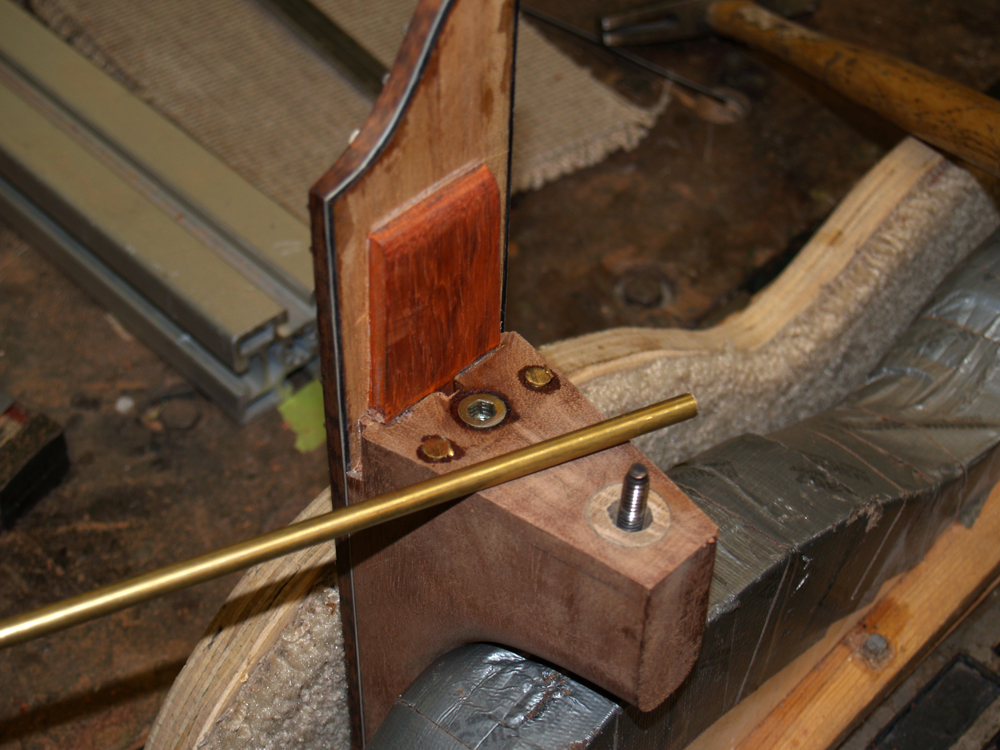
I cut small sections off a brass rod for the set screw posts. The brass is just soft enough so that the stainless steel set screws create a small divot in the posts when the neck is attached and under compression. This ensures that the neck will set firmly in place.
 ( 388 ) 8-June-2011
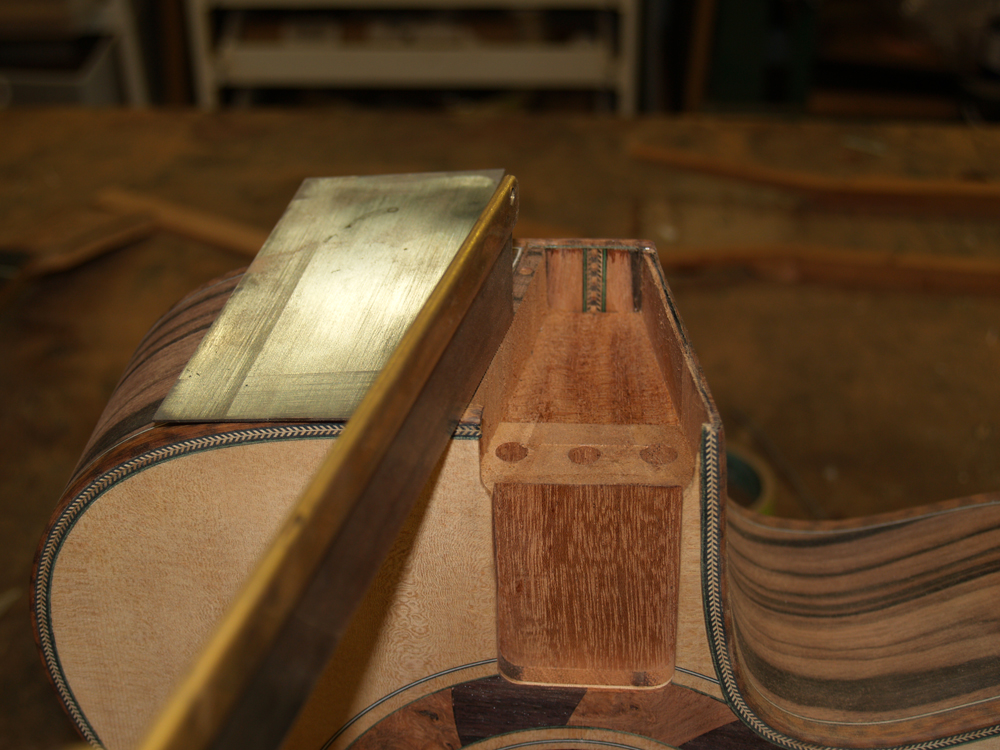
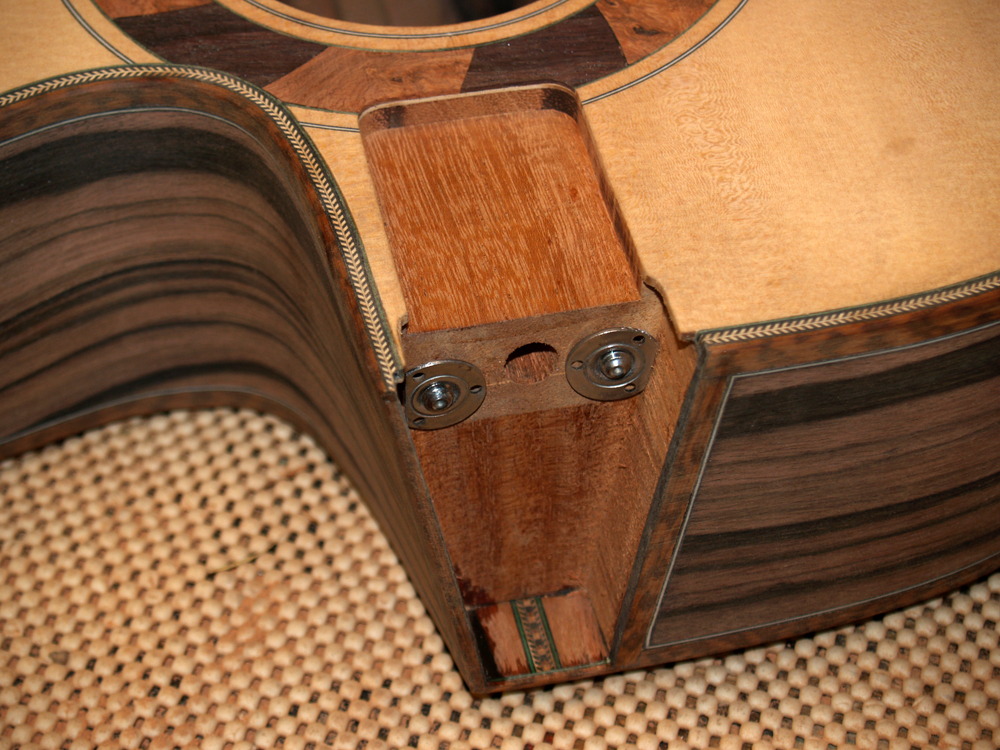
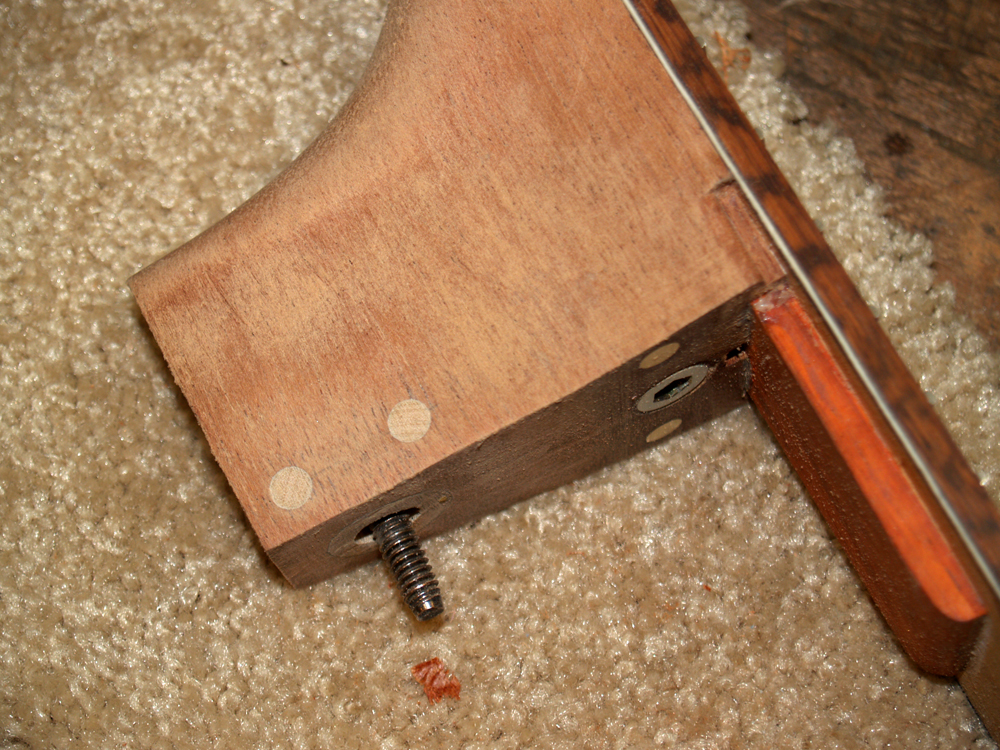
Here you see the finished business end of the heel.
 ( 389 ) 8-June-2011
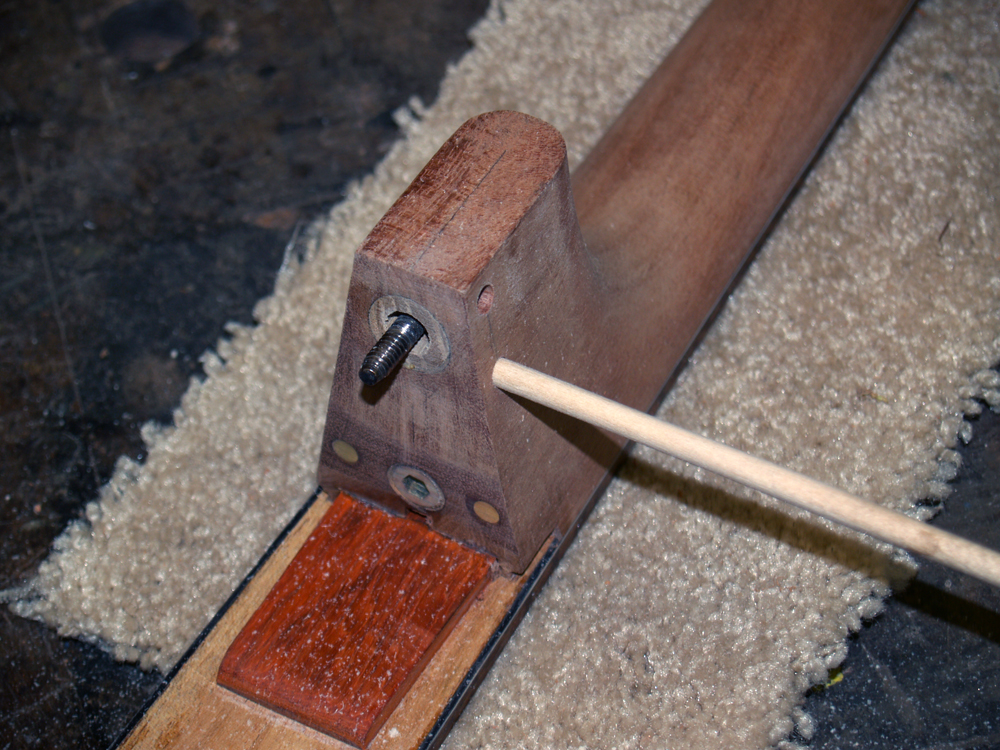
To hold the tilt action adjustment bolt in place the retainer must must withstand about 115 lbs of force when the guitar is strung with light strings To ensure that that plug does not work its way loose I install two retainer pins to help hold it in place. Here I am drilling the holes for the retainer pins.
 ( 390 ) 8-June-2011
Gluing the retainer pins in place.
 ( 391 ) 8-June-2011
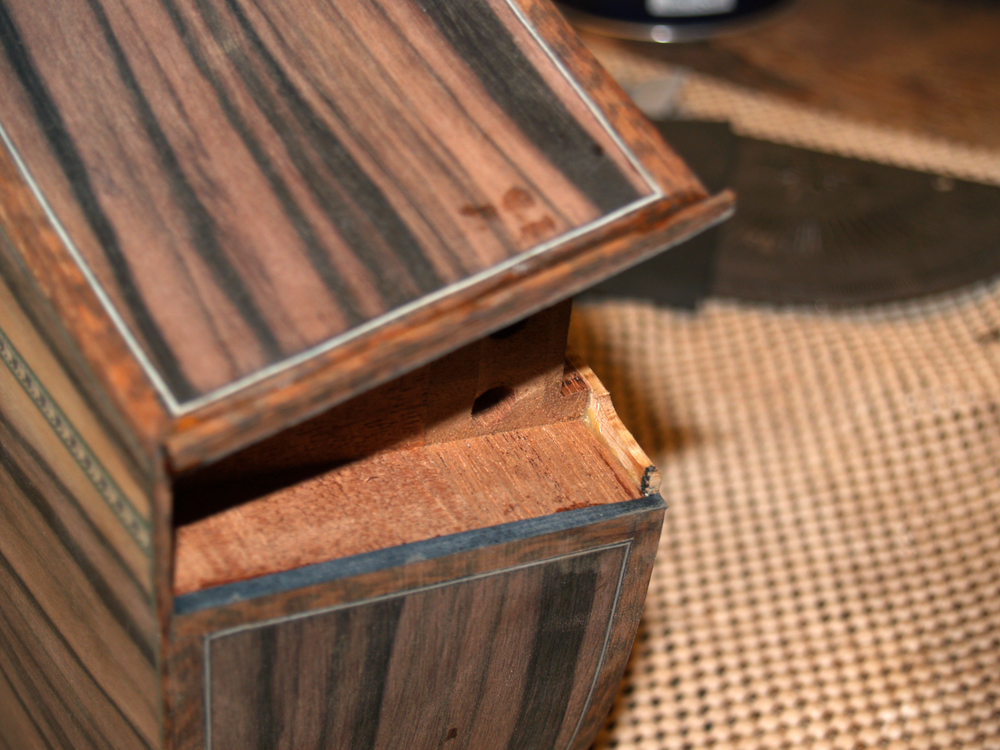
And a picture after they have been trimmed and sanded flush.
 ( 392 ) 8-June-2011
I assemble the body and neck and tighten everything down to checked out the tilt action functionality.
 ( 393 ) 8-June-2011
I need to prepare the bottom of the heel for the heel cap. I use this special sanding tool I made to sand the bottom of the heel coplanar with the bottom of the guitar, but off set by the thickness of the heel cap.
 ( 394 ) 8-June-2011
This picture is a bit fuzzy, but here I have glued the heel cap blank and a b/w/b pinstripe blank onto the bottom of the heel. After the glue sets up I sand everything flush and smooth.
 ( 395 ) 8-June-2011
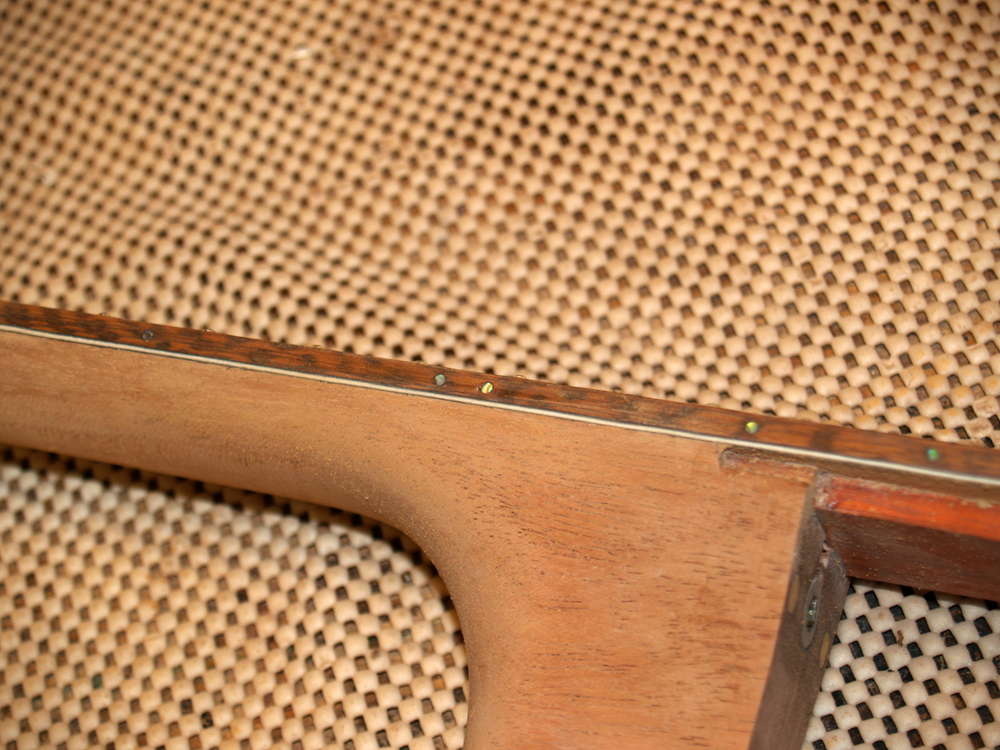
A small but important detail; I have installed a set of Abalone fret markers on the side of the neck.
 ( 396 ) 8-June-2011
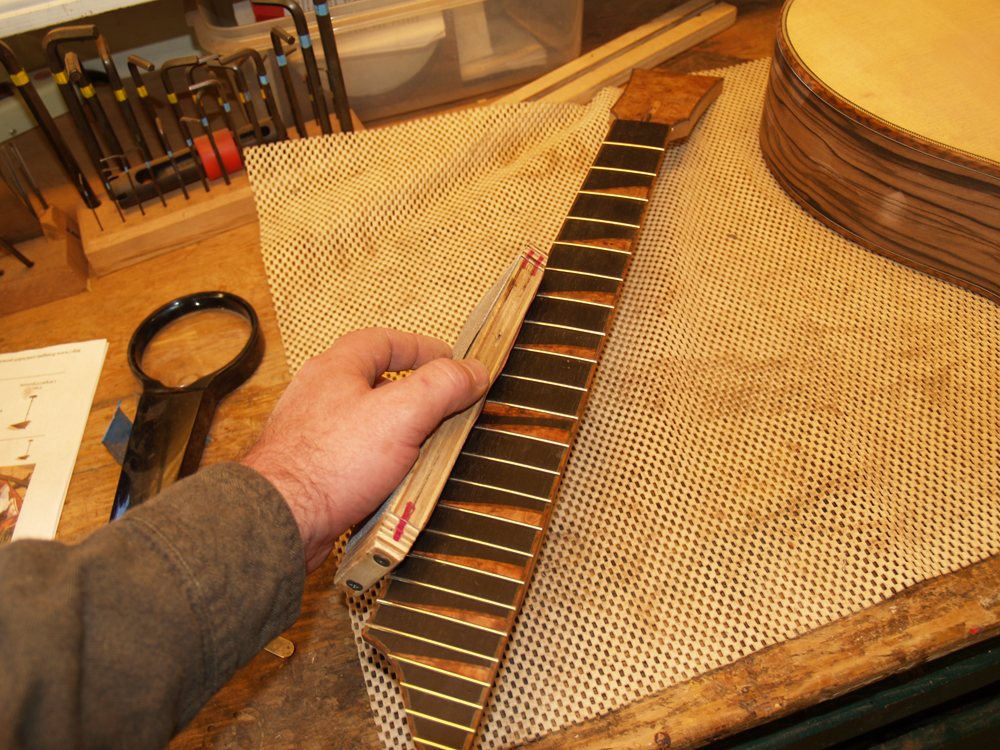
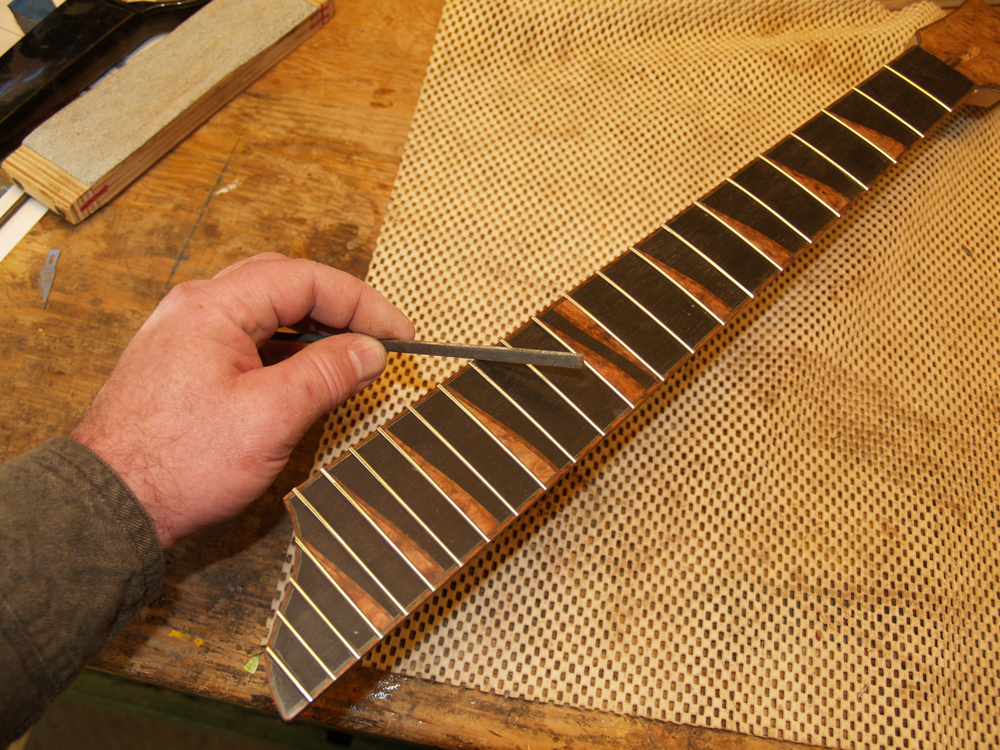
To dress the frets, I start out by sanding the ends to a 45 deg angle.
 ( 397 ) 8-June-2011
And then I file the ends into smooth little quarter-spheres. My objective is to have the ends of the frets look like a string of tiny little jewels when they are polished up. After the guitar is strung up for the first time and I have a sense for how the neck is performing, I will hone the frets to optimize the action.
 ( 398 ) 8-June-2011
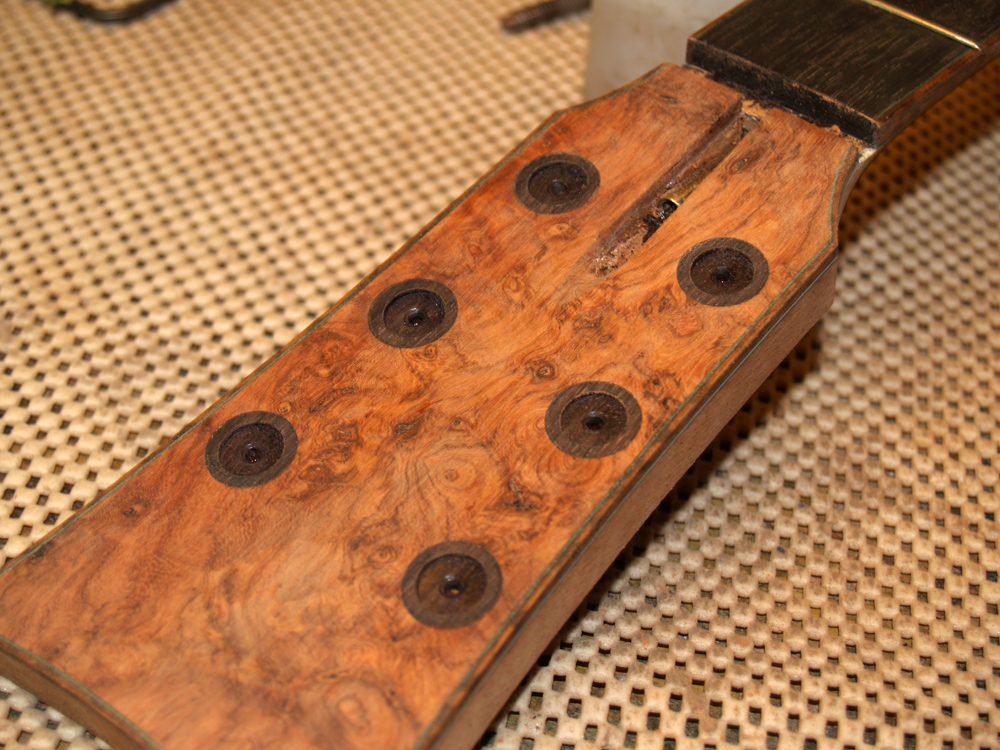
I like to provide an outline for the tuning machines posts, so I have inserted a rosewood disk and drilled a counter sink for each machine.
 ( 399 ) 8-June-2011
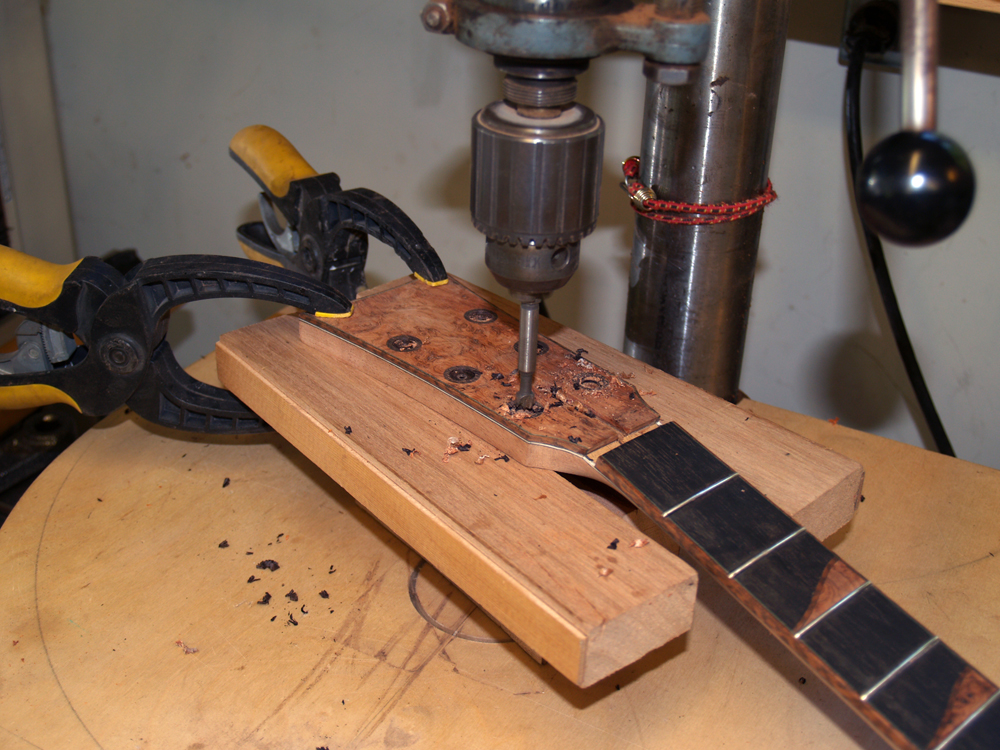
And then I drill the hole for the tuning peg to go through.
 ( 400 ) 8-June-2011
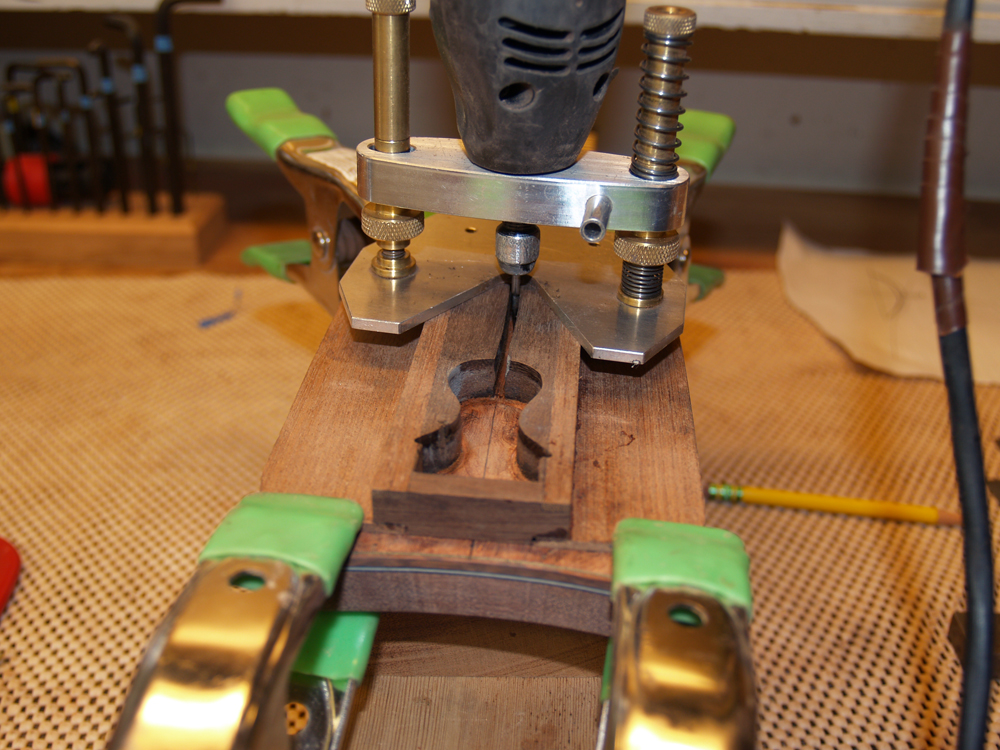
I use a template guide to rout the channel for the Silver Rose that I am inlaying into the headstock.
 ( 401 ) 8-June-2011
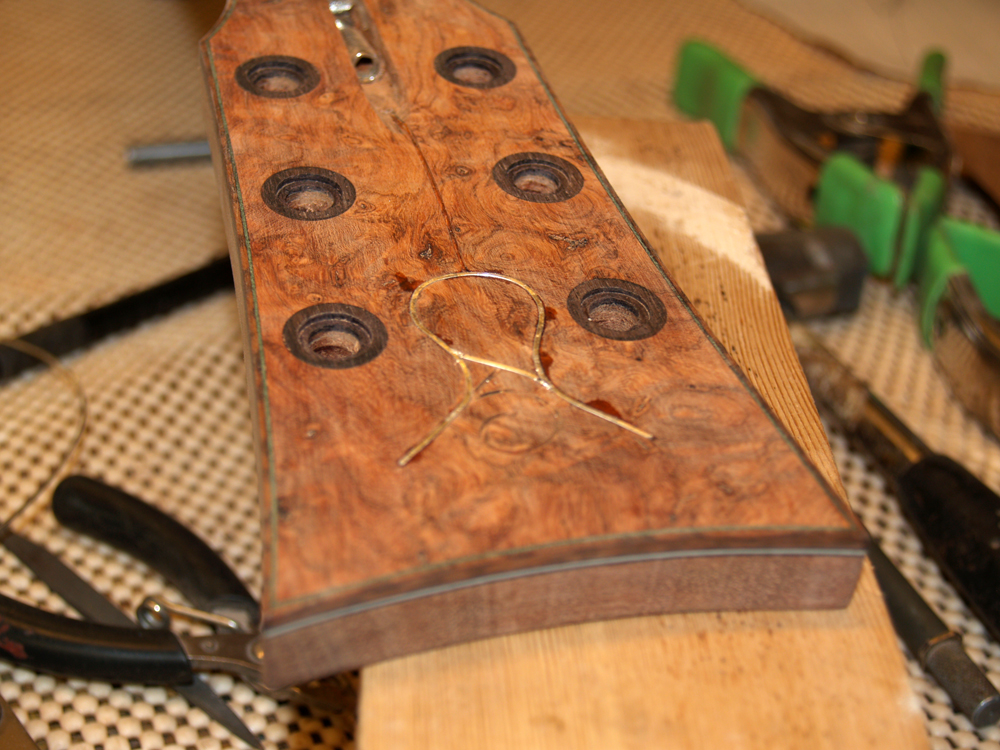
I carefully inlay the square silver wire making sure that it stands a bit proud of the surface.
 ( 402 ) 8-June-2011
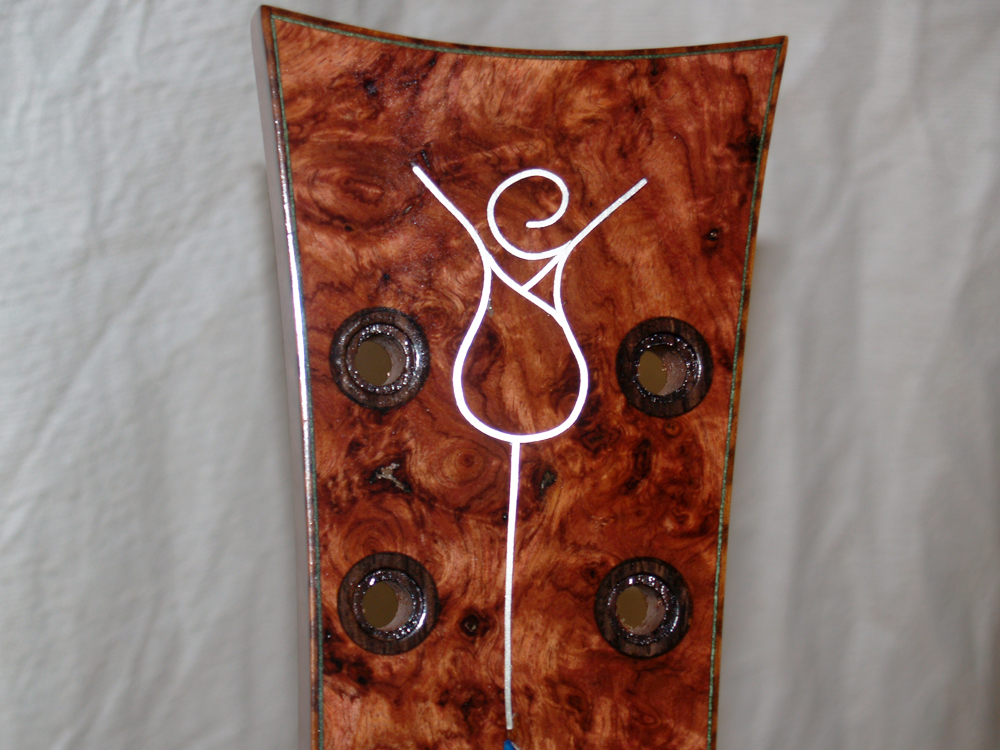
After sanding everything flush and getting the lighting just right, The Portland Guitar Rose.
 ( 403 ) 8-June-2011
The next phase of the project is applying the finish. Before I start to do that though, I go over the guitar with bright lights and a magnifying glass to find any defects or anomalies that need to be fixed. Good prep work is crucial to the process of getting a superior finish on the guitar. After I apply the first few coats of lacquer a whole new set of defects will become apparent. The principal I work under is: If I find a defect I fix the defect.