 ( 250 ) 8-Mar-2012
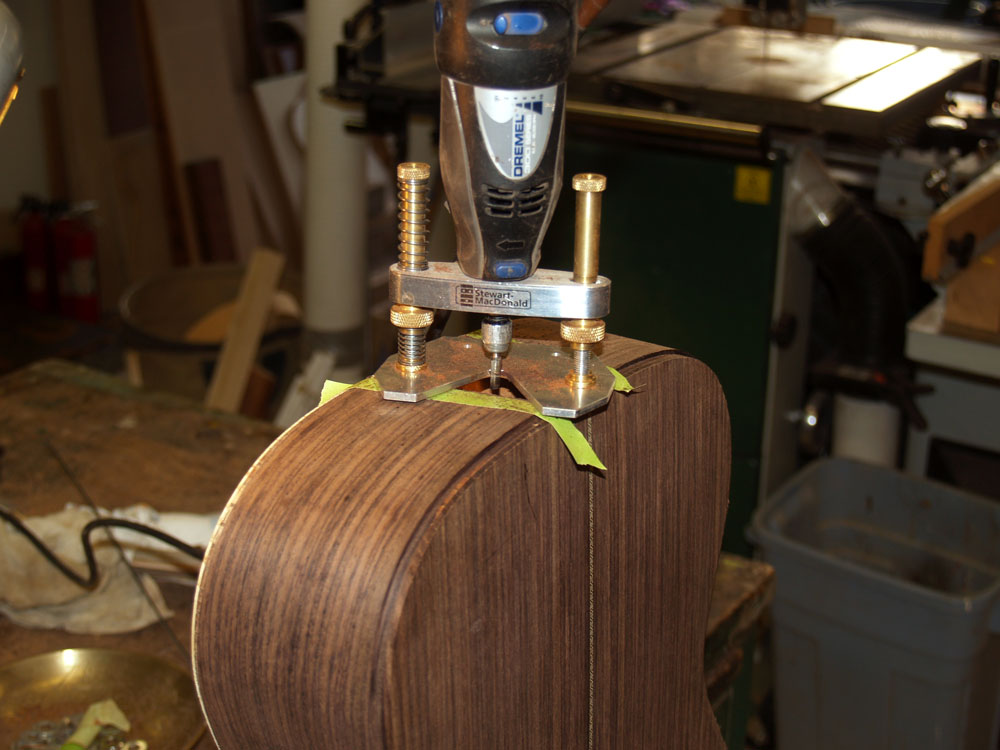
Now that the slots for the tuning pegs have been routed out I have to drill the holes for them. Since I am mounting the individual pegs on a curve I have to carefully line up the drill to make sure the hole will run true.
( 250 ) 8-Mar-2012
Now that the slots for the tuning pegs have been routed out I have to drill the holes for them. Since I am mounting the individual pegs on a curve I have to carefully line up the drill to make sure the hole will run true.
 ( 251 ) 8-Mar-2012
I am using this precision block to line up the headstock for each hole.
 ( 252 ) 8-Mar-2012
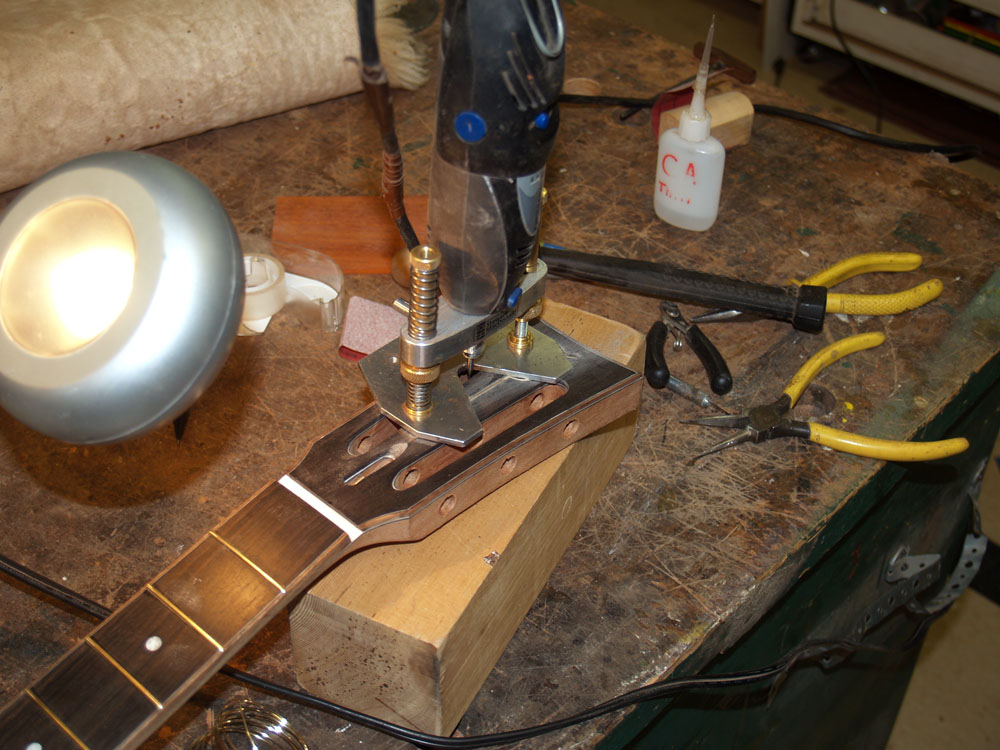
I insert this piece of wood in the slot so that when the drill punches through the wood will not split.
 ( 253 ) 8-Mar-2012
I very carefully drill each hole using the milling machine.
 ( 254 ) 8-Mar-2012
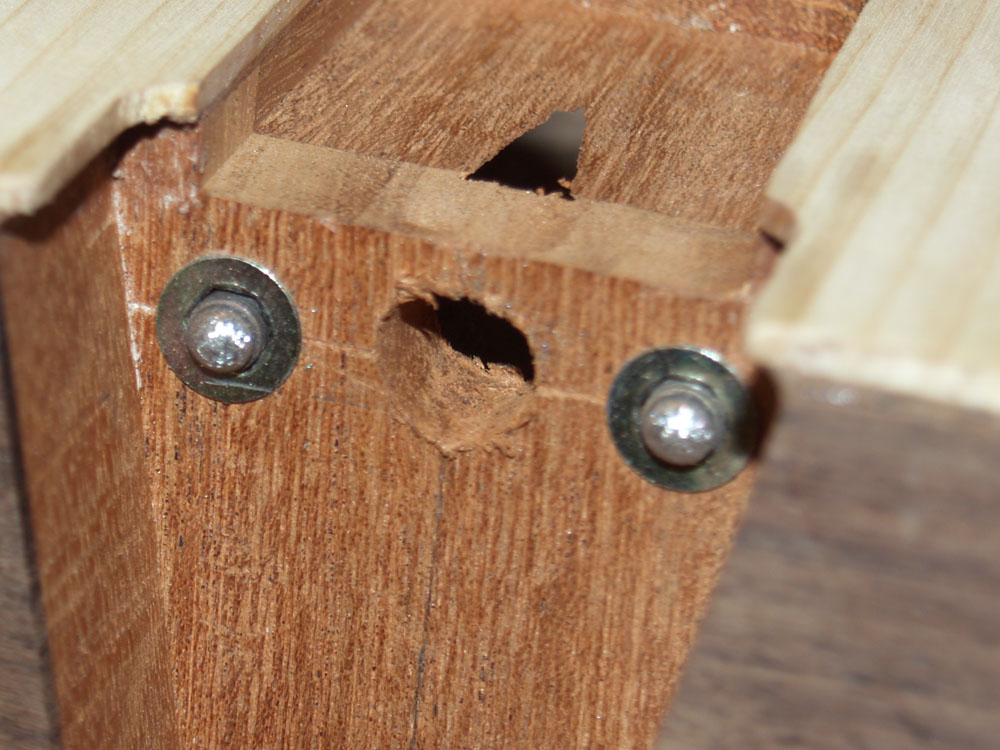
A shot from the front showing the installed tuning pegs.
 ( 255 ) 8-Mar-2012
And a shot from the back.
 ( 256 ) 8-Mar-2012
In this picture I am using a grinding wheel to shape the set screws used in the neck mounting hardware.
 ( 257 ) 8-Mar-2012
These set screws act as the fulcrum for the User Adjustable tilt Action Neck. The rounded shape insures a well defined contact point between the neck and the body and allows for a smooth rotation.
 ( 258 ) 8-Mar-2012
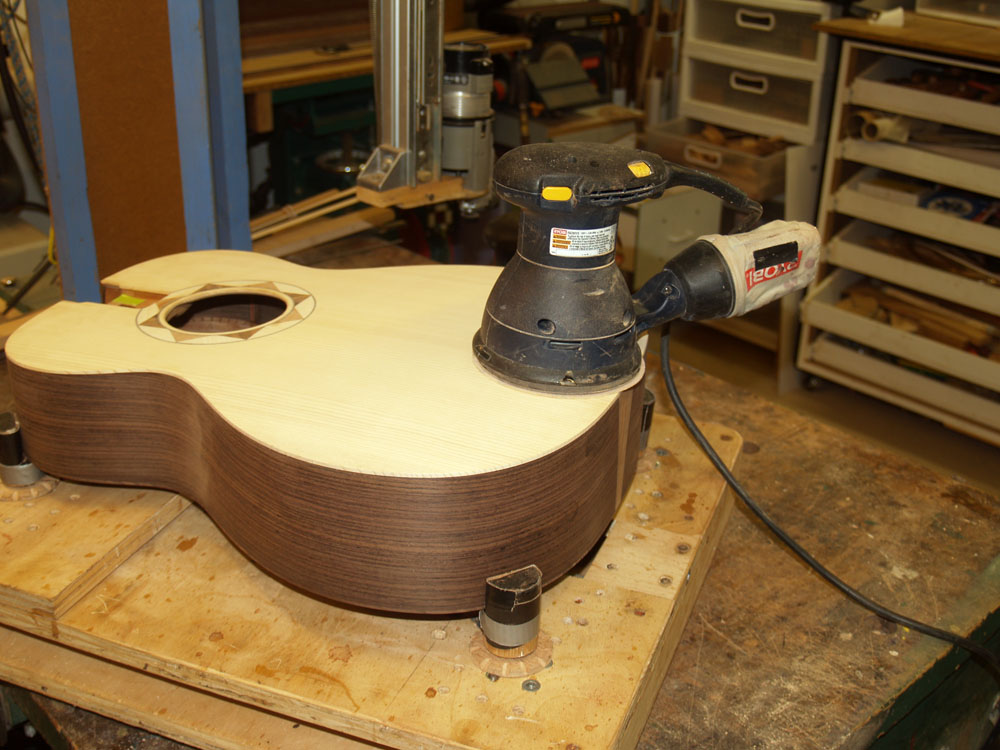
To enhance the mobility of the top I reduce its thickness around the edge before I install the binding. The middle of the top will measure about 100 mils (100/1000 inch) thick in the center and about 60 mils at the edge.
 ( 259 ) 8-Mar-2012
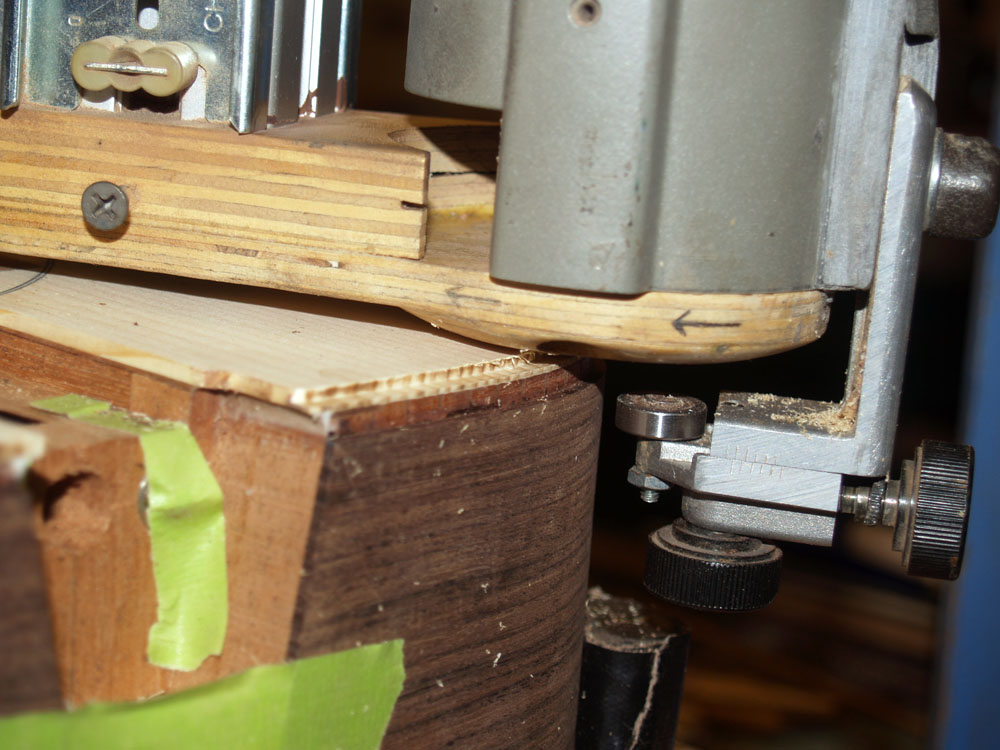
In this image I have set up my Universal Bindalator machine to route the channels for the binding and purfling. This machine is necessary because the top and back are not flat. If I used a router with a flat platen, the channels would be routed at an angle to the sides. This machine holds the router parallel to the sides while giving me five degrees of freedom.
 ( 260 ) 8-Mar-2012
The platen is rounded so the contact point is well defined and right next to the router bit.
 ( 261 ) 8-Mar-2012
Here is an image of the routed channels.
 ( 262 ) 8-Mar-2012
In this picture I am attending to a detail in the channel around the tail graft.
 ( 263 ) 8-Mar-2012
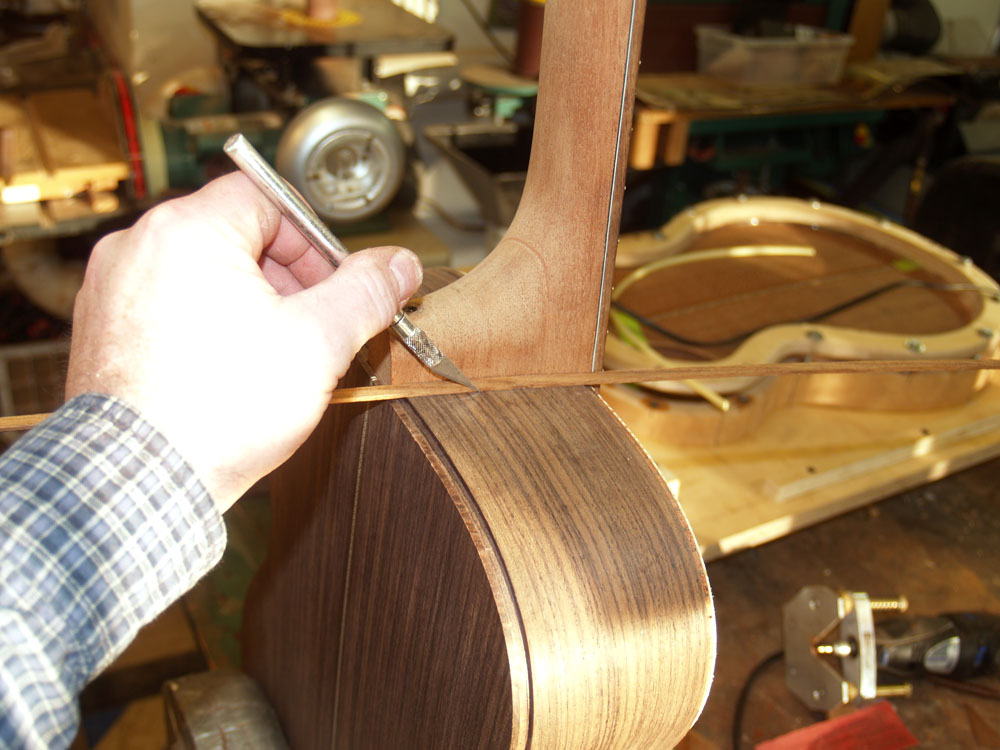
I have attached the neck in this picture and am marking the width of the binding that will frame the heel of the neck.
 ( 264 ) 8-Mar-2012
I use my small router to route out the channel around the neck.
 ( 265 ) 8-Mar-2012
A look at the results.
 ( 266 ) 8-Mar-2012
I forgot to take pictures as I was installing the binding, but here is a picture of the results.
 ( 267 ) 8-Mar-2012
The purfling is a wide herringbone pattern, the binding is Koa, and below the binding is a black/white/black pin stripe to match the neck pin striping
 ( 268 ) 8-Mar-2012
One of the vexing problems in installing the heel graft is getting it oriented so it matches the angle of the back. To solve this problem I created this sanding plate that has offset sanding strips of two different depths and is designed to slide across the back. I am one to never waist anything if I can avoid it. This sanding plate is made from a left over piece of Indian Rosewood from the very first guitar that I made. It makes a beautiful and elegant tool.
 ( 269 ) 8-Mar-2012
I tape a piece of paper onto the back to prevent causing scratches and then work the sanding plate back and forth with the sanding strips in contact with the heel. I work the plate until sanding strip stops removing material from the heel. You might notice the lambs wool that I am laying the guitar on. I use this beacuase if anything that might scratch or dent the top finds its way onto the wool, it settles deep into the pile ans is safely out of the way. It feels good too.
 ( 270 ) 8-Mar-2012
When I am finished, the angle on the heel matched the angle on the back. I then glue on the heal graft.
 ( 271 ) 8-Mar-2012
In this case the heel graft is made from Koa to match the binding and has a set of pin striping underneath it to match the pin striping on the side and neck.
 ( 272 ) 8-Mar-2012
Here I have carefully measure and marked the position of the side markers. I drill a small hole for each marker.
 ( 273 ) 8-Mar-2012
And then I glue the dowel in place, clip it off and sand it smooth.
 ( 274 ) 8-Mar-2012
In this picture I am setting up the outline of the Portland Guitar Headstock Rose. My daughter Jasmine Rose designed this for me, so this is the Jasmine Rose.
 ( 275 ) 8-Mar-2012
I use my small router again to rout out the channel for the gold wire I use to create the rose.
 ( 276 ) 8-Mar-2012
After gluing the wire in place I sand it smooth and we are now ready to put the finish on the guitar.