Portland Guitar Co. | Portland Oregon | Contact Jay Dickinson-503.245.3276 | jay@portlandguitar.com
Portland Guitar Pretty Good Intonation (PGPG) System
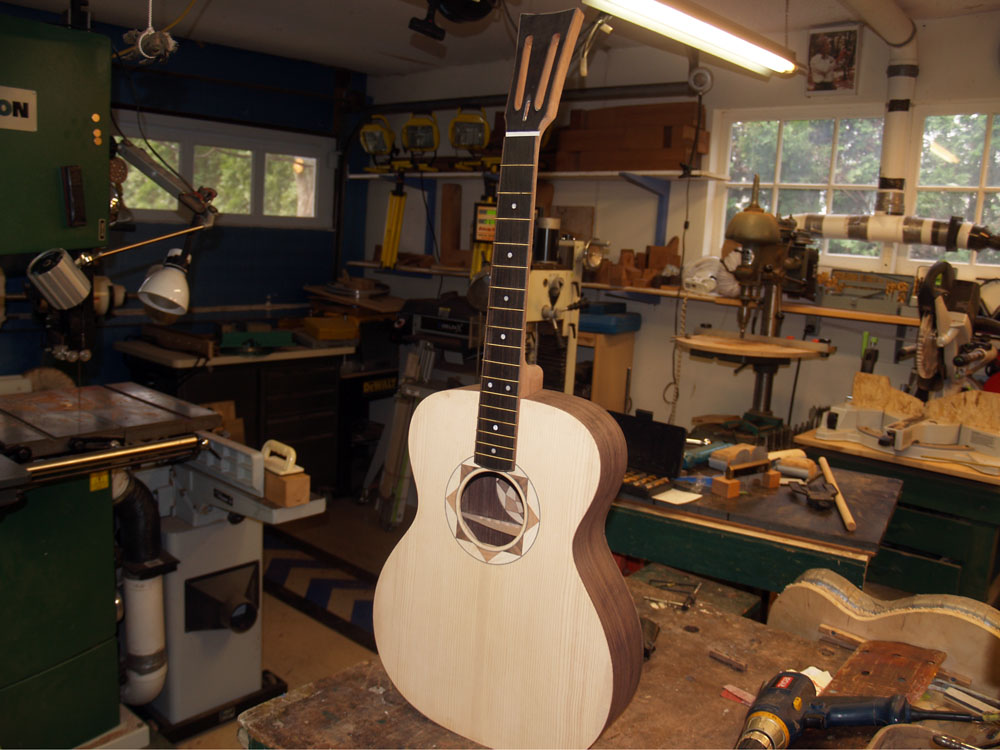
Finished Build
Nylon String Orchestral Model
Serial # OMX 1.2.51
- Body: Indian Rosewood
- Top: Adirondack Spruce
- Neck: Mahogany
- Binding : Koa
- Fretboard and Bridge: Ebony
- Nut and Saddle: Bone
Page 6
 ( 181 ) 31-Jan-2012
To make the guitar more comfortable to play we like to carve a radius on the fretboard to match the curvature of the fingers as you make a chord. A typical fretboard is tapered, being narrower at the nut than the saddle. To make a fretboard so that each strings is the same height above the board we have to cut the fretboard from a section of a cone. This results in what we call a "Compound Radius Fretboard", i.e.,, the radius of the fretboard gets more shallow the farther up the fretboard you go. To fabricate a compound radiused fretboard I have built a machine I call the Universal Radiusator. In this picture you can see the very strong double stick tape I use to attach the fretboard blank to the bottom of the radiusing machine.
 ( 182 ) 31-Jan-2012
The Universal Radiusator is essentially a two armed pendulum where the two arms are different lengths and are joined together by a rigid cross bar. Here I have attached the fretboard blank to the bottom of the cross bar.
 ( 183 ) 31-Jan-2012
I suspend the cross bar above a router and slide the whole machine on a set of tracks along the length of the fretboard blank while swinging the pendulum back and forth. Each time the pendulum swings above the router bit a section of the fretboard is routed off in an arch. By judiciously choosing the length of each arm I can create a compound radius fretboard with any dimension from a 7 inch radius to a 20 inch radius. The dimension of the radius is taken at the 12th fret since by design the radius changes dimension from nut to saddle. In this picture you see the Universal Radiusator on its tracks.
 ( 184 ) 31-Jan-2012
The process creates a lot of saw dust.
 ( 185 ) 31-Jan-2012
Here is a picture of the end of the fretboard after it has been through thr process.
 ( 186 ) 31-Jan-2012
The fretboard blank gets a quick sanding to remove the tool marks.
 ( 187 ) 31-Jan-2012
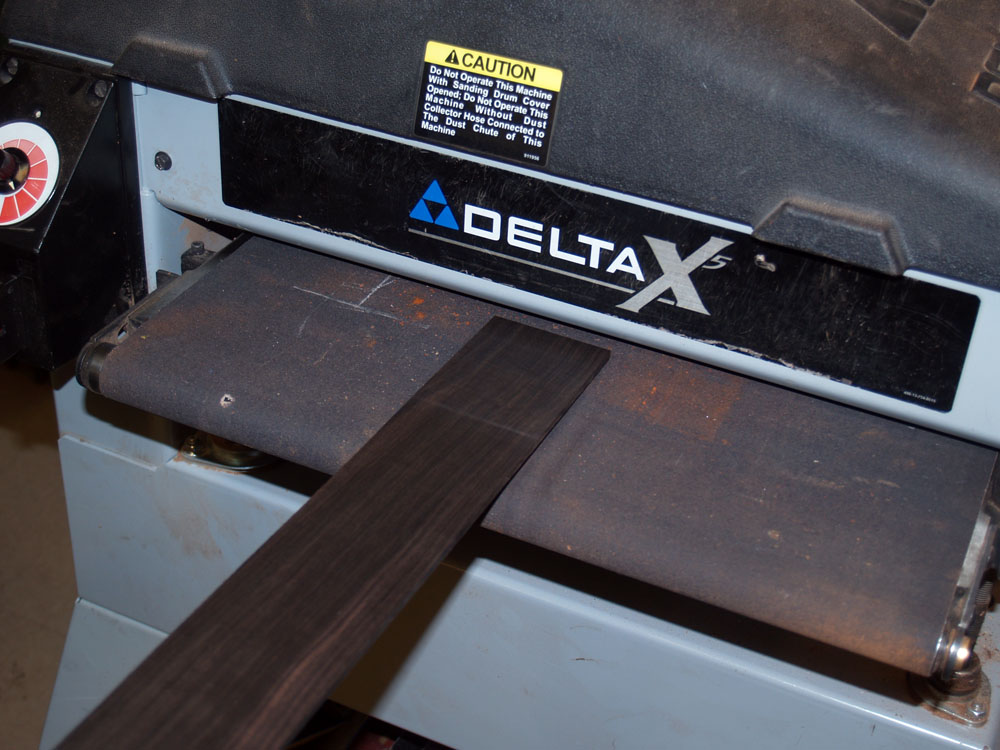
After the radius has been cut I sand the fretboard blank to about 1/4 inchm thick.
 ( 188 ) 31-Jan-2012
To cut the fretwire slots at their correct position I have a machine with a set of templates that lets me index a Dremel Crosscut Saw along the length of the fretboard.
 ( 189 ) 31-Jan-2012
I check the depth of each slot using a piece of fret wire. It is important that the slots are deep enough so that the fretwire doesn't bottom out.
 ( 190 ) 31-Jan-2012
I use my bandsaw to trim the edges of the fretboard blank.
 ( 191 ) 31-Jan-2012
And then I use the belt sander to finish up the dimensions.
 ( 192 ) 31-Jan-2012
This fretboard will have Koa binding with a b/w pinstripe along its length. Here I am gluing on the binding and pinstripe.
 ( 193 ) 31-Jan-2012
Before I install the fretwire, I install the fretboard dots. I have made these from a marbled white acrylic block.
 ( 194 ) 31-Jan-2012
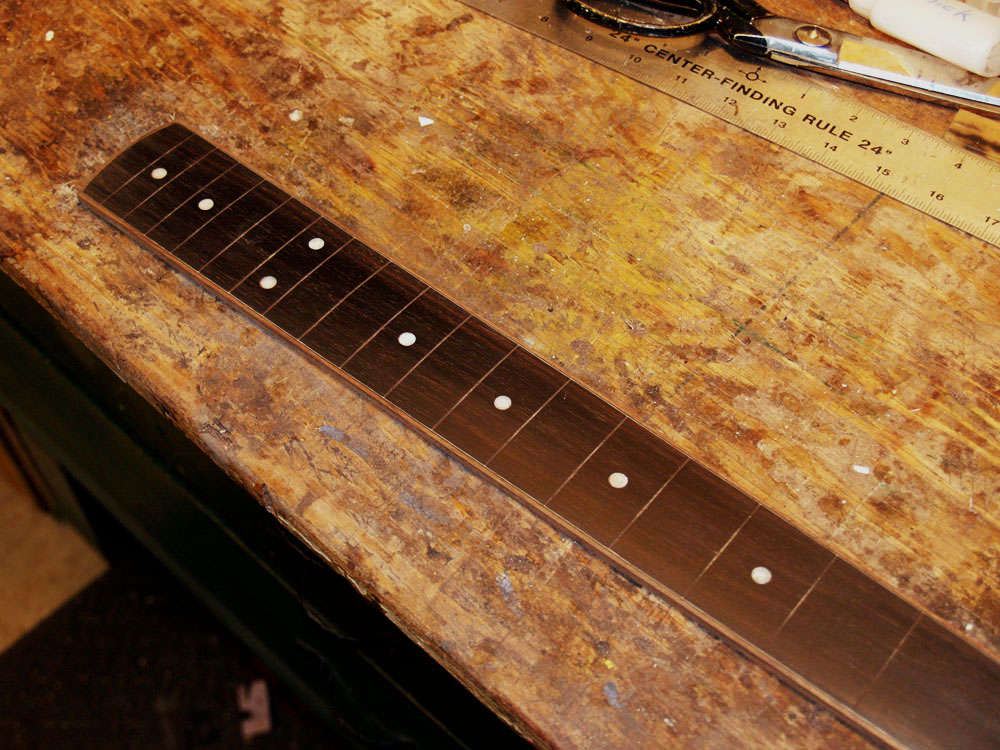
Here is a close up of the fretboard before the wire is installed.
 ( 195 ) 31-Jan-2012
The nut end of the fretboard get trimmed up using the disk sander.
 ( 196 ) 31-Jan-2012
Now I am ready to install the fret wire. I first cut a piece of fretwire for each fret so that it is a bit longer than the board is wide.
 ( 197 ) 31-Jan-2012
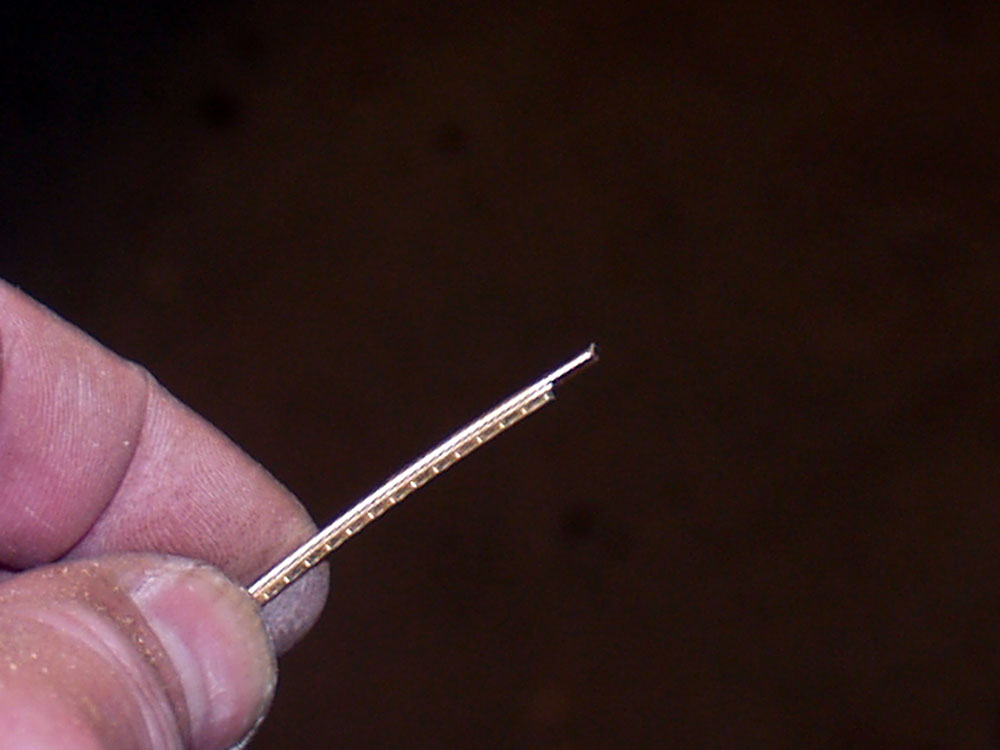
Since the fretboard is bound, the fretwire slot stops at the binding. This means that the fretwire must have the tang removed from the ends of the wire. I have special jig to hold the wire at the correct angle so I can easily sand the tang off of the wire.
 ( 198 ) 31-Jan-2012
Here you can see the end of a piece of fretwire with the tang removed.
 ( 199 ) 31-Jan-2012
I use a brass hammer and an anvil to hammer the fretwire into place. I inspect each piece of wire to ensure that it is fully seated on the fretboard.
 ( 200 ) 31-Jan-2012
Here is a picture of the fretboard with the wire installed.
 ( 201 ) 31-Jan-2012
I place a small drop of thin cyanoacrylate glue on the end of each fret. The glue quickly wicks up into the fret slot and glues the free end of the fretwire to the binding.
 ( 202 ) 31-Jan-2012
Finally I use the belt sander to sand the ends of the fretwire flush qith the binding. I will shape the ends of the fretwire later.
 ( 203 ) 31-Jan-2012
Now I turn my attention to make the headstock veneer.
 ( 204 ) 31-Jan-2012
I am binding the headstock with the same layout at the fretboard, Koa and b/w pinstripe.
 ( 205 ) 31-Jan-2012
The binding and purfling goes on each edge.
 ( 206 ) 31-Jan-2012
Here is a close up of the headstock binding.
 ( 207 ) 31-Jan-2012
The heal of the neck gets a few features routed into it. I include a channel on the edges that will help hide the joint between the top of the guitar and the fretboard.
 ( 208 ) 31-Jan-2012
I also route out a channel for a cantilever support plate. The end of the fretboard floats free above the top of the guitar so the support plate helps to keep it stable.
 ( 209 ) 31-Jan-2012
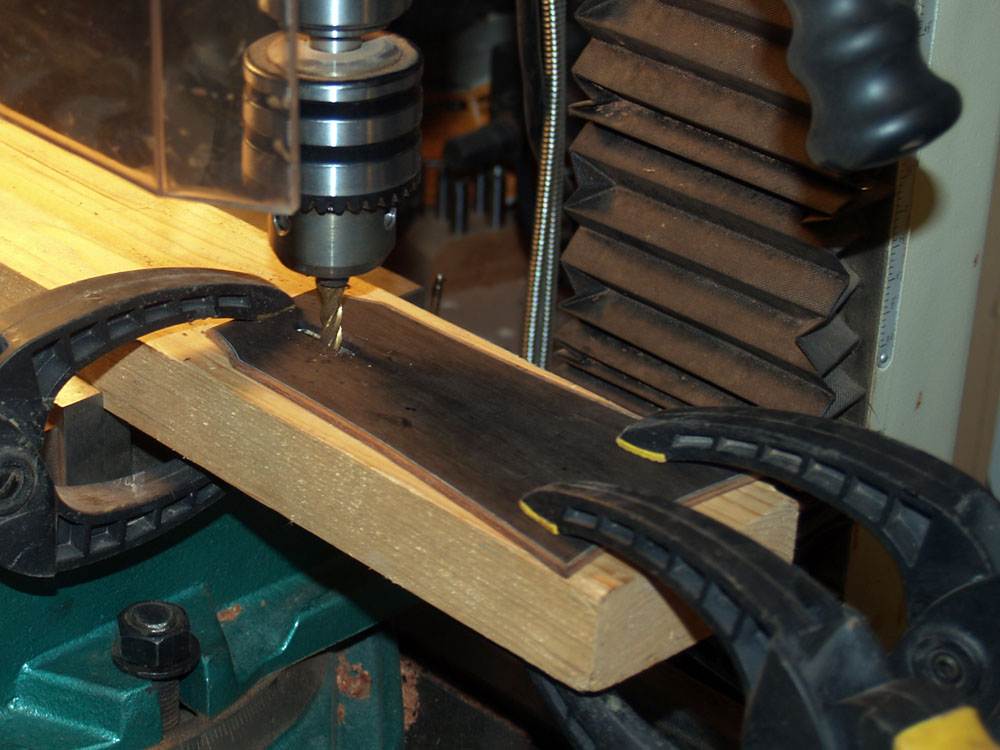
I use my milling machine to route out a truss rod access slot in the head plate.
 ( 210 ) 31-Jan-2012
To create a b/w pinstripe along the edge of the fretboard and head plate I am gluing a piece of black and white fiberboard to the bottom of the fretboard.
 ( 211 ) 31-Jan-2012
When I glue the fretboard to the neck blank I use a couple fiducial buttons to help position and constrain the fretboard. I use the bone blocks to help me position the fretboard when I glue the button in place.
 ( 212 ) 31-Jan-2012
Here are the fiducial buttons glued to the bottom of the fretboard.
 ( 213 ) 31-Jan-2012
I lay the fretboard out on the neck blank to make sure everything lines up correctly.
 ( 214 ) 31-Jan-2012
Now I use the milling machine to dimension the thickness of the neck blank and to create the volute.
 ( 215 ) 31-Jan-2012
Here is a picture showing the volute as it is carved out of the neck blank. Since this neck is carved from a single block of Mahogany in this case the volute is purely a decorative feature. On a laminated neck the volute was historically included to reenforce the joint between the headstock and neck.
 ( 216 ) 31-Jan-2012
I use the table saw to trim the heal to its proper length.
 ( 217 ) 31-Jan-2012
And here is the first time the neck is inserted into the body of the guitar.
 ( 218 ) 31-Jan-2012
I use a piece of purple heart to create the cantilever fretboard support. Purpleheart is a very stiff wood.
 ( 219 ) 31-Jan-2012
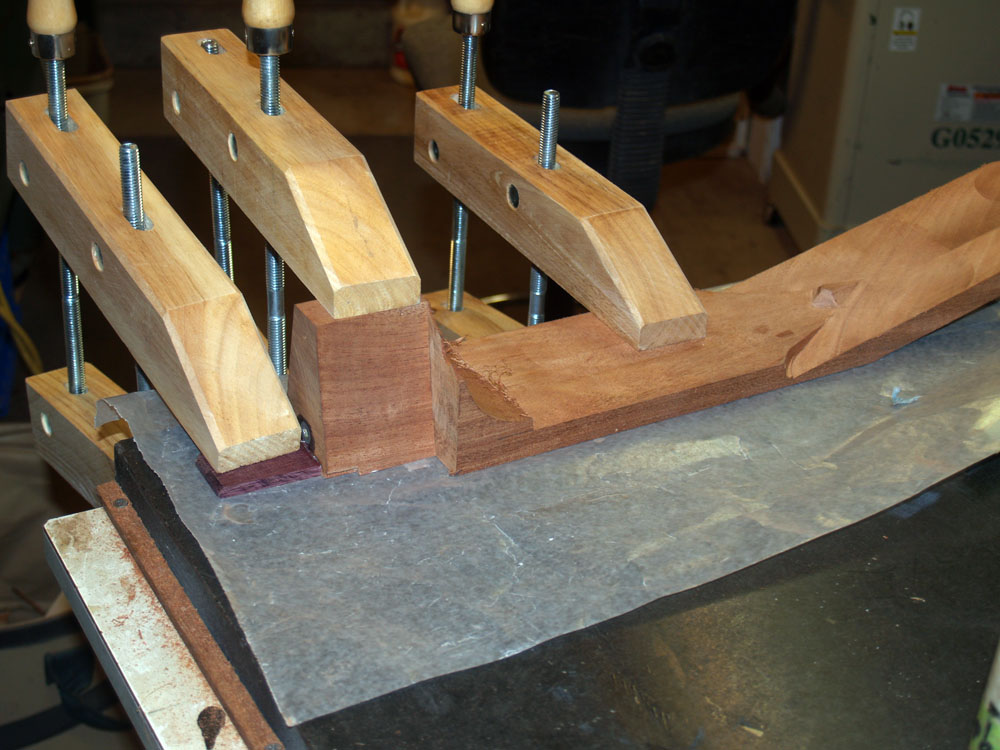
When I glue the cantilever support in place I take pains to make sure the plate is level with the top of the neck blank. I glue the plate in place on my very flat granite table top.
 ( 220 ) 31-Jan-2012
I use my compound miter saw to trim the end of the heal to a 3 deg angle. This will allow the neck to freely move in the neck channel.
 ( 221 ) 31-Jan-2012
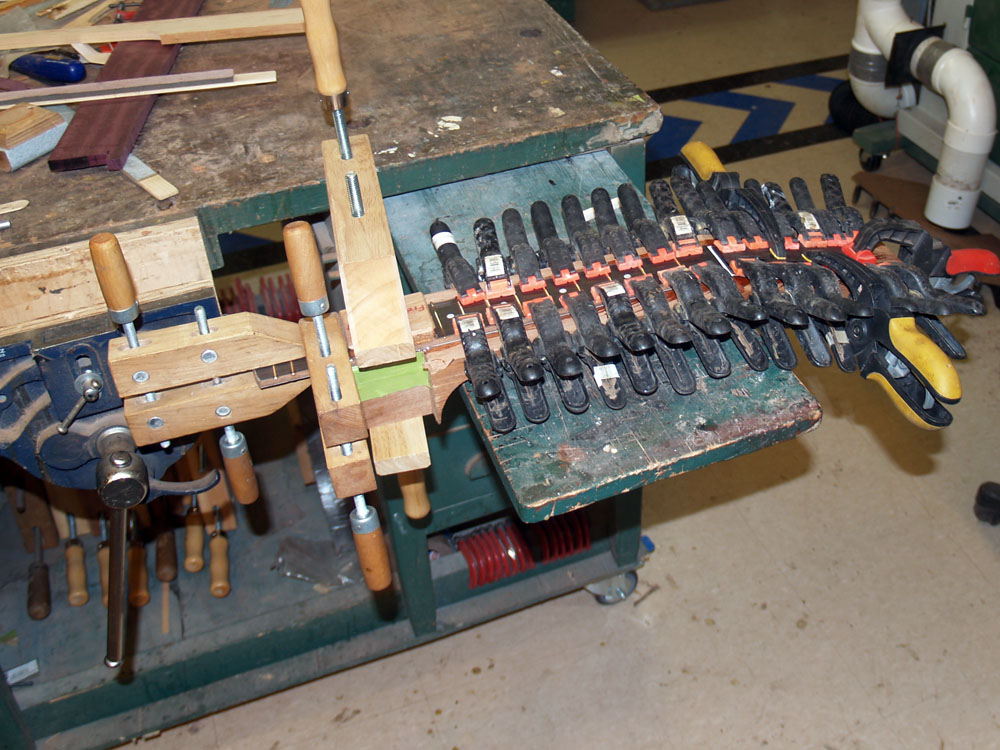
And finally I glue the fretboard to the neck blank. I use epoxy glue and lots of clamp.
 ( 222 ) 31-Jan-2012
After the glue cures over night the fretboard is firmly attached to the neck blank.
 ( 223 ) 31-Jan-2012
Here I am laying out the tuning peg slots on the head stock.
 ( 224 ) 31-Jan-2012
And then I use my milling machine to route out the tuning machine slots.
 ( 225 ) 31-Jan-2012
I use the bandsaw to trim away the edges of the neck blank.
 ( 226 ) 31-Jan-2012
This is truly a case where I glue a couple different pieces of wood together and then sand away everything that doesn't look like a guitar neck. Here I am working on the head stock.
 ( 227 ) 31-Jan-2012
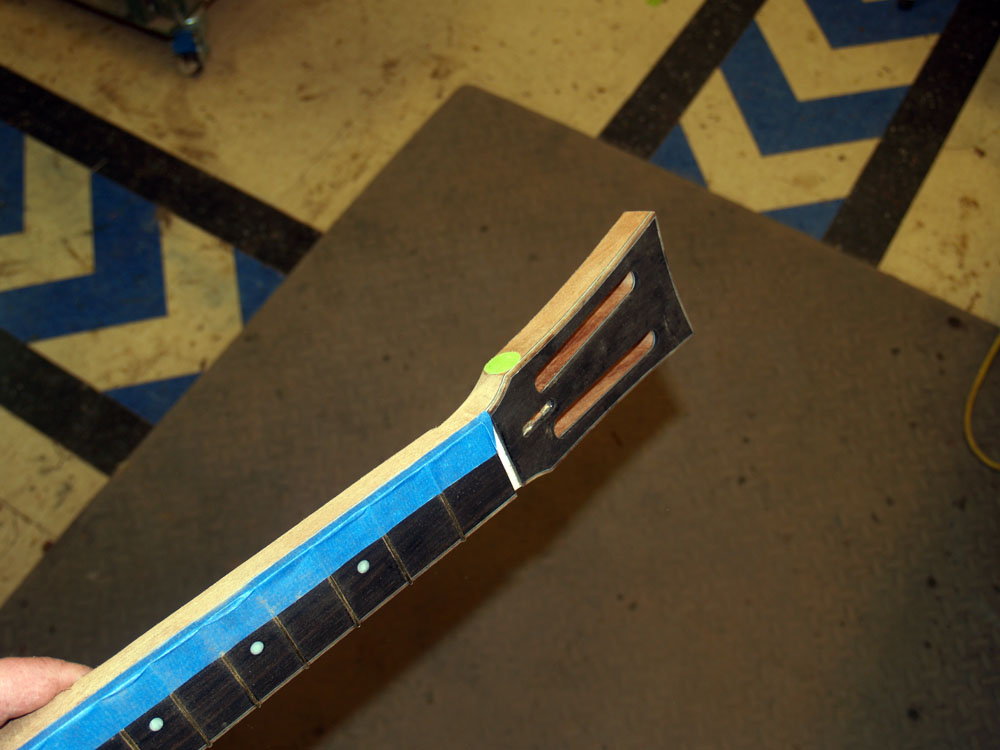
It is very easy to make a mess of this operation, so to make sure that I don't over do it I use masking tape to limit where I sand and where I don't. The masking tape provides a visual clue as to the out of bounds areas, and if the sanding block should slip, the masking tape provides a sacrificial grace layer.
 ( 228 ) 31-Jan-2012
I use a variety of different tools to shape the neck, but mostly I use sanding blocks and elbow grease.
 ( 229 ) 31-Jan-2012
I am not in a hurry during this process. I have a couple of tools to help me measure the shape of the neck as I progress. The most import tool though is my sense of touch.
 ( 230 ) 31-Jan-2012
Here I am filing a bevel into the end the the tuning machine slots.
 ( 231 ) 31-Jan-2012
A close up of the tuning machine slots. The truss rod slot will be covered with a decorative plate.
 ( 232 ) 31-Jan-2012
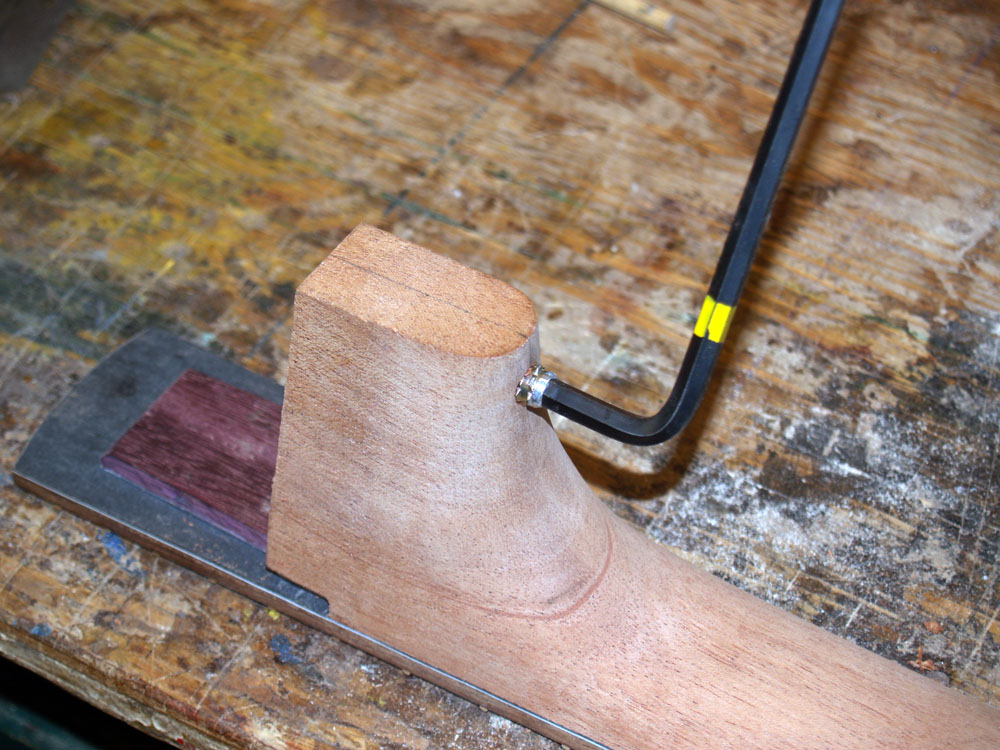
In this picture I have installed a marking point into the neck adjustment bolt insert. When I press the neck into the channel it will leave a small hole on the end of the heal indicating where I need to drill the bolt hole.
 ( 233 ) 31-Jan-2012
Here I am drilling the bolt hole in the end of the heal.
 ( 234 ) 31-Jan-2012
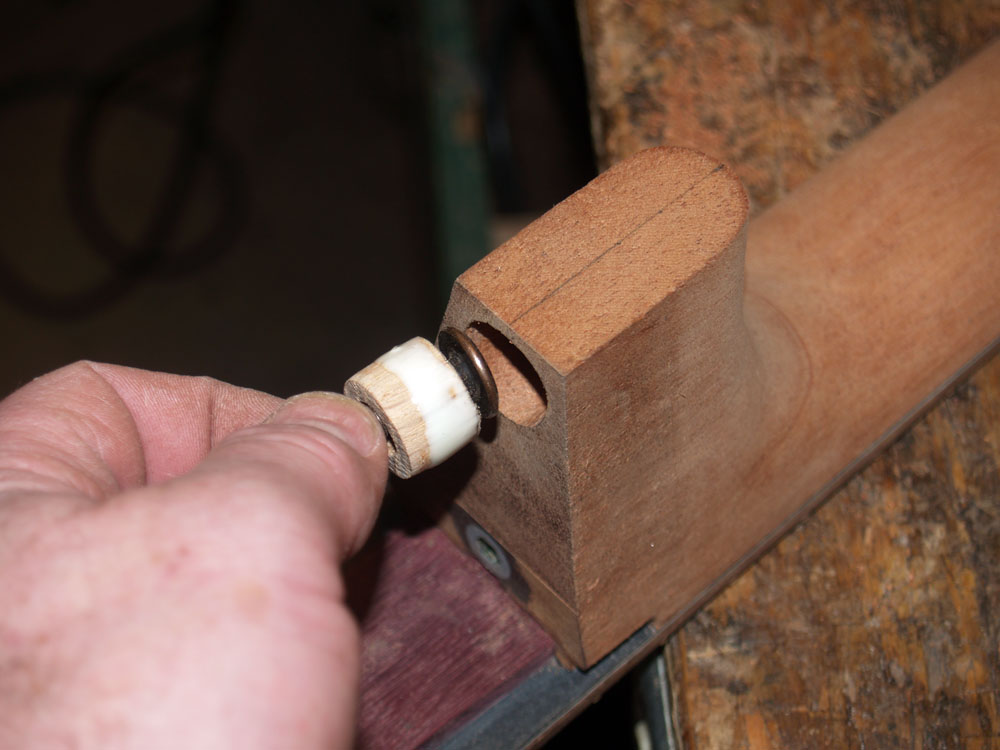
I use a hand drill to drill out the hole for the strap button / neck adjustment access hole.
 ( 235 ) 31-Jan-2012
I install a wood insert into the access hole so the strap button can be securely screwed into place.
 ( 236 ) 31-Jan-2012
The strap button bolt insert.
 ( 237 ) 31-Jan-2012
The neck adjustment bolt is held in place with an oak retaining flange.
 ( 238 ) 31-Jan-2012
A bit of glue goes on the flange.
 ( 239 ) 31-Jan-2012
And then a clamp is used to press the flange into place as the glue dries.
 ( 240 ) 31-Jan-2012
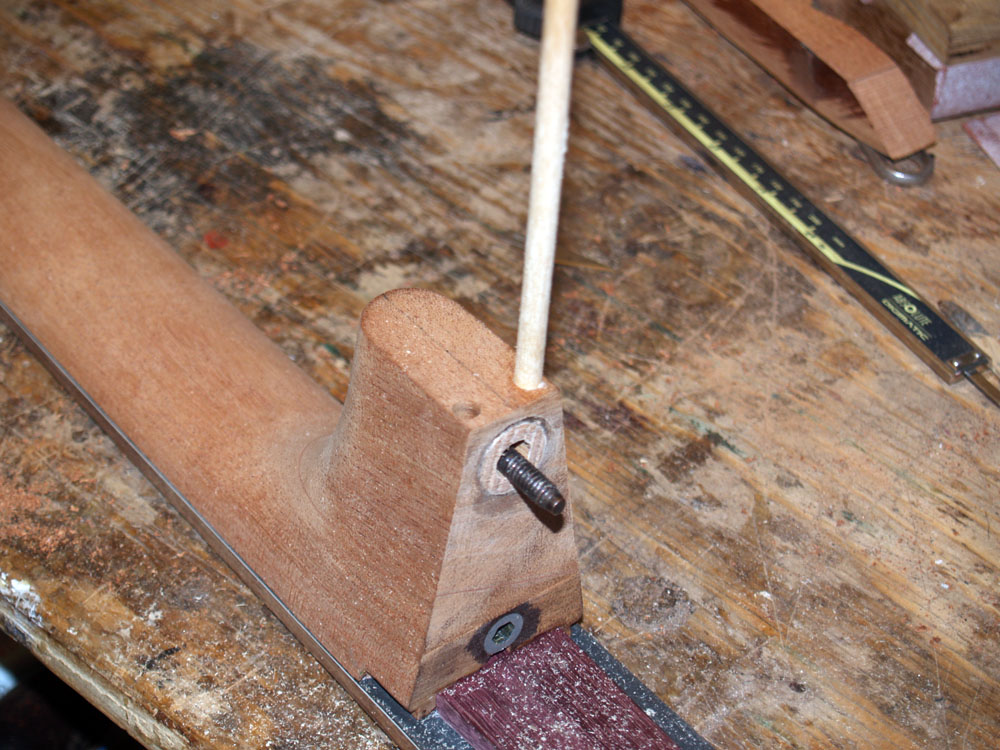
As a consequence of the string tension, the retaining flange holding the neck adjustment bolt in place has a significant amount of force applied to it. To help hold the flange in place and prevent it from creeping over time, I drive a couple of retaining posts through the flange and into the bulk of the heal. Here I am drilling the holes for the retaining posts.
 ( 241 ) 31-Jan-2012
A 1/4 inch dowel goes into each hole.
 ( 242 ) 31-Jan-2012
Here is a look at the ends of the retaining posts.
 ( 243 ) 31-Jan-2012
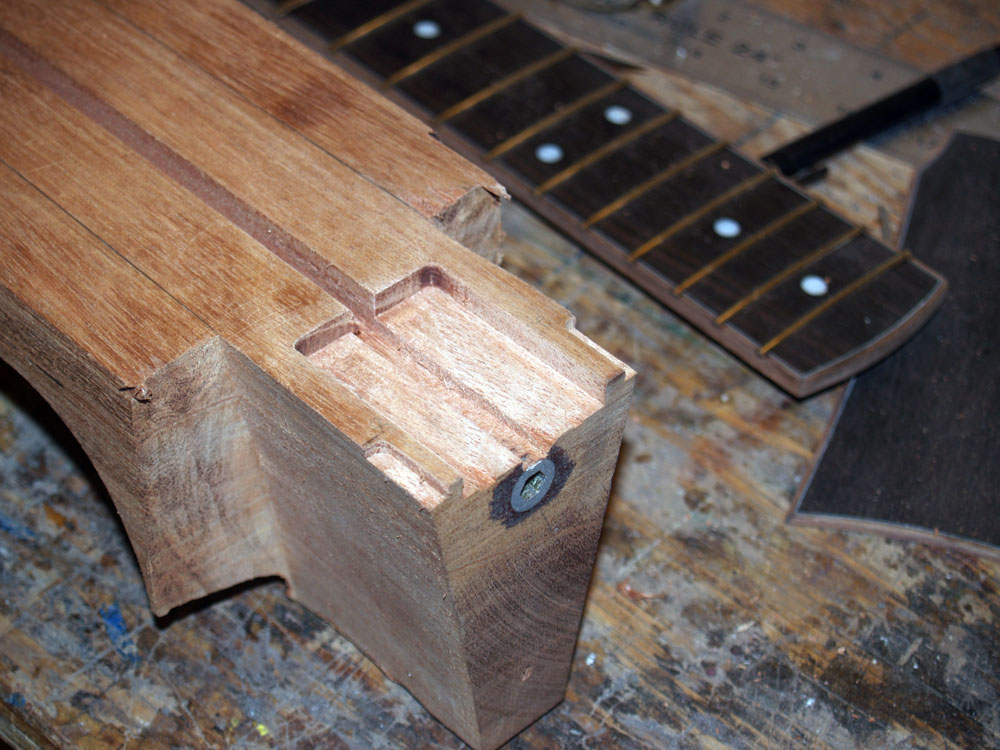
I install two brass plugs in the end of the heal where the set screws in the body of the guitar make contact with the neck. The User Adjustsble Tilt Action Neck attachment scheme provides three very well defined places where the neck and body make contact.
 ( 244 ) 31-Jan-2012
I use 1/4 inch brass bar stock for the plugs.
 ( 245 ) 31-Jan-2012
I sand the ends of the brass plugs flush with the end of the heal.
In this picture you can see all of the features of the neck attachment scheme. The cantilever section of the fretboard will float free above the body of the guitar. The support plate reinforces the cantilever section. The small wings that overhang the heal channel (Visible in picture 232) slide into the joint slots on the side of the heal and help hide the joint between neck and body. The wood insert, in the center between the brass plugs, bolts the neck to the body when the strings are removed. And the tilt action adjustment bolt is held in place by the oak flange.
 ( 246 ) 31-Jan-2012
And now I can attach the neck to the body. These sticks I have glued together is starting to look like a guitar, don't you think.
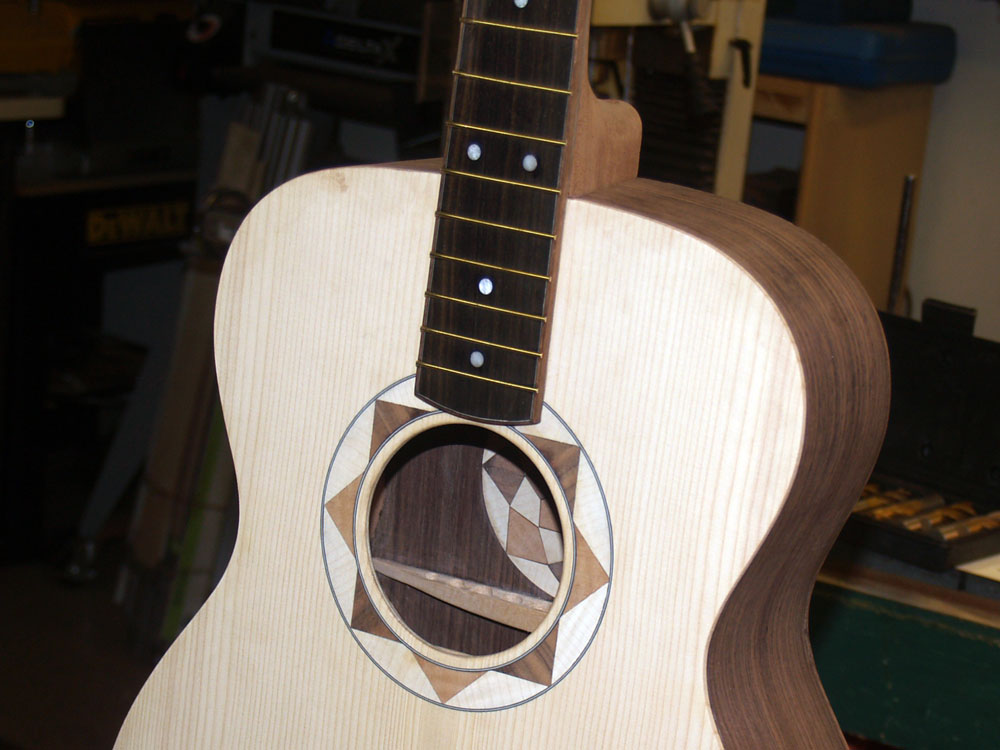 ( 247 ) 31-Jan-2012
The neck body interface.
 ( 248 ) 31-Jan-2012
The neck.
 ( 249 ) 31-Jan-2012
The head stock.