 ( 222 ) 17-Aug-2012
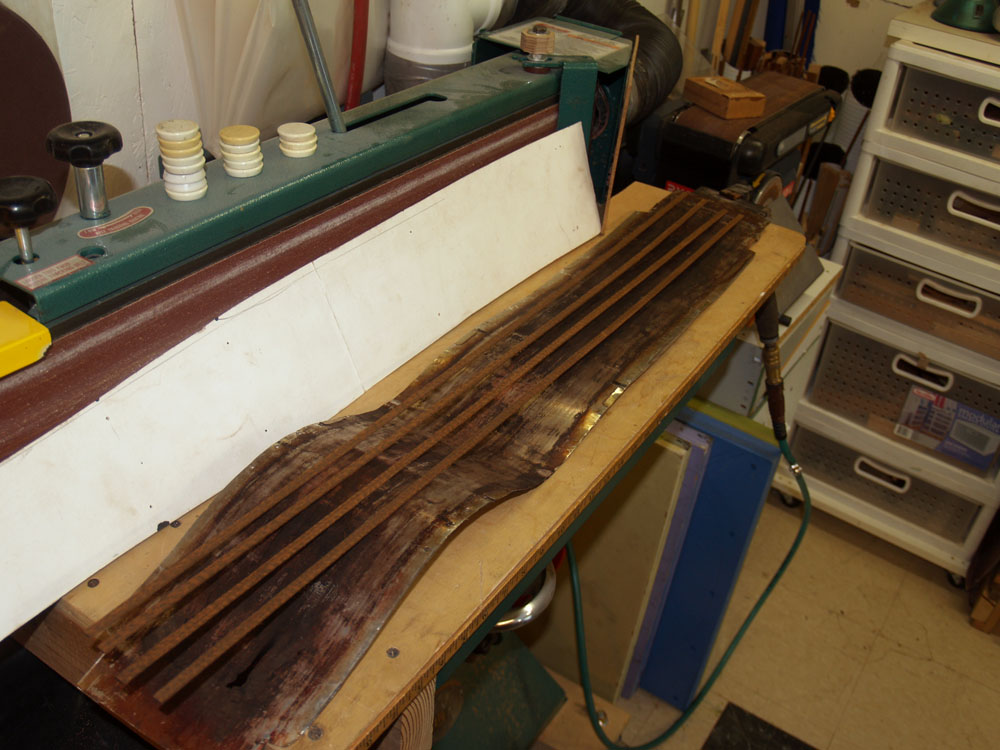
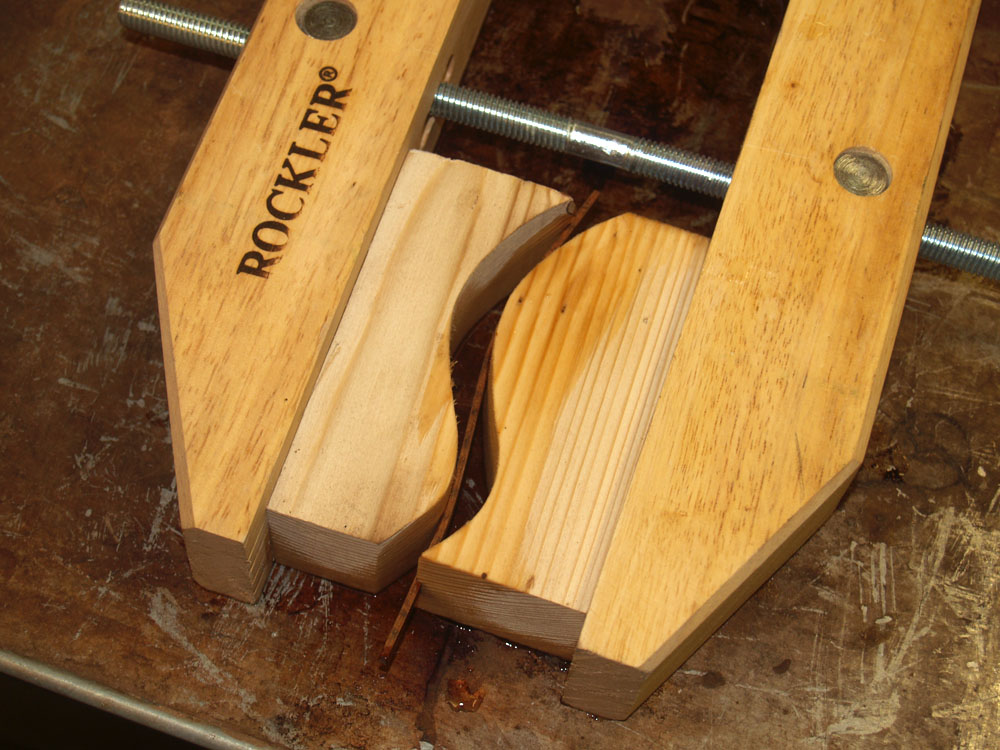
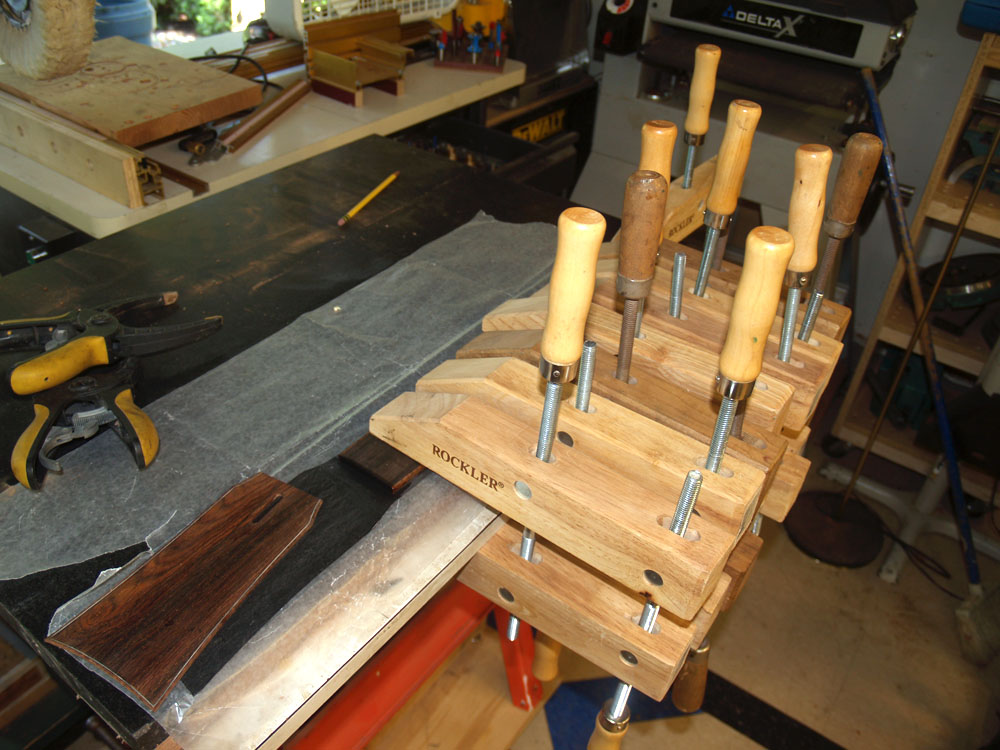
We are going to use Snakewood binding; in this picture I am preparing the heating blanket that will make the wood strips pliable.
( 222 ) 17-Aug-2012
We are going to use Snakewood binding; in this picture I am preparing the heating blanket that will make the wood strips pliable.
 ( 223 ) 17-Aug-2012
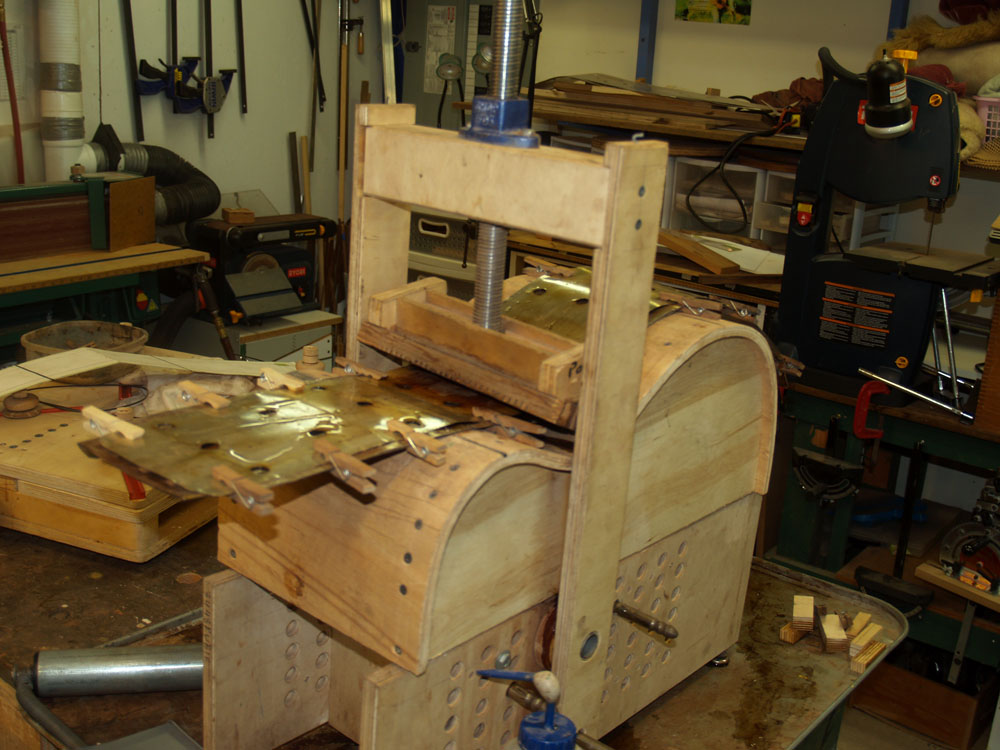
After heating up the binding strips I use the bending machine to shape them. I'll put these aside until I am reading to install the binding.
 ( 224 ) 17-Aug-2012
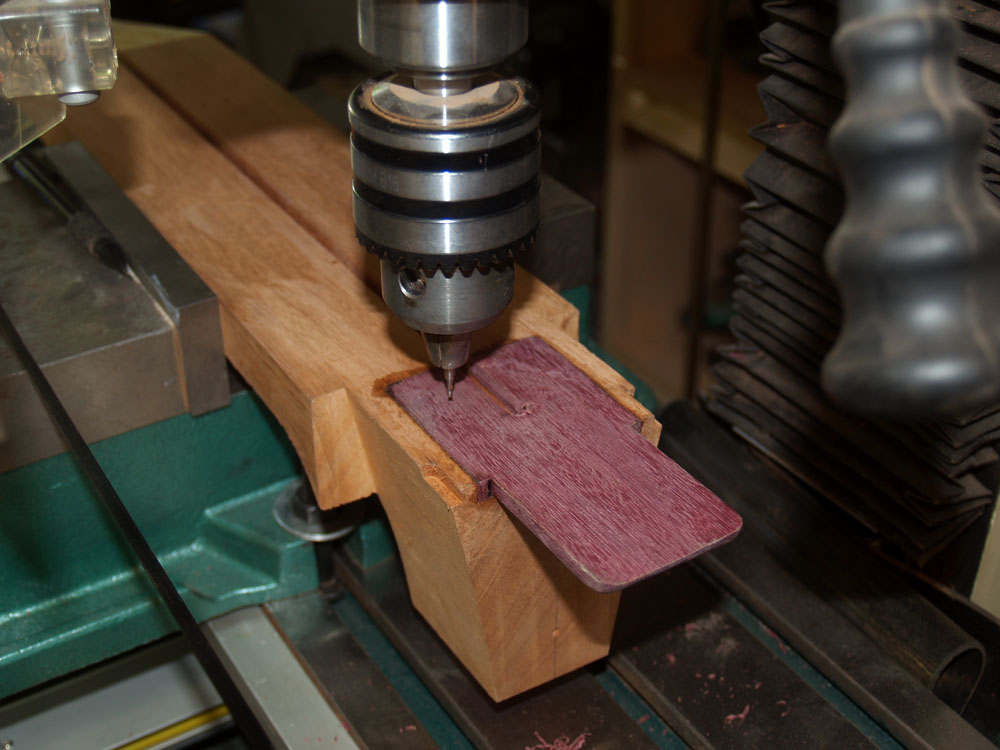
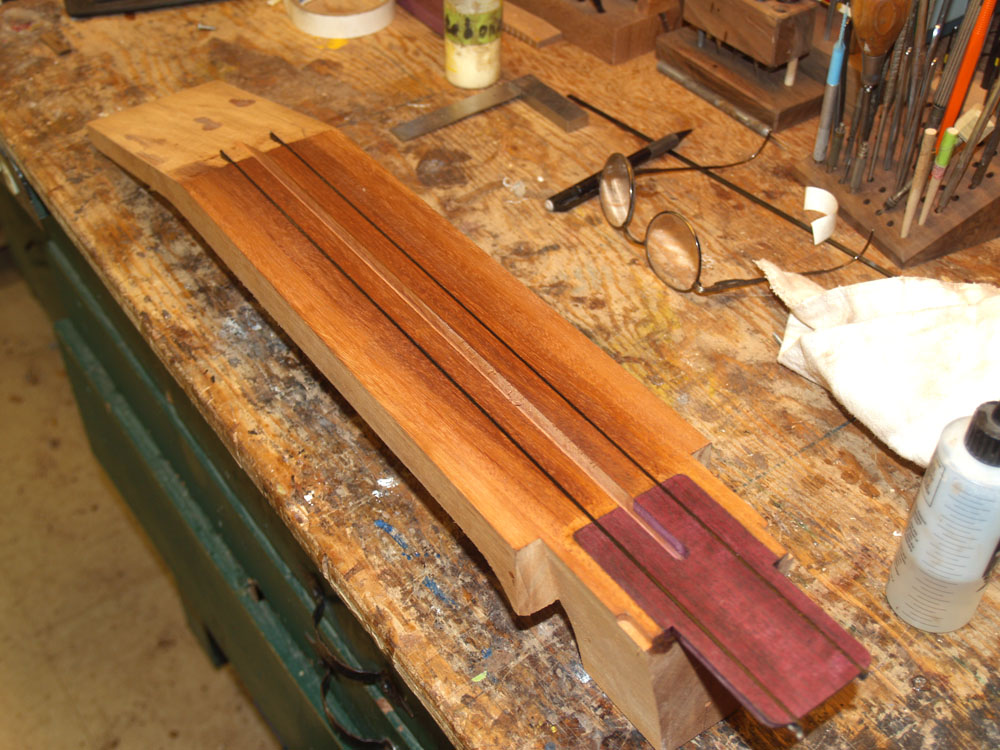
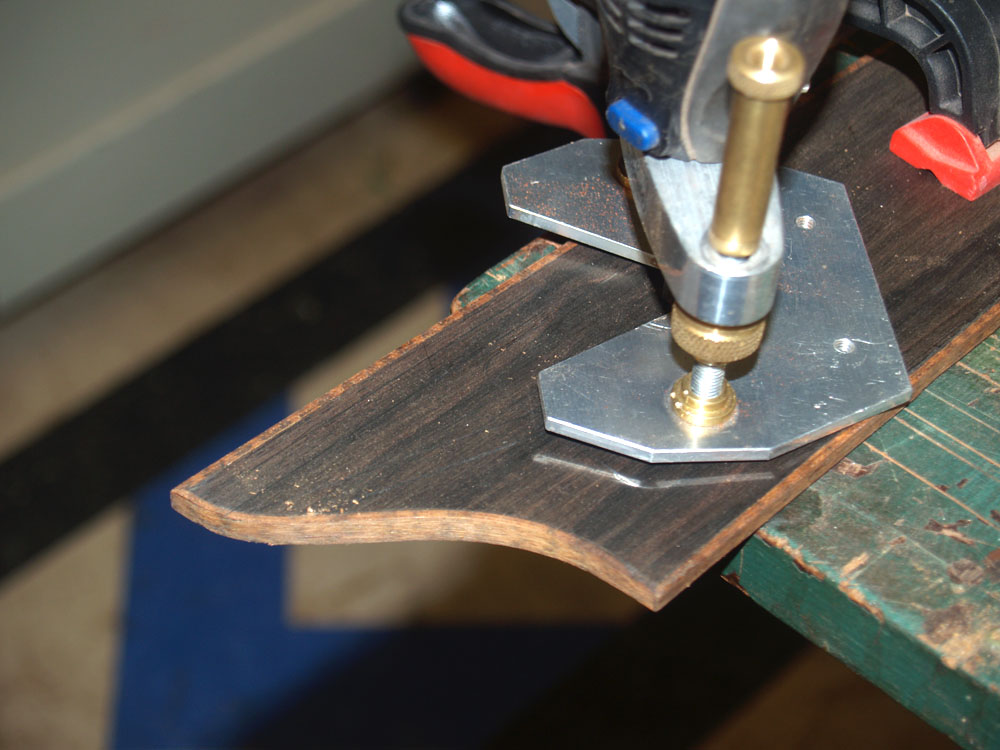
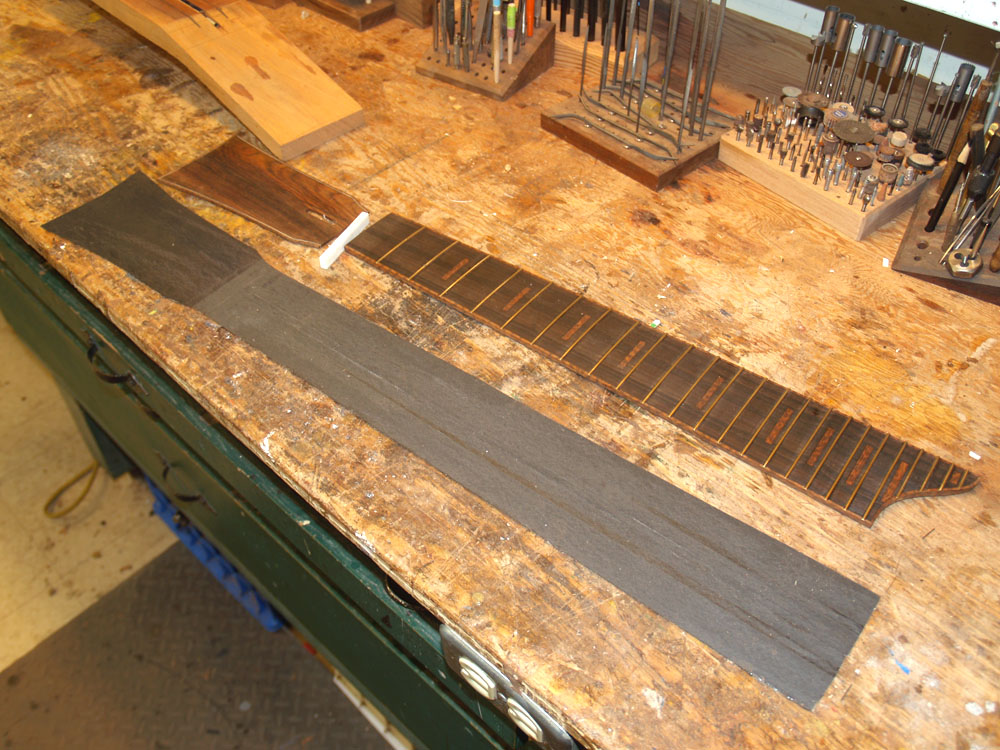
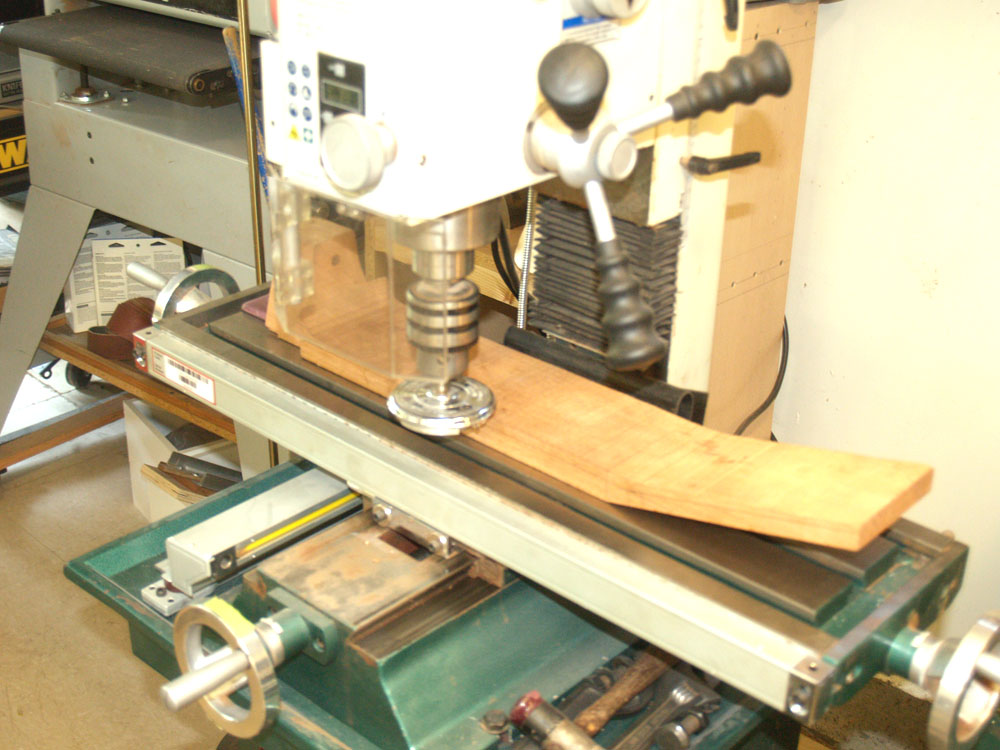
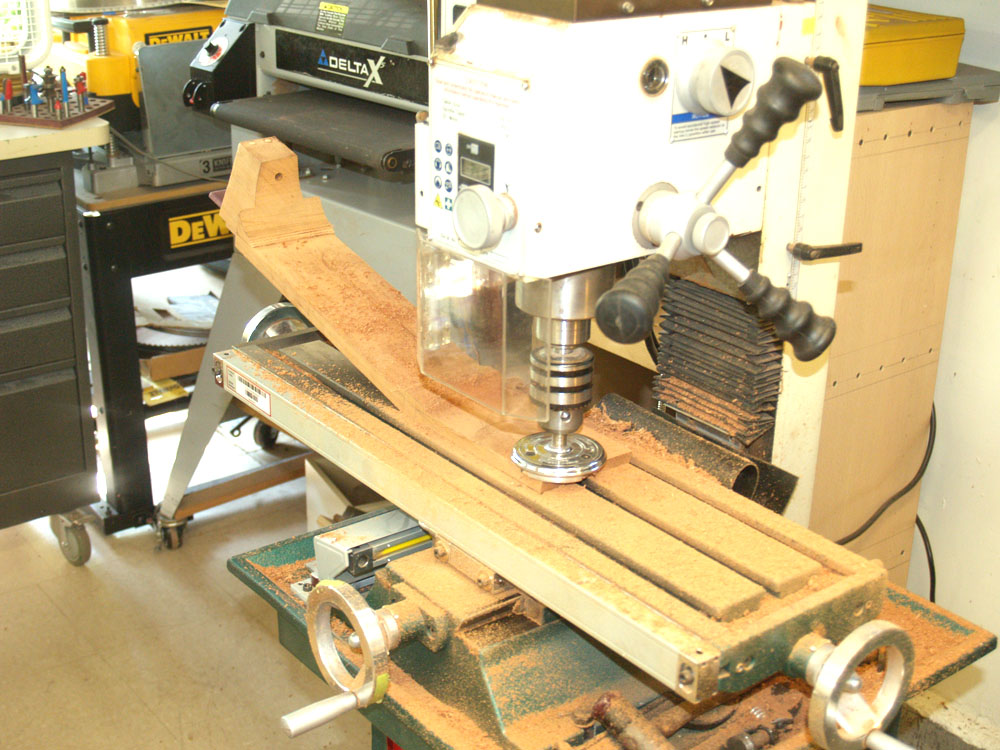
The 24 fret extended fingerboard needs to be supported with a cantilever support plate. I this case I have used a piece of Purpleheart for this purpose because it is hard and stiff and I just happen to have a piece the right size. In this picture I am getting ready to route out two slots for a couple of carbon fiber reinforcing strips.
 ( 225 ) 17-Aug-2012
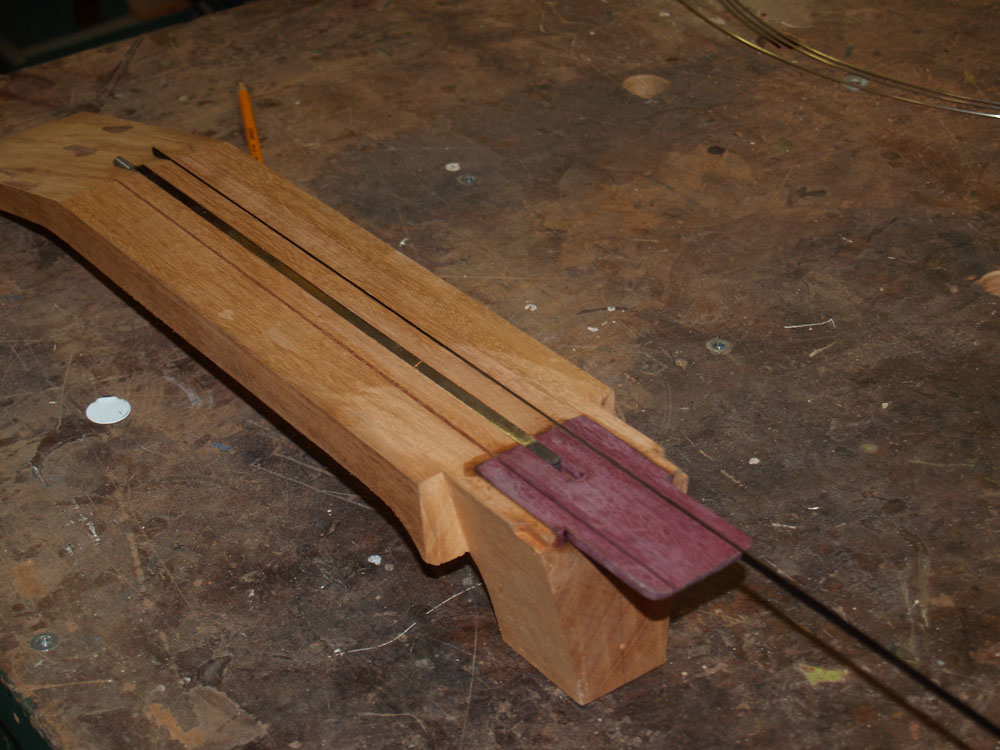
The reinforcing strips extend from the headstock through the cantilever support plate.
 ( 226 ) 17-Aug-2012
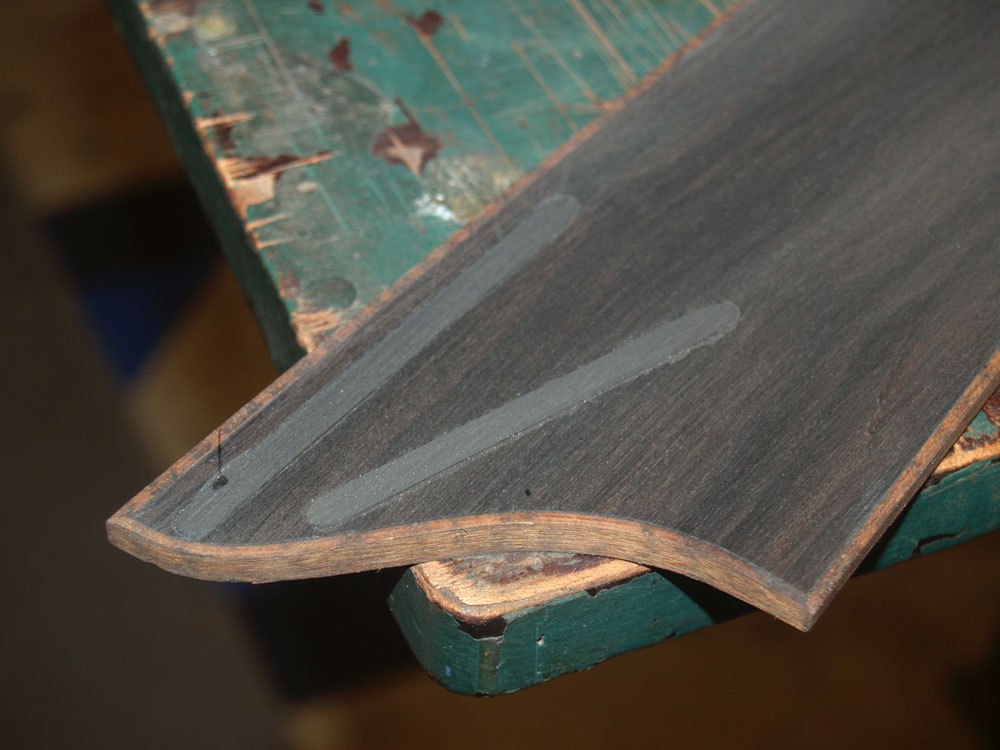
Here you can see the reinforcing strips installed.
 ( 227 ) 17-Aug-2012
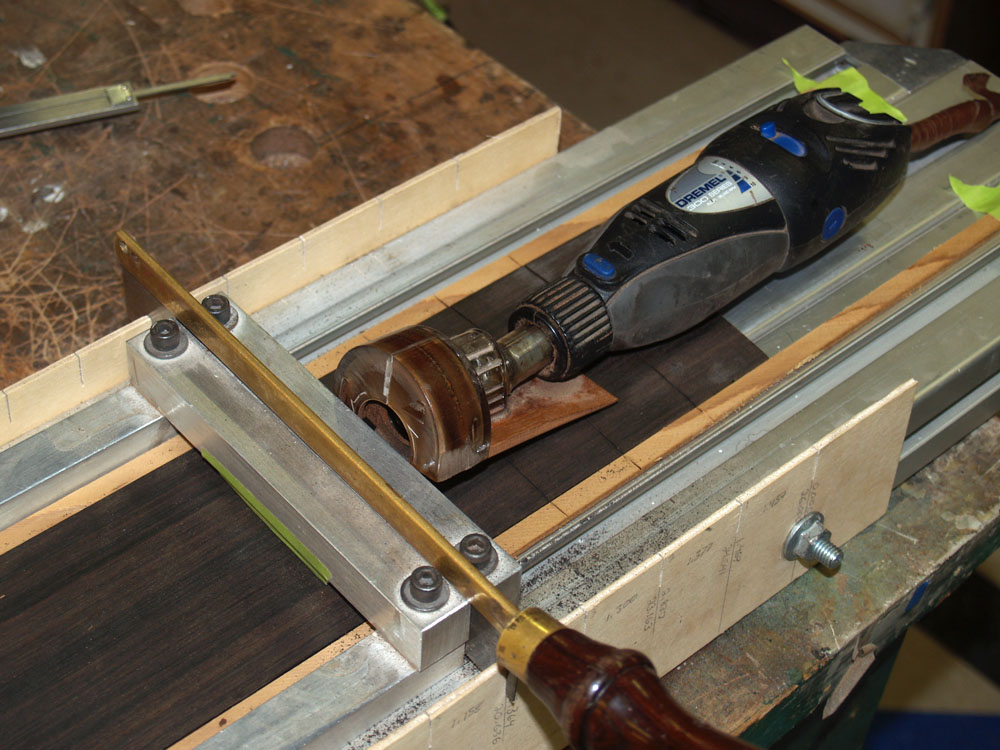
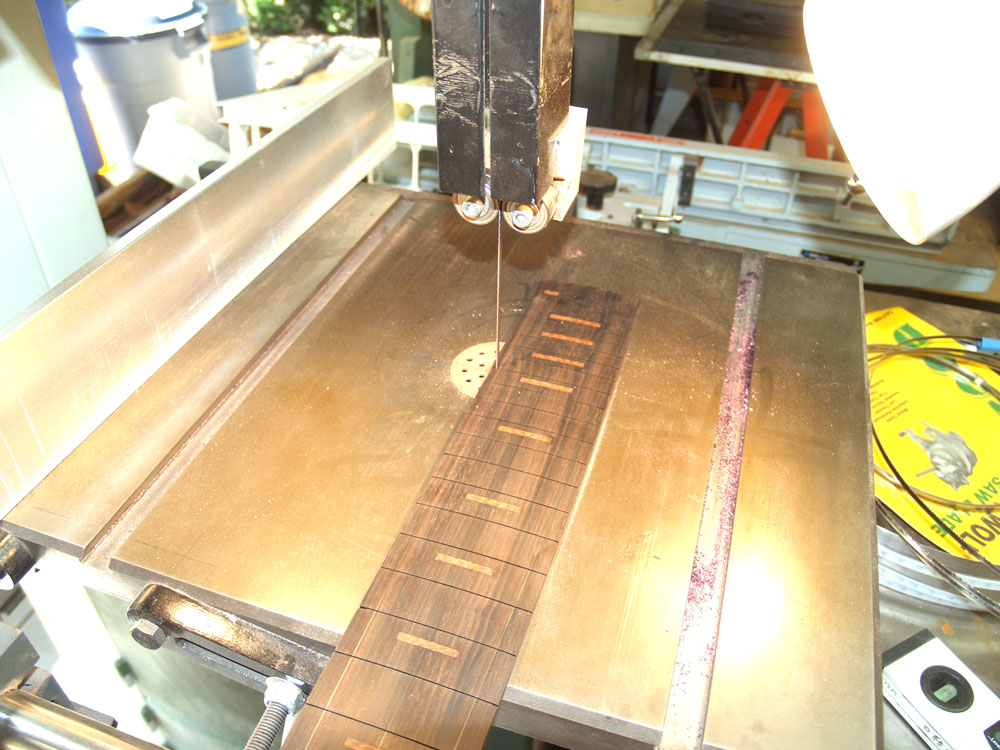
Now I am ready to cut the fret slots. I use this sled and template machine to position and guide the Dremel tool.
 ( 228 ) 17-Aug-2012
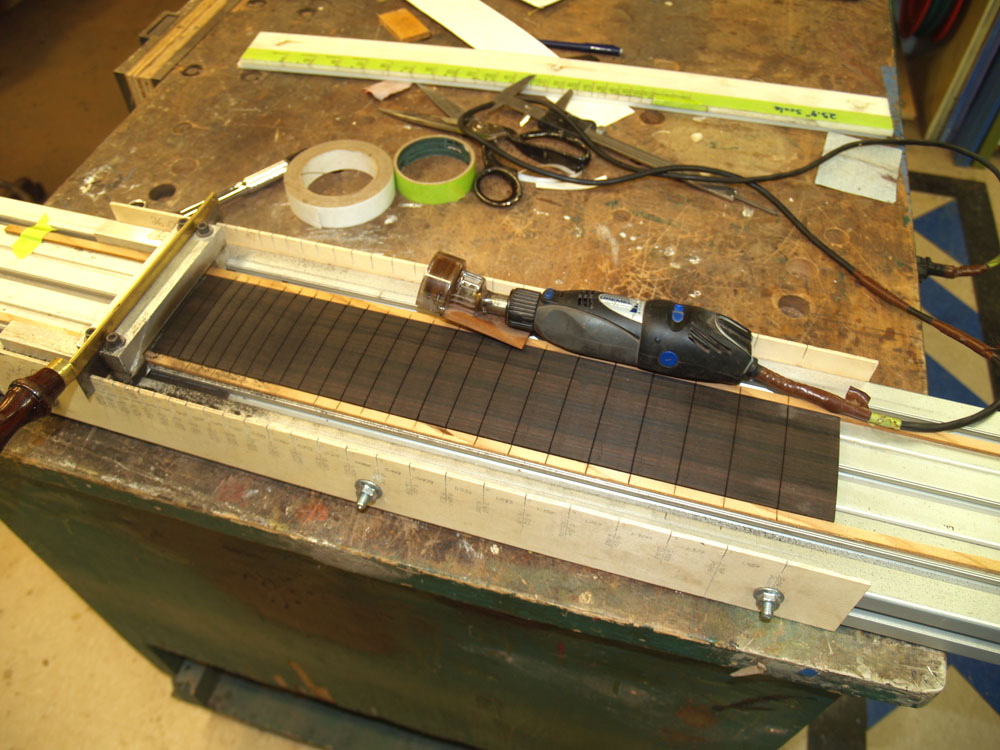
Here you can see the fret slots cut into the fretboard blank.
 ( 229 ) 17-Aug-2012
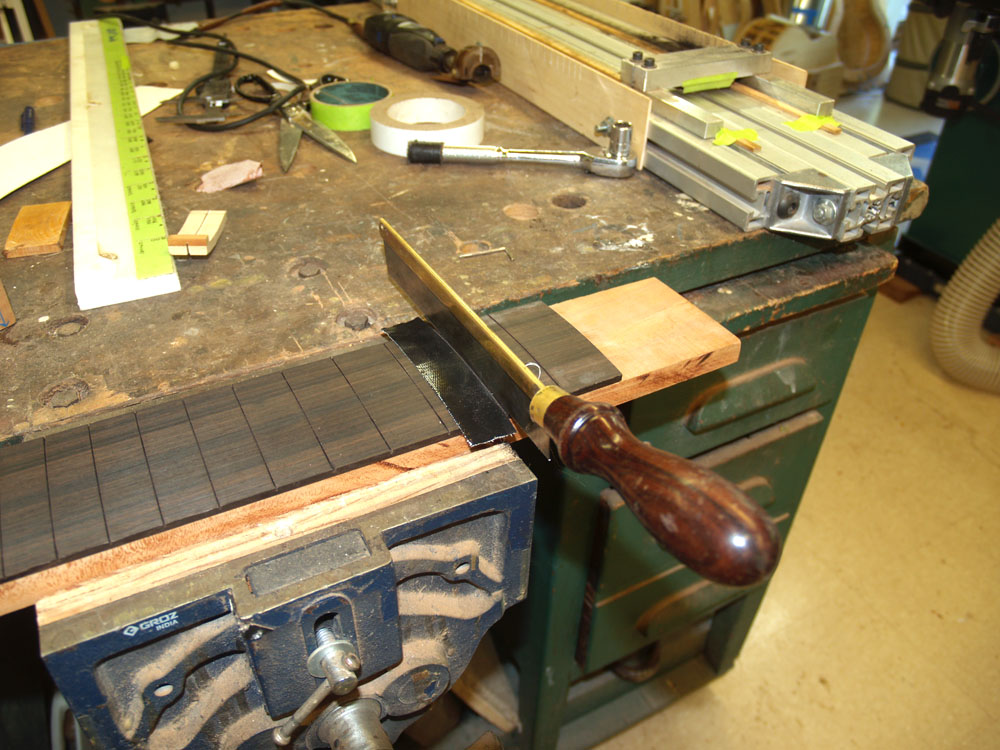
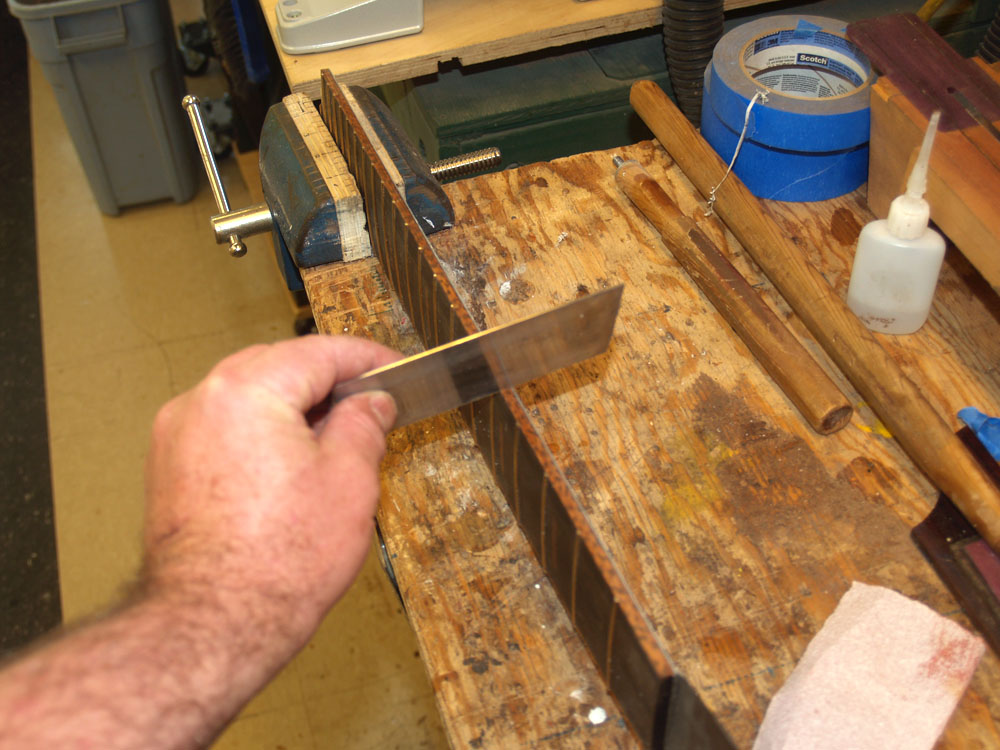
I use my hand saw to fine tune the slots' width and depth.
 ( 230 ) 17-Aug-2012
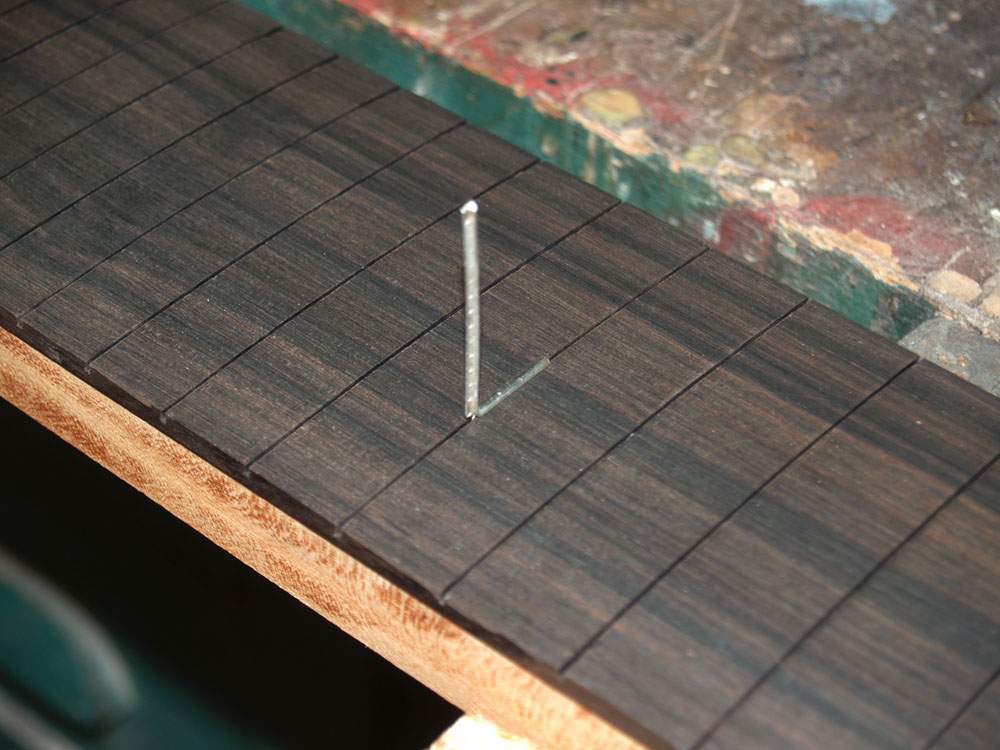
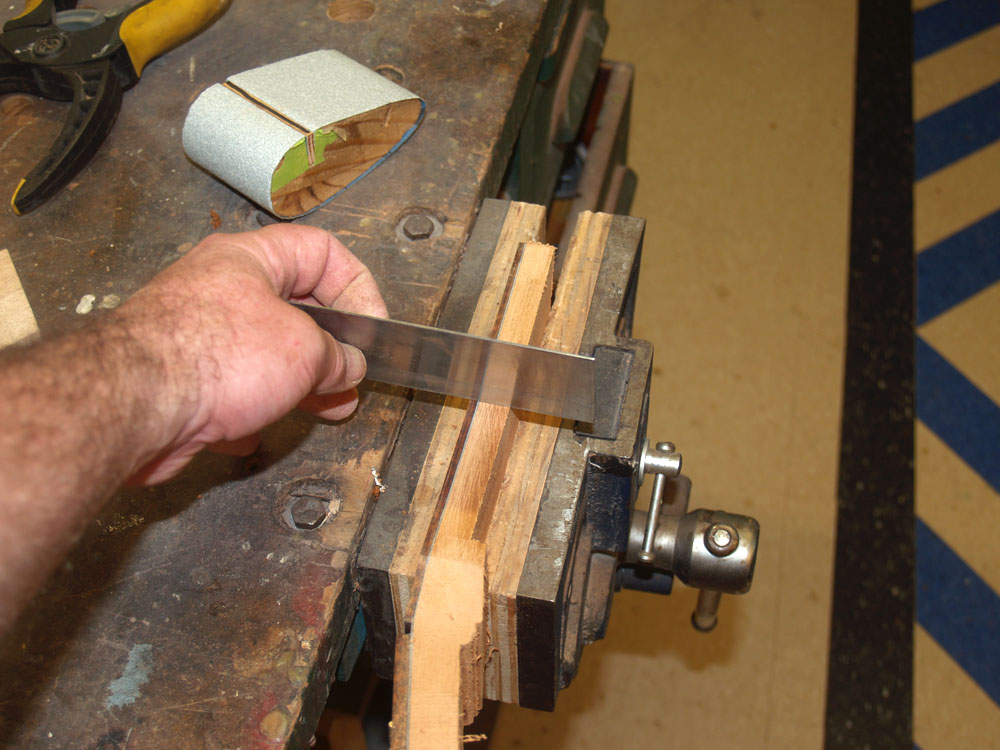
I check each slot with a fretwire tool to make sure that the fretwire will fully seat into the slot. When I press this tool into the slot if it wiggles back and forth I know the slot isn't deep enough.
 ( 231 ) 17-Aug-2012
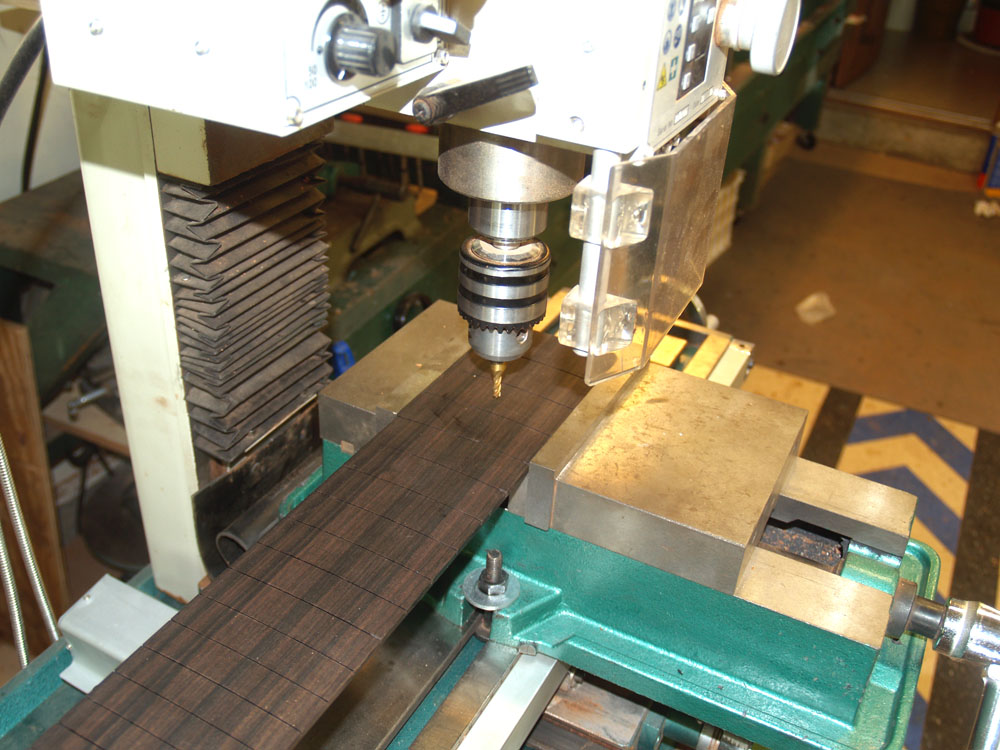
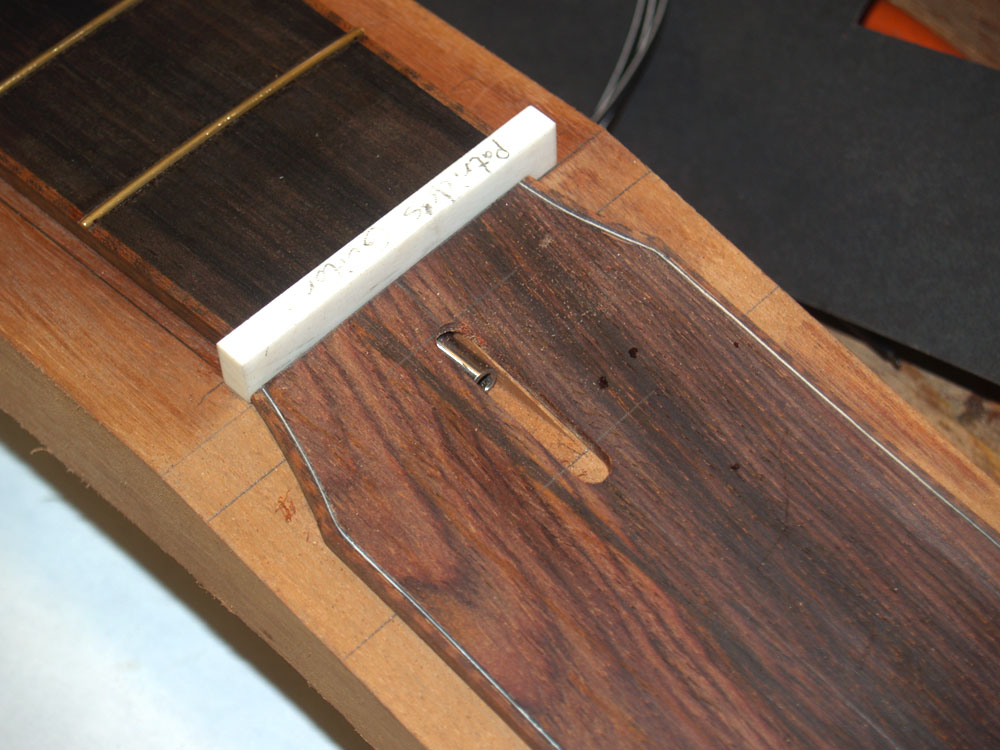
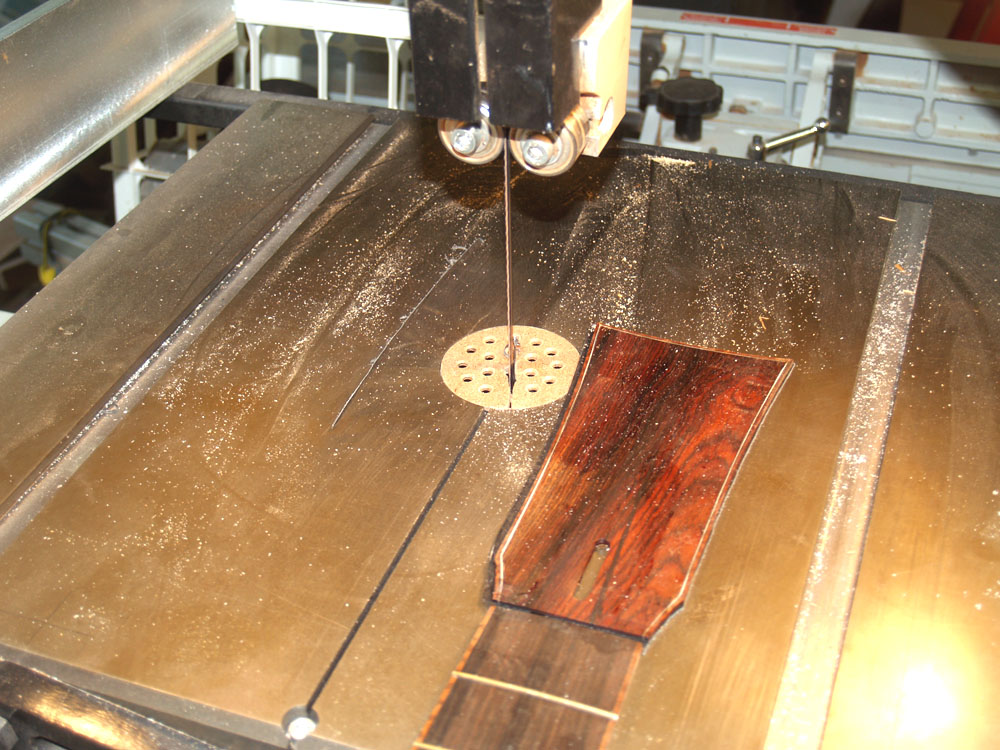
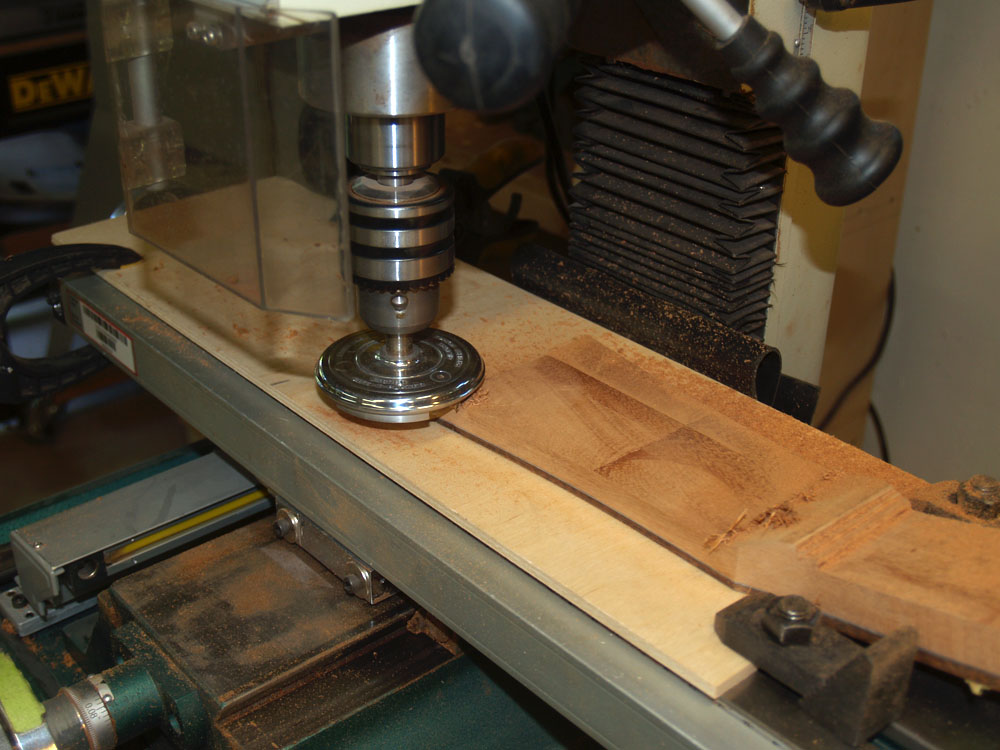
Patrick has asked me to inlay Snakewood position markers. In this picture I am routing out the channels for the markers.
 ( 232 ) 17-Aug-2012
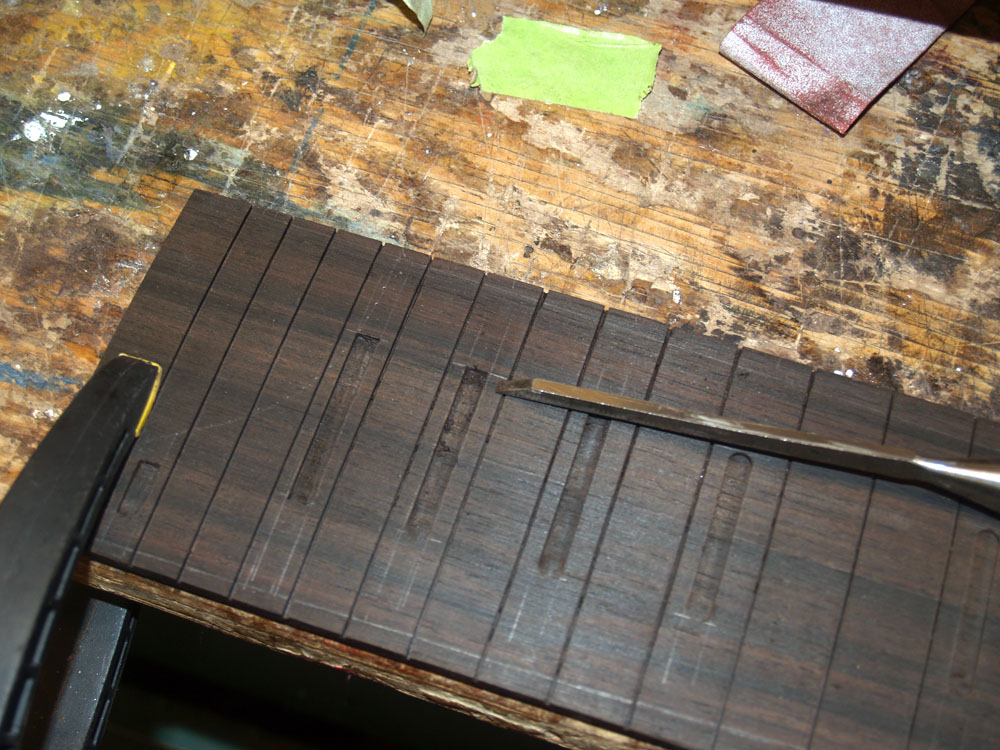
I use a hand chisel to square up the ends of the channels.
 ( 233 ) 17-Aug-2012
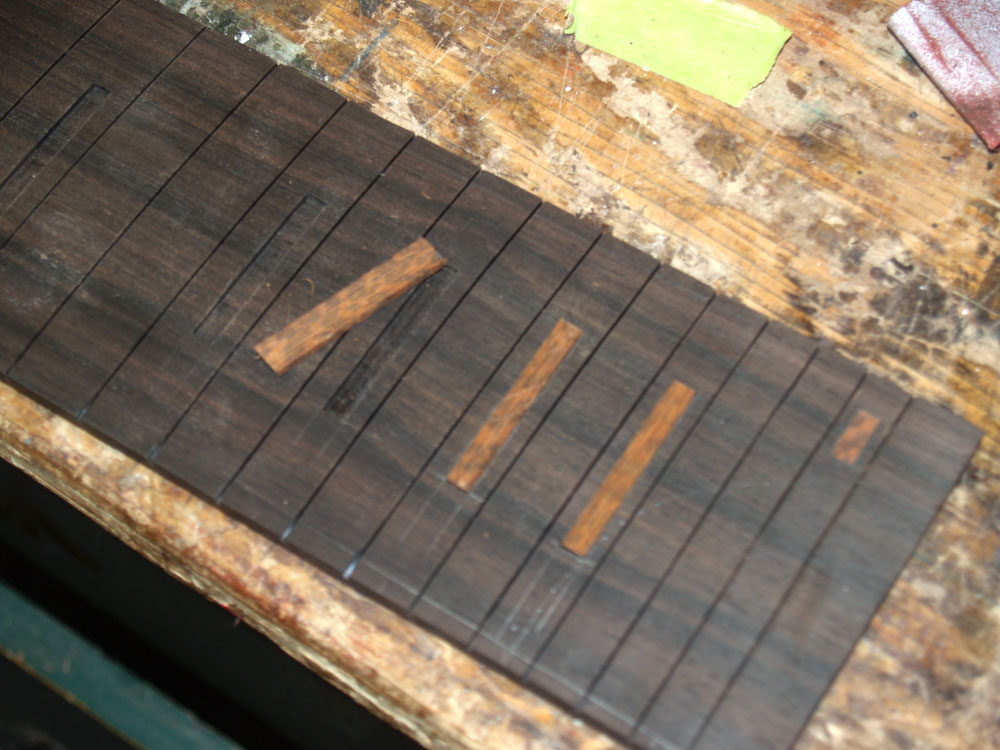
And then I trim the Snakewood pieces to fit the slots. Any gaps - I hate gaps - will be filled in with CA and ebony dust.
 ( 234 ) 17-Aug-2012
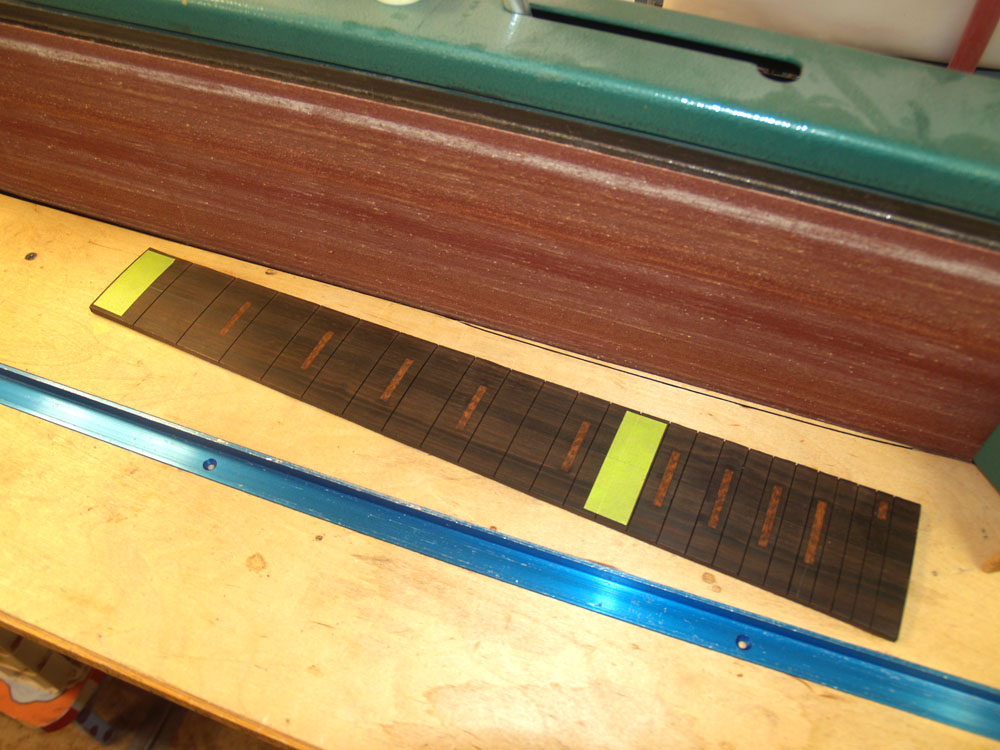
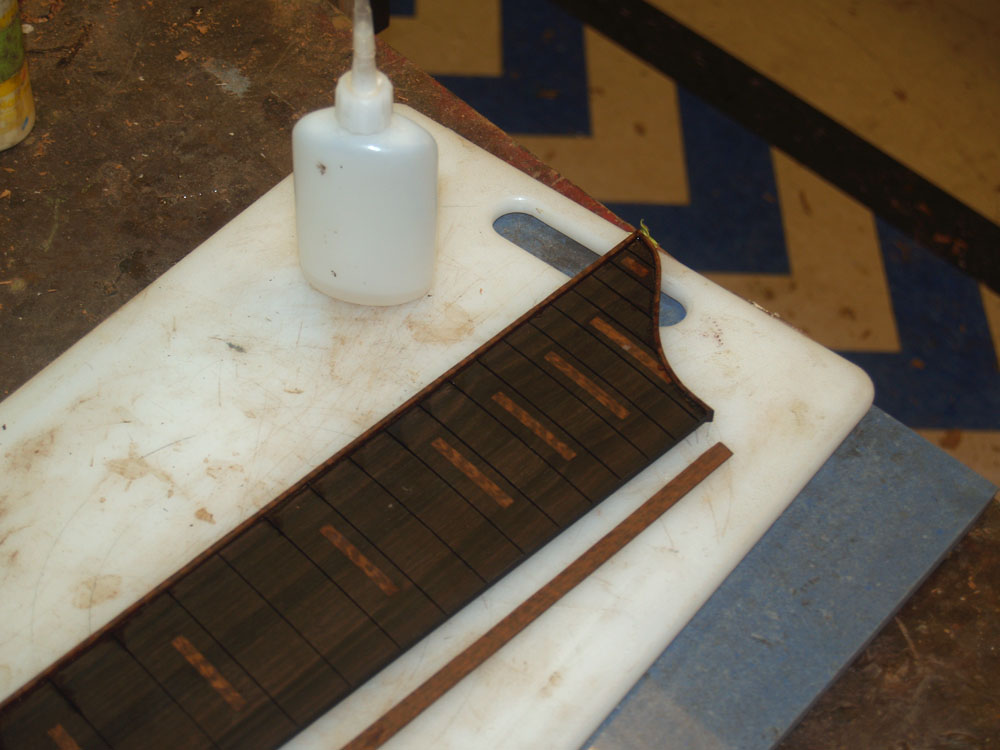
After sanding the markers flush I trim excess from the fretboard.
 ( 235 ) 17-Aug-2012
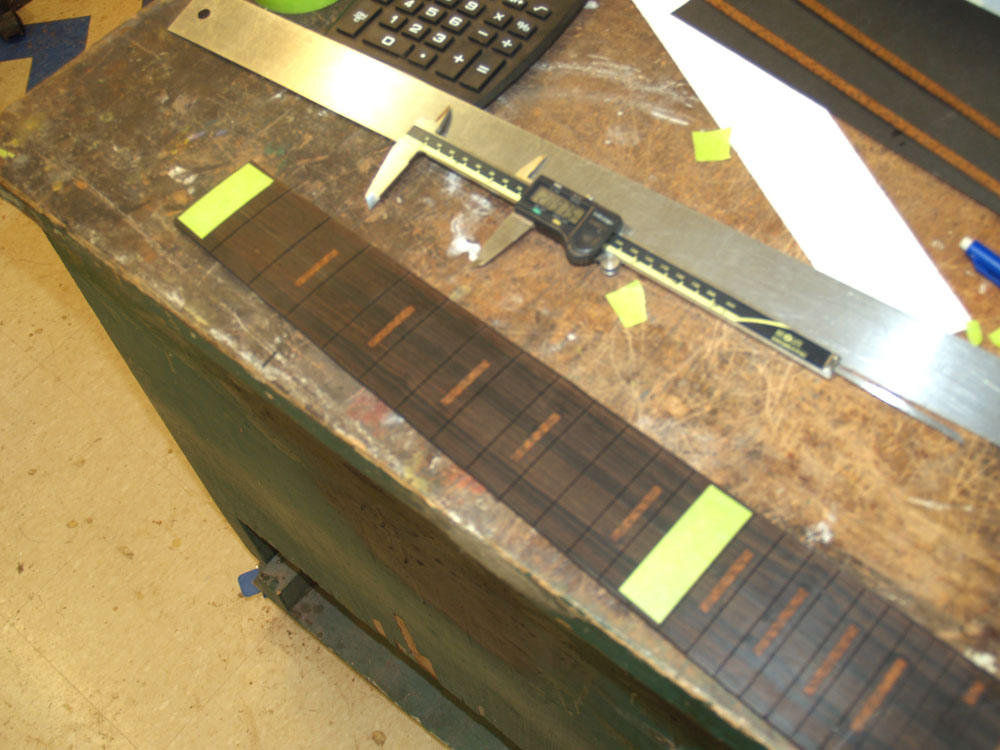
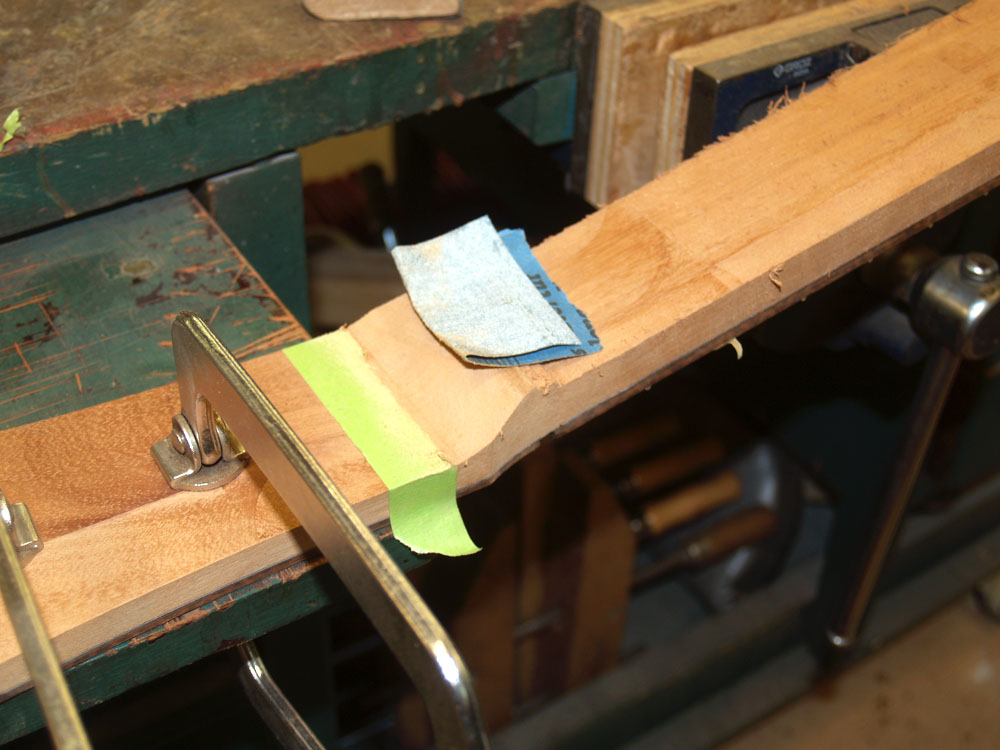
I am using masking tape to mark the final dimensions of the fretboard blank to accommodate for the width of the binding.
 ( 236 ) 17-Aug-2012
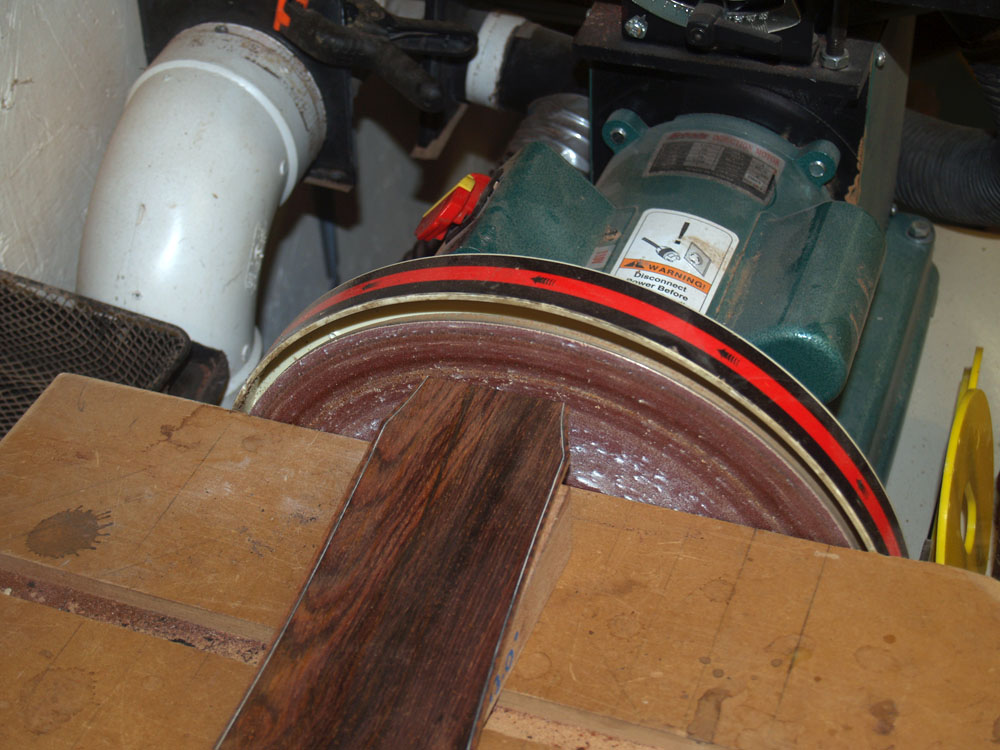
The belt sander lets me trim the fretboard to its final dimension.
 ( 237 ) 17-Aug-2012
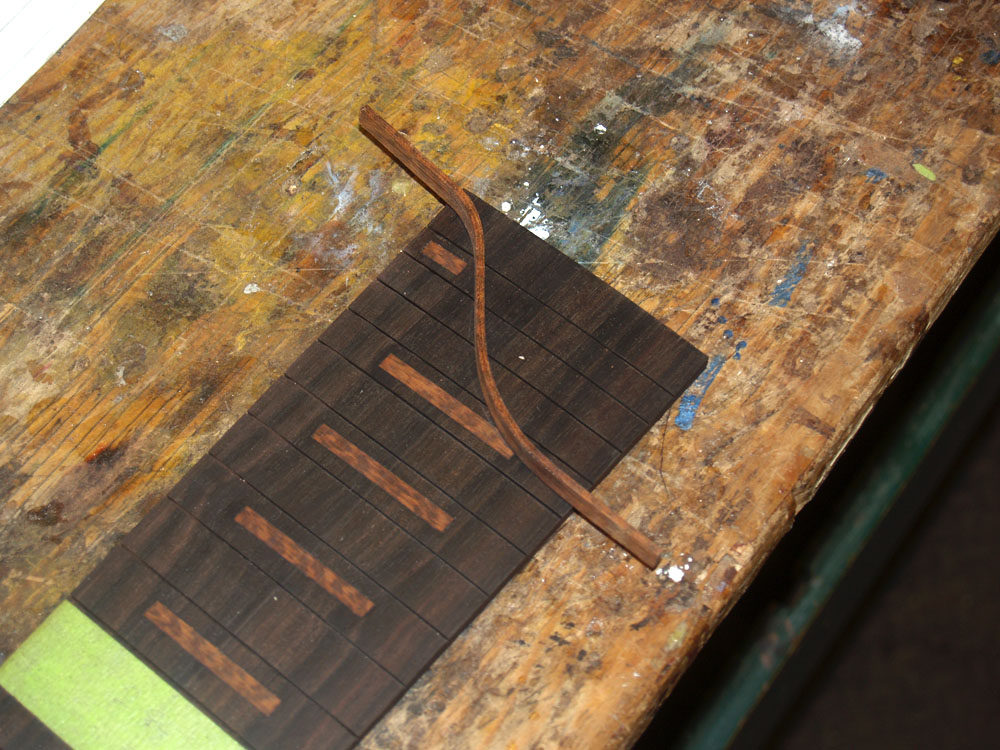
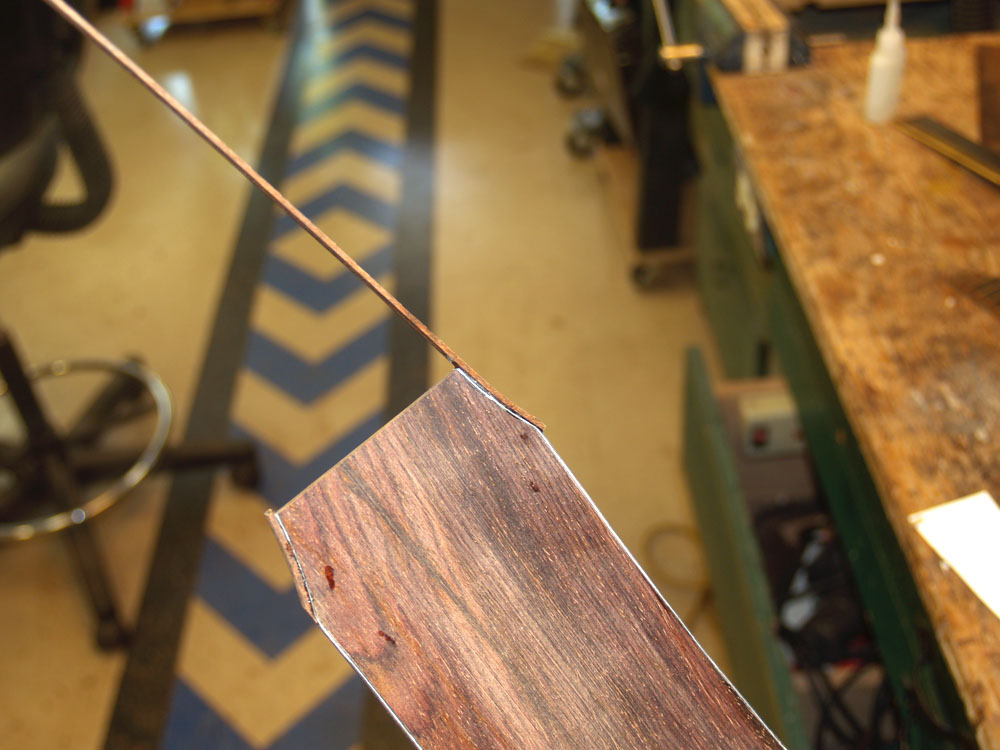
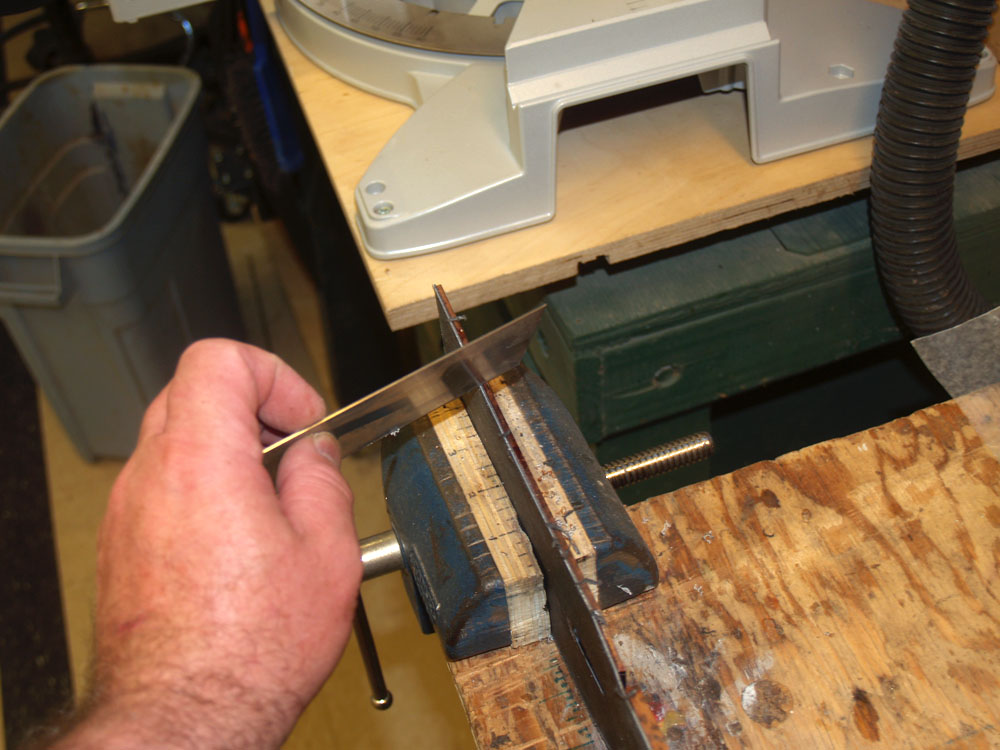
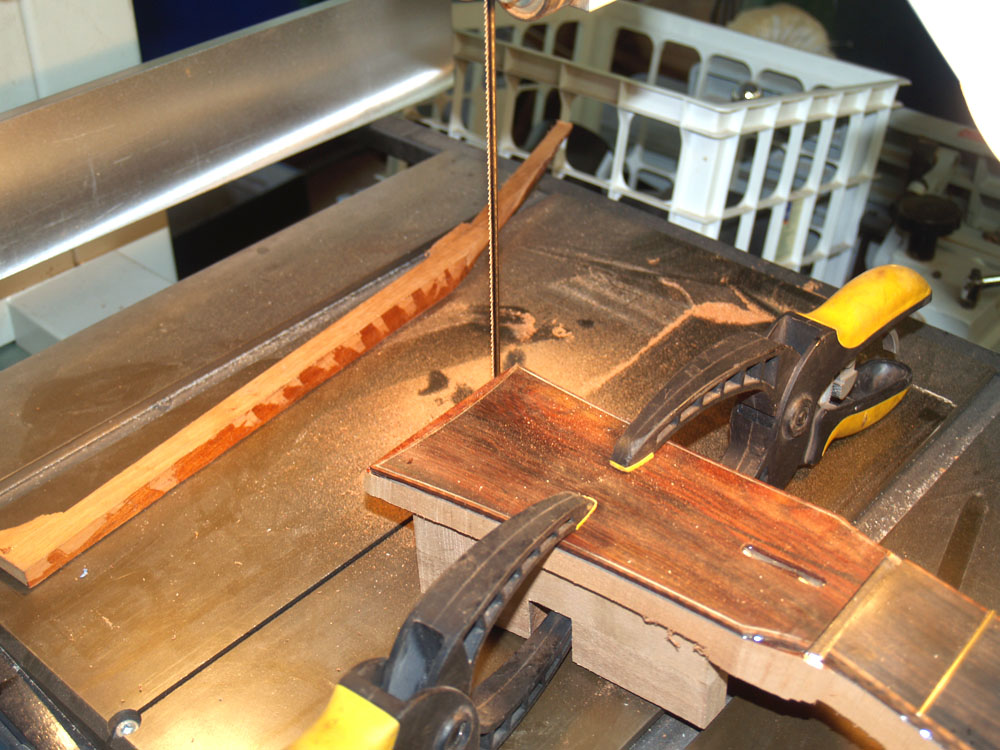
The extend fretboard has a serpentine termination. Here I am bending the Snakewood binding to shape.
 ( 238 ) 17-Aug-2012
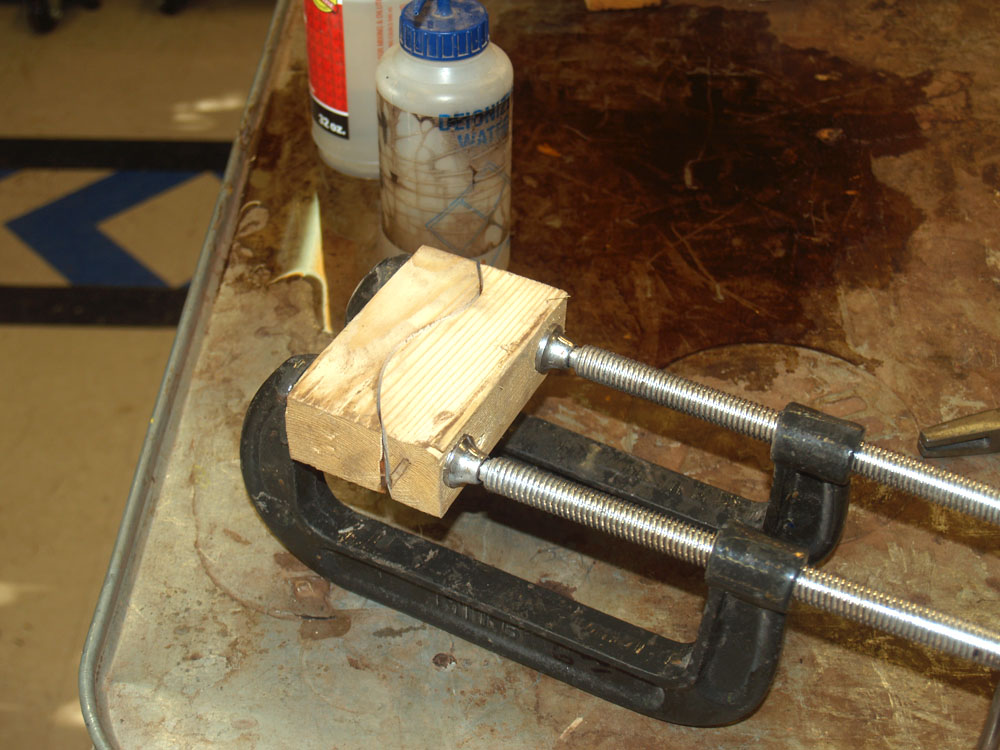
After I have the binding bent I place this assembly in the oven to fix its shape.
 ( 239 ) 17-Aug-2012
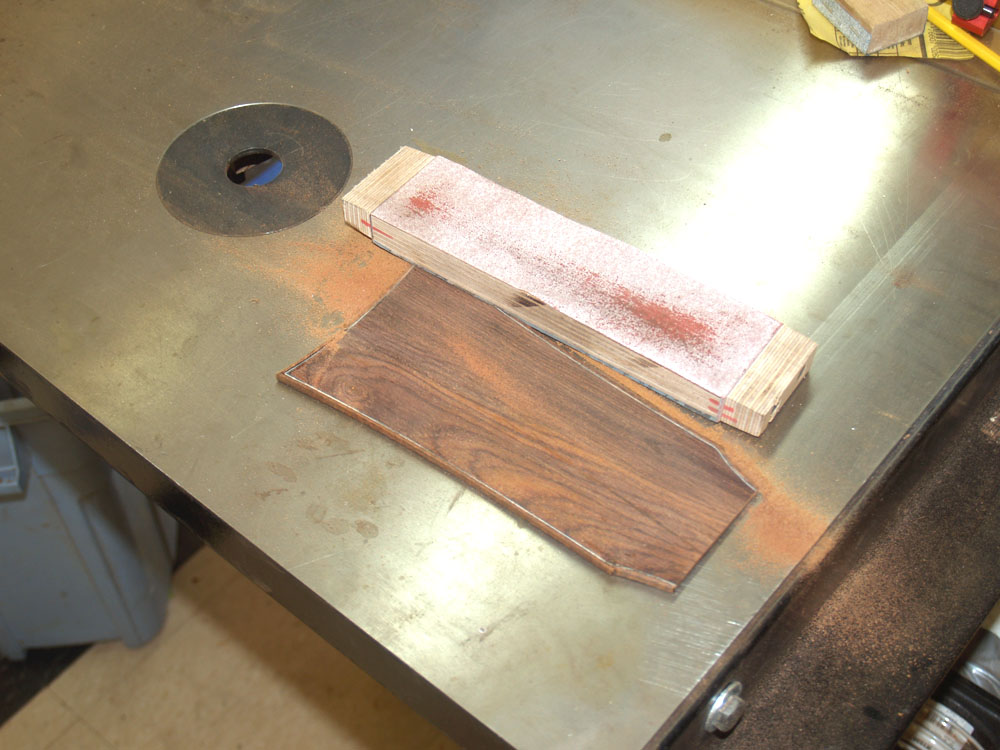
Here is the terminal piece of binding.
 ( 240 ) 17-Aug-2012
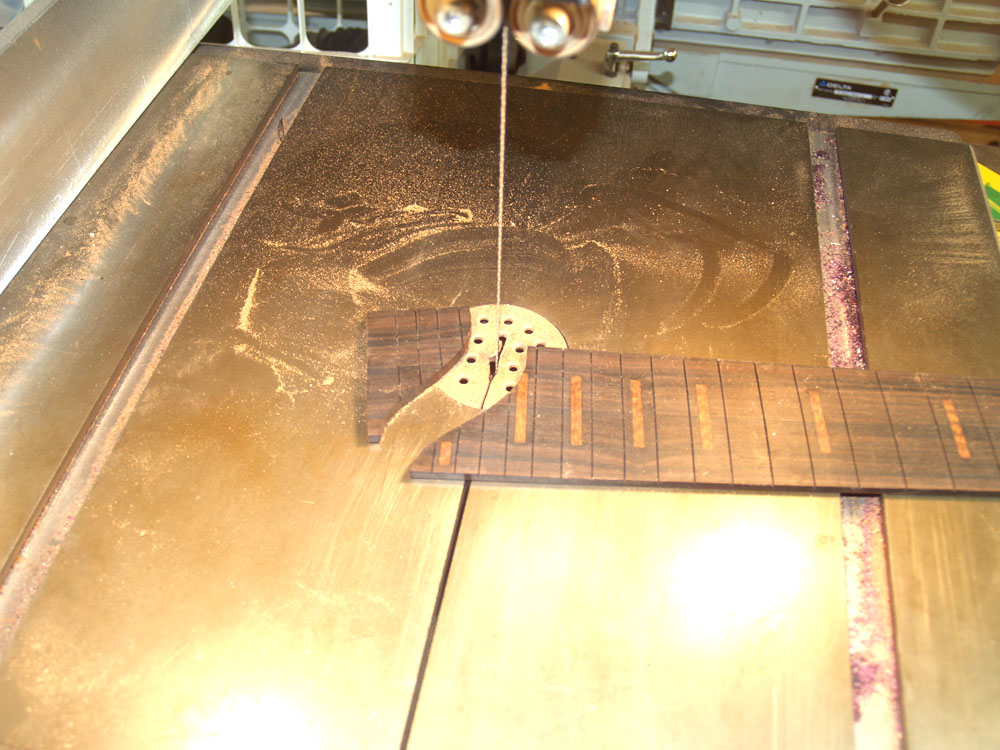
I trim the fretboard blank to its final shape.
 ( 241 ) 17-Aug-2012
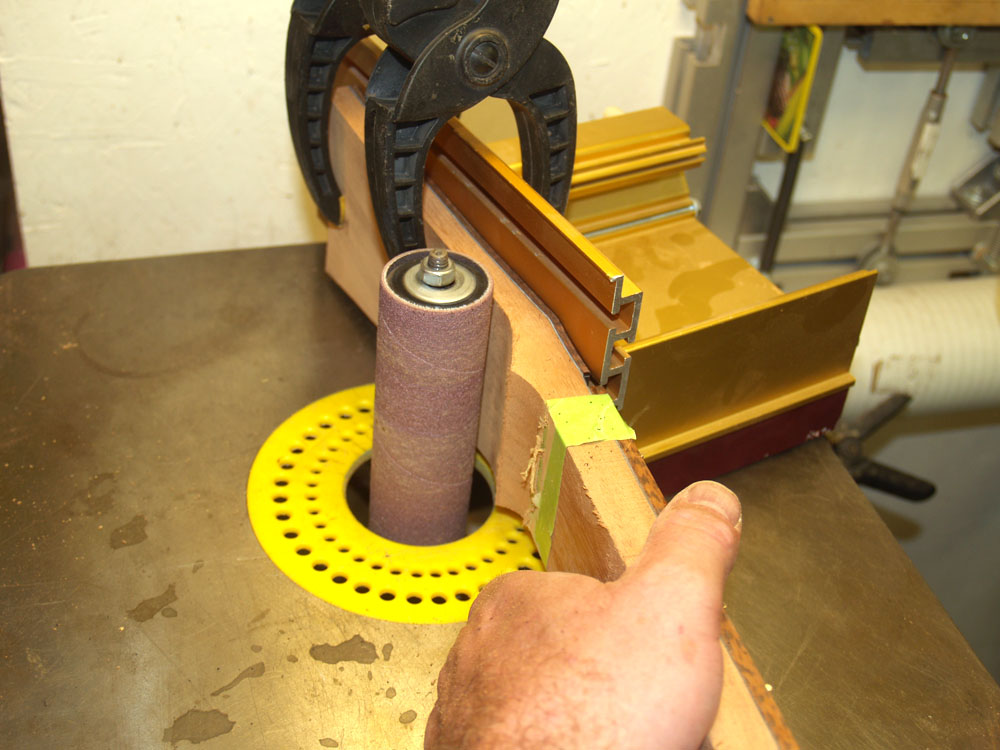
And touch it up with the oscillating sander.
 ( 242 ) 17-Aug-2012
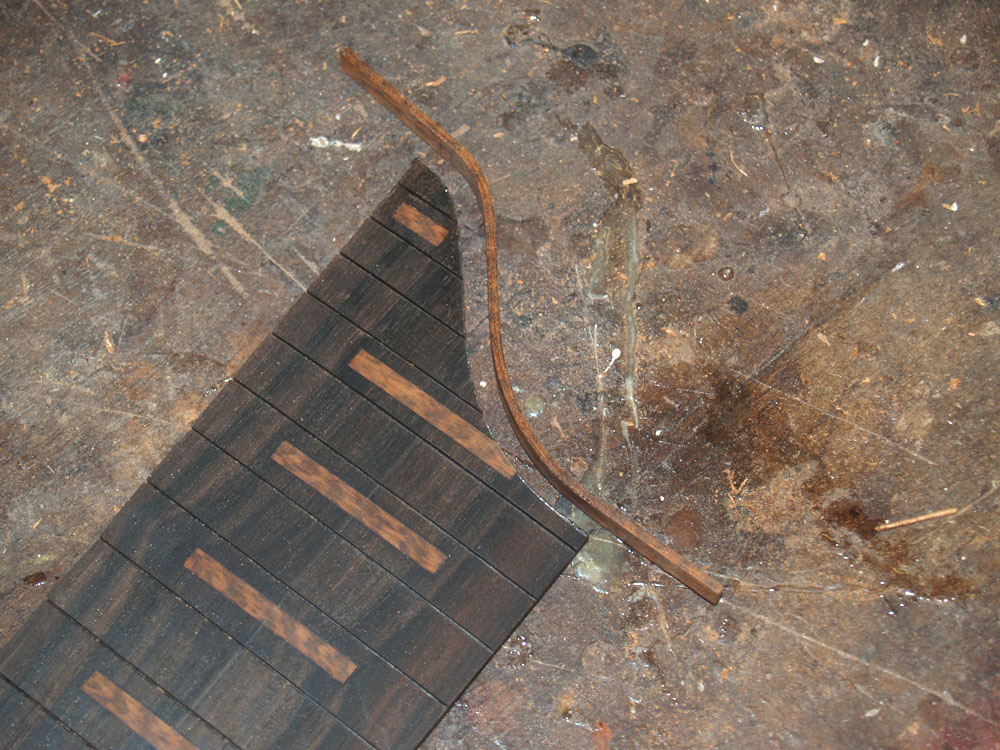
The terminal binding and the fretboard.
 ( 243 ) 17-Aug-2012
I use CA glue to attach the binding to the fretboard.
 ( 244 ) 17-Aug-2012
To further reinforce the extended fretboard I am going to install a couple of carbon fiber reinforcing strips.
 ( 245 ) 17-Aug-2012
The strips will help to prevent the extended portion of the fretboard from flexing.
 ( 246 ) 17-Aug-2012
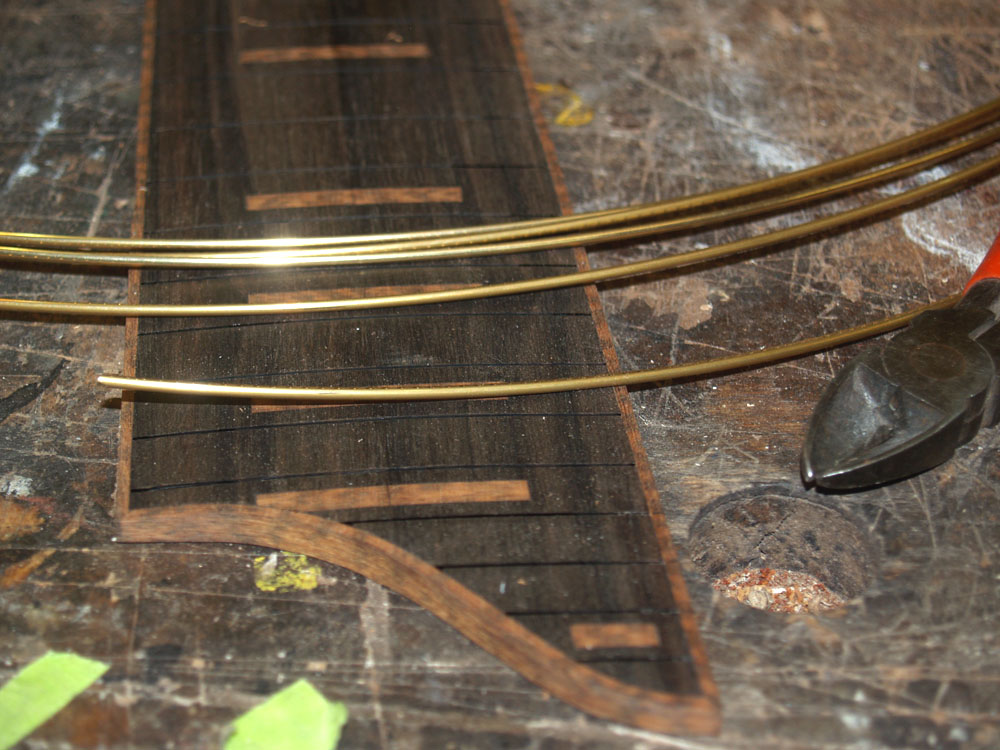
Now I am getting ready to install the gold "Evo" fretwire.
 ( 247 ) 17-Aug-2012
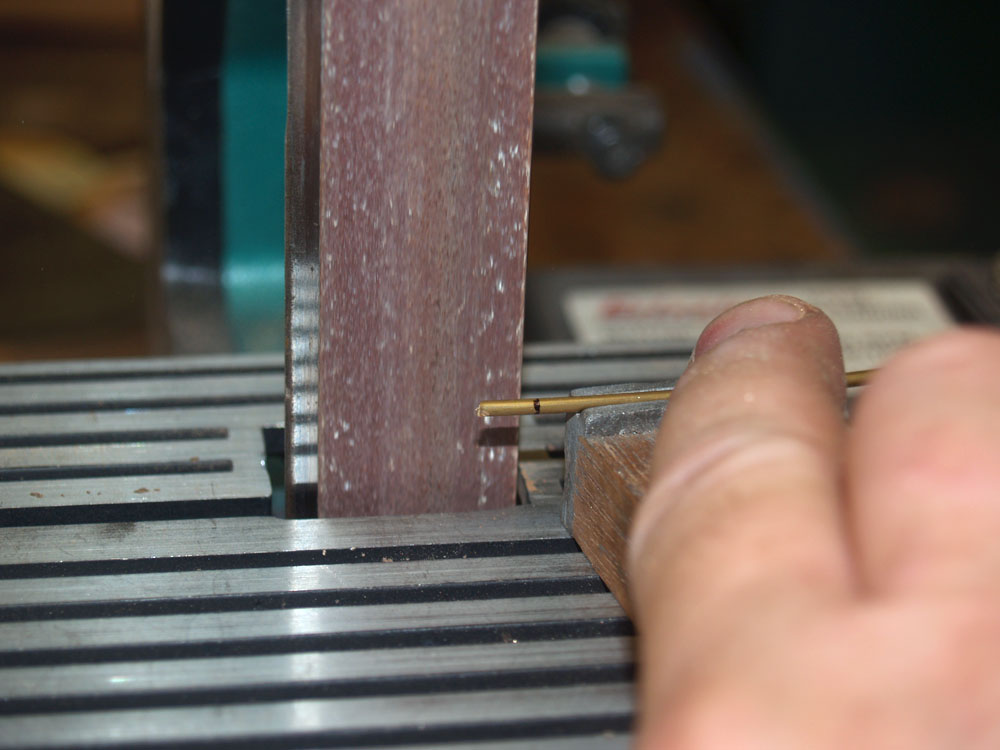
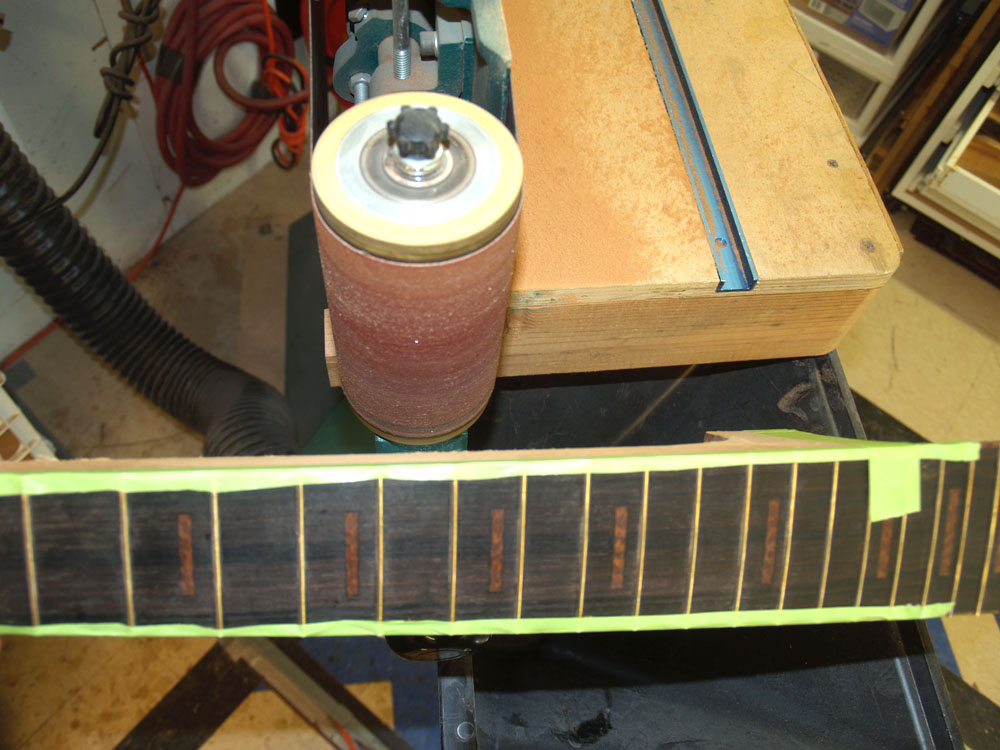
After carefully cutting twenty-four pieces of fretwire and marking the portion that will overlay the binding, I use a belt sander to remove the tang from the binding portion.
 ( 248 ) 17-Aug-2012
To insure the matrix of frets will be level, I level and check the fretboard blank one last time. My objective is to have the tops of the fretwire level to within plus or minus 1 mil. This will avoid any frets from buzzing and allow a very low action. This very straight and level sanding tool helps me sand the fretboard to its final shape.
 ( 249 ) 17-Aug-2012
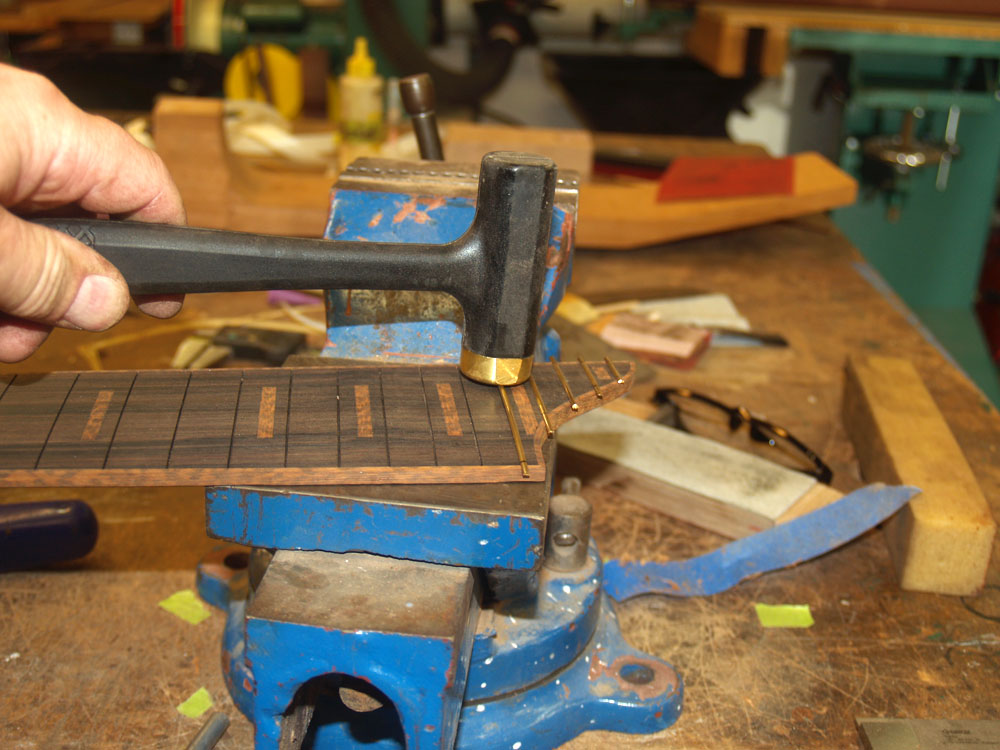
I use a brass hammer to install the fretwire.
 ( 250 ) 17-Aug-2012
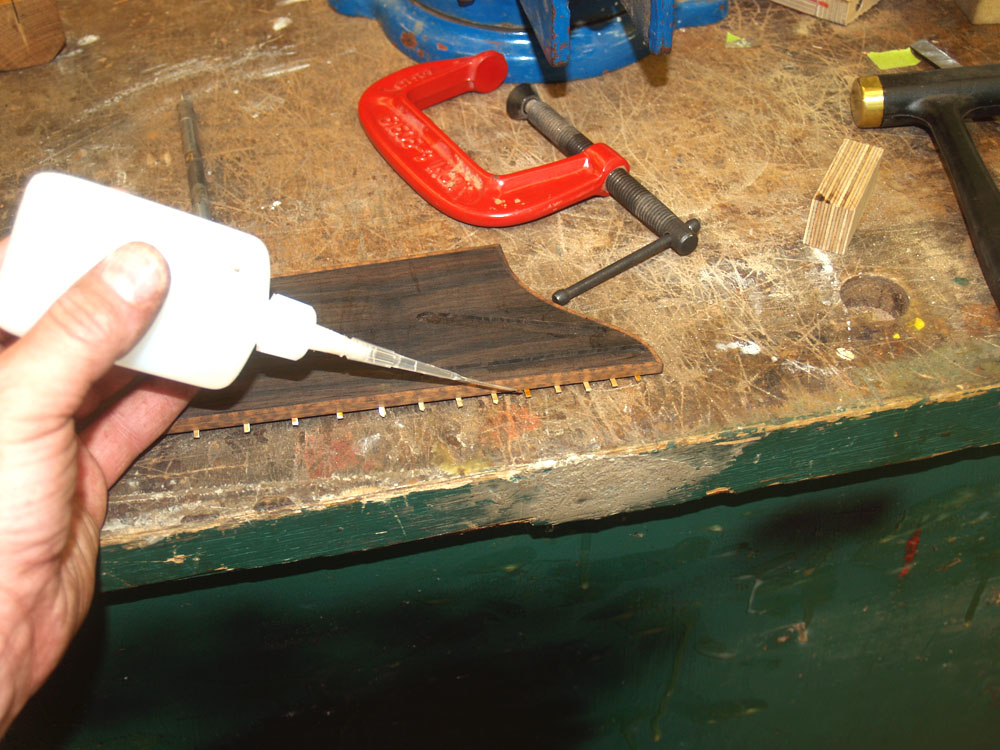
And then I put a few drops of CA glue on the ends of the fretwire to lock them in place.
 ( 251 ) 17-Aug-2012
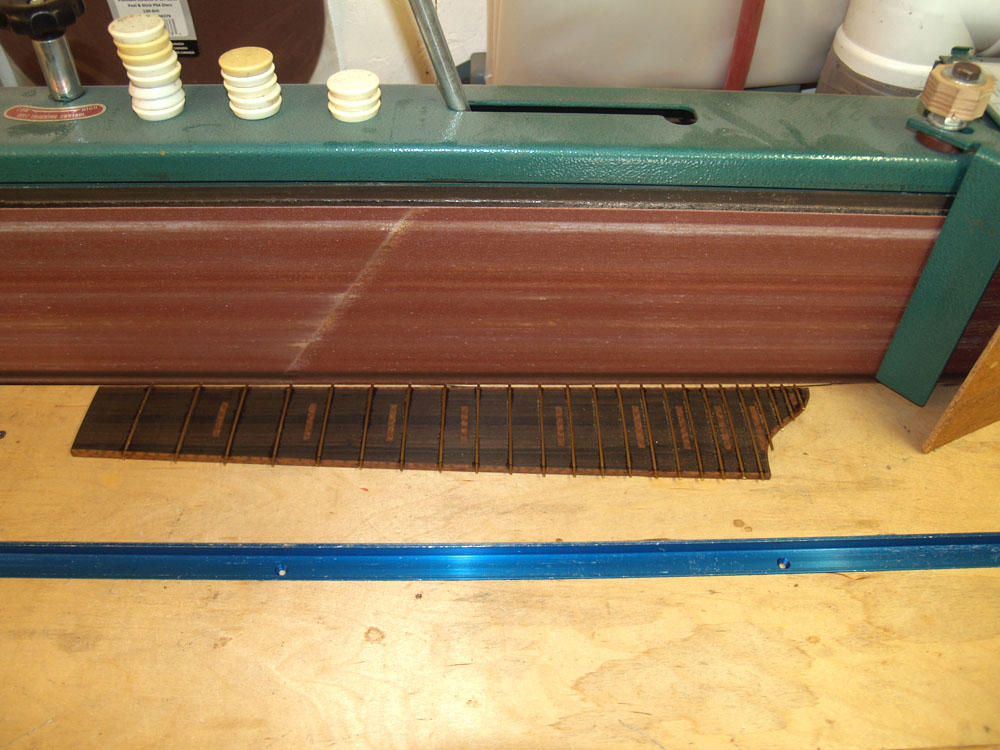
The belt sander trims off the excess fretwire.
 ( 252 ) 17-Aug-2012
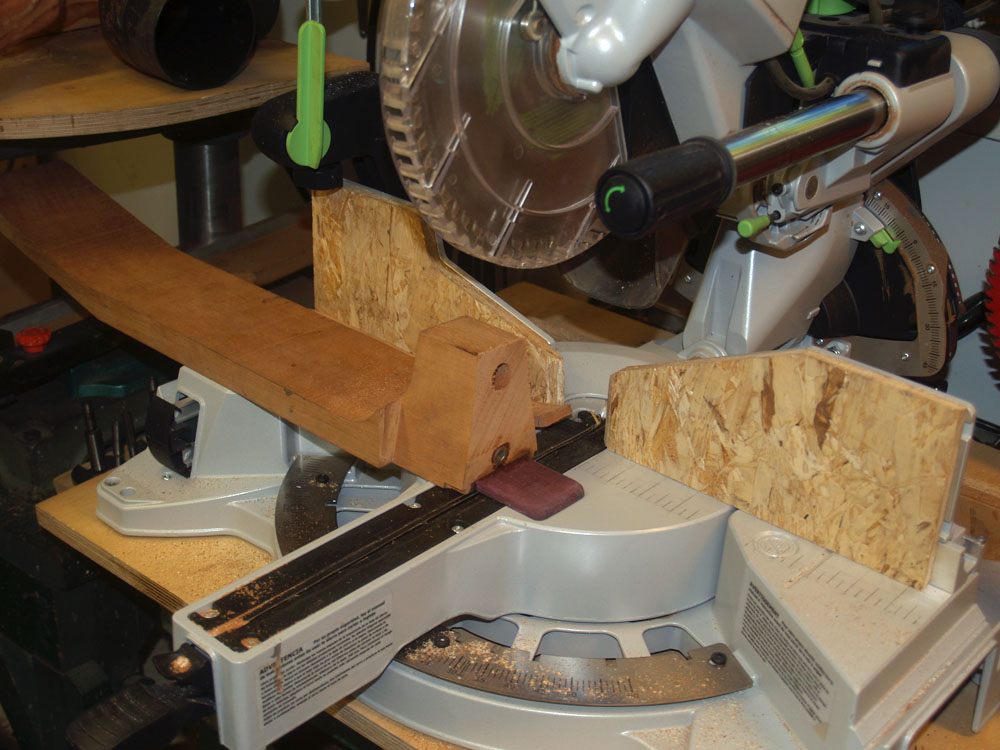
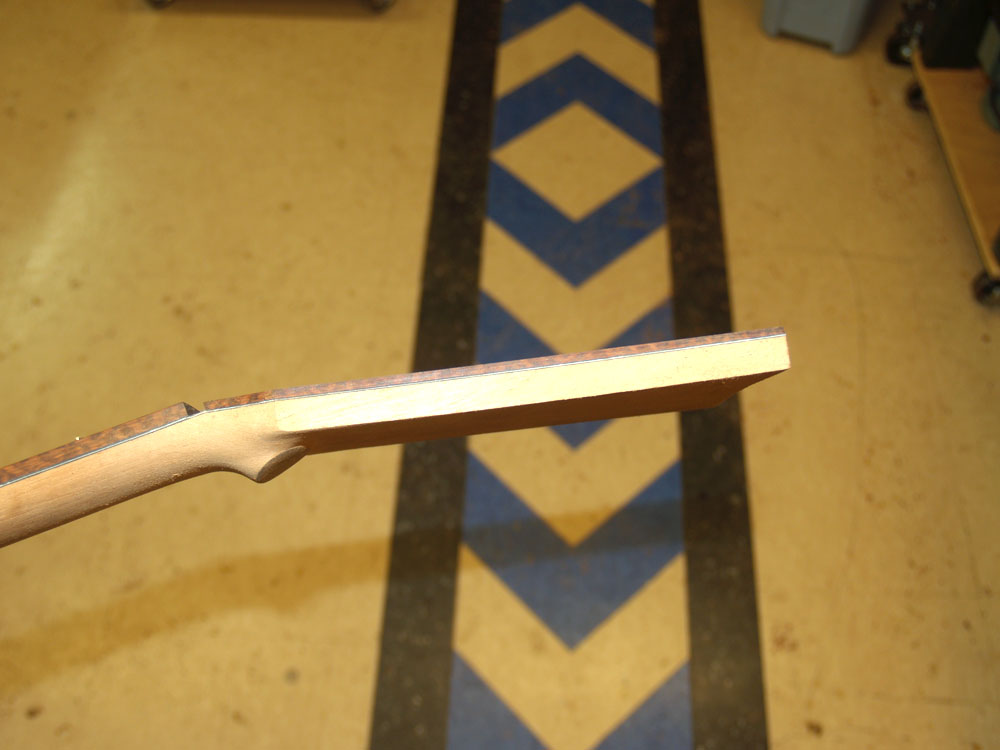
In this picture Ii am trimming the heal of the neck to a 3 deg angle. This will allow free movement of the neck in the heal channel as it is adjusted.
 ( 253 ) 17-Aug-2012
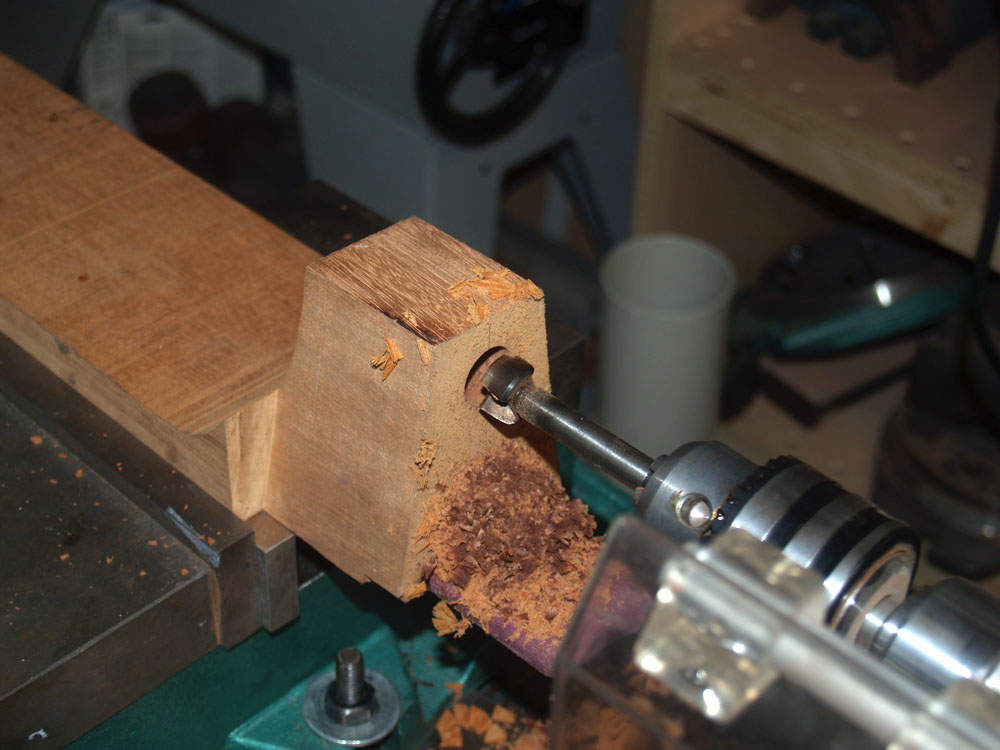
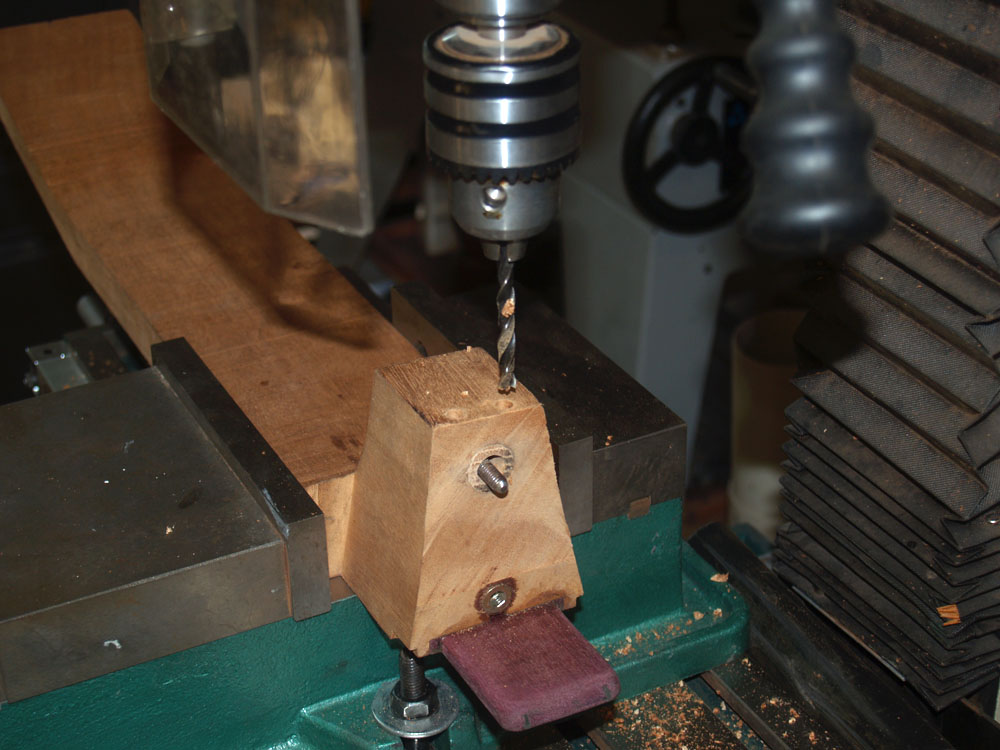
I use my milling machine to drill out the hole for the Tilt Action adjustment hardware.
 ( 254 ) 17-Aug-2012
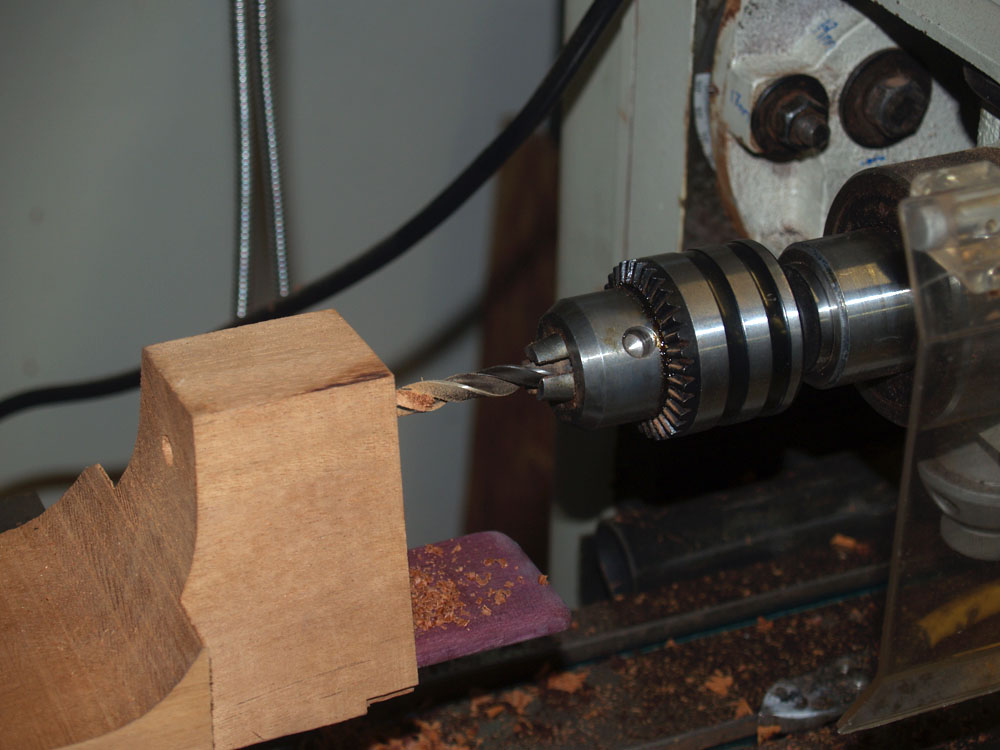
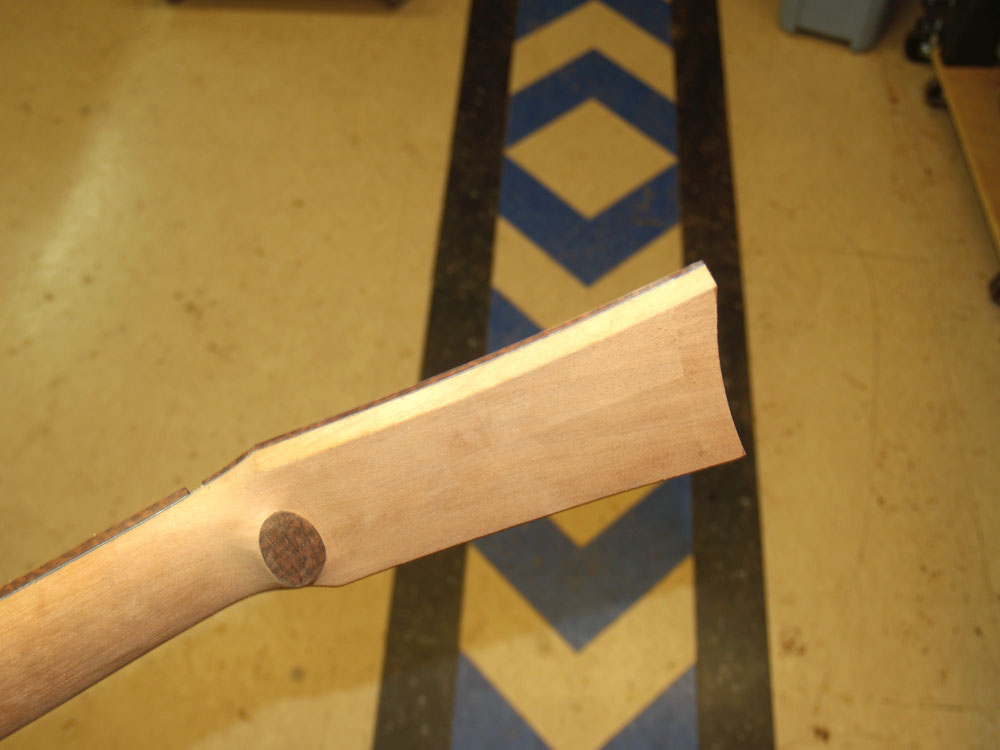
And then I drill a hole straight through the heal for the adjustment tool access. I will instal a 1/4-20 wood insert in this hole for the strap button. The strap button then hides the adjustment hole.
 ( 255 ) 17-Aug-2012
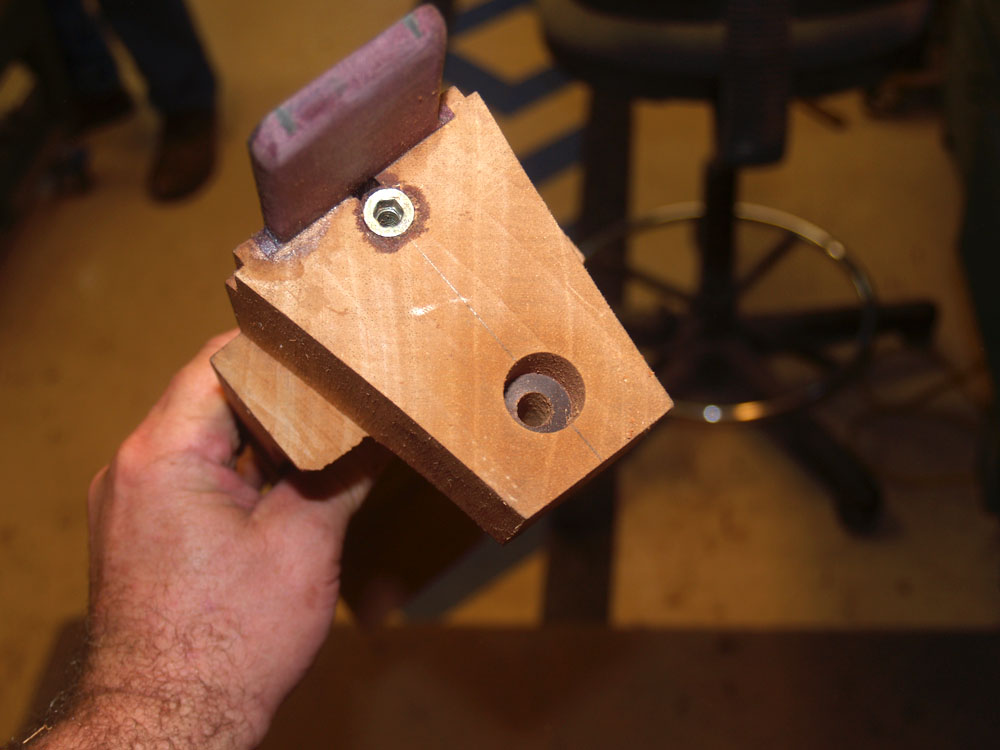
The end of the heal where the adjustment bolt will be installed.
 ( 256 ) 17-Aug-2012
After the retaining flange is installed I drive two retaining dowels through the flange to insure that it will not pull out under the tension on the neck from the strings.
 ( 257 ) 17-Aug-2012
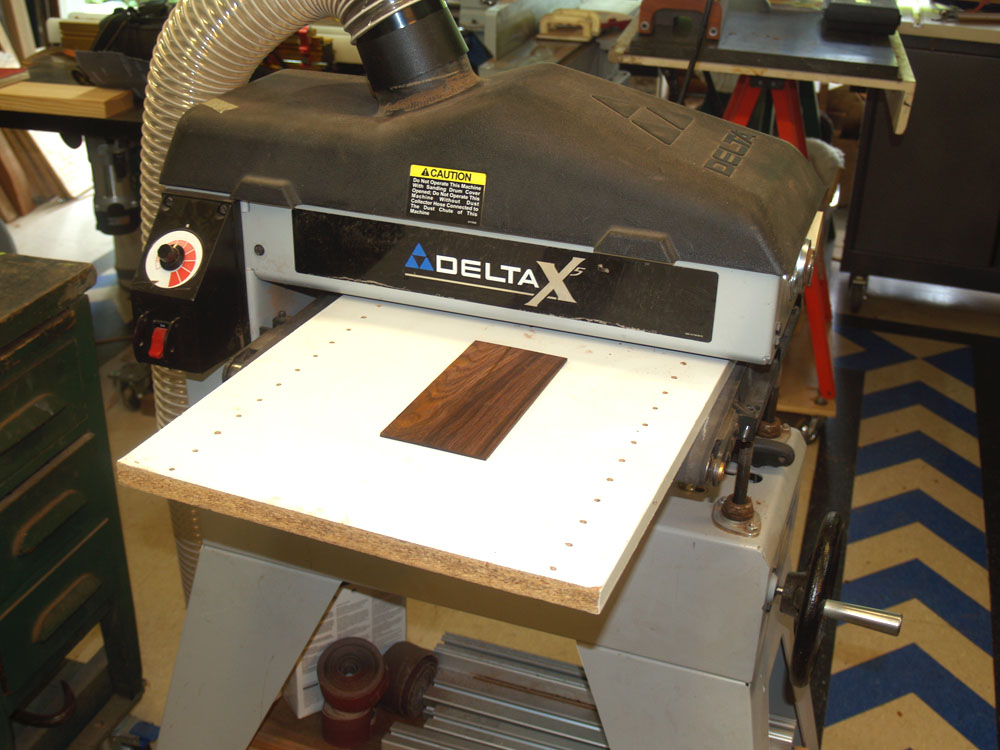
We are going to use a Cocobolo veneer on the headstock. In this picture I am using by drum sander to level the blank.
 ( 258 ) 17-Aug-2012
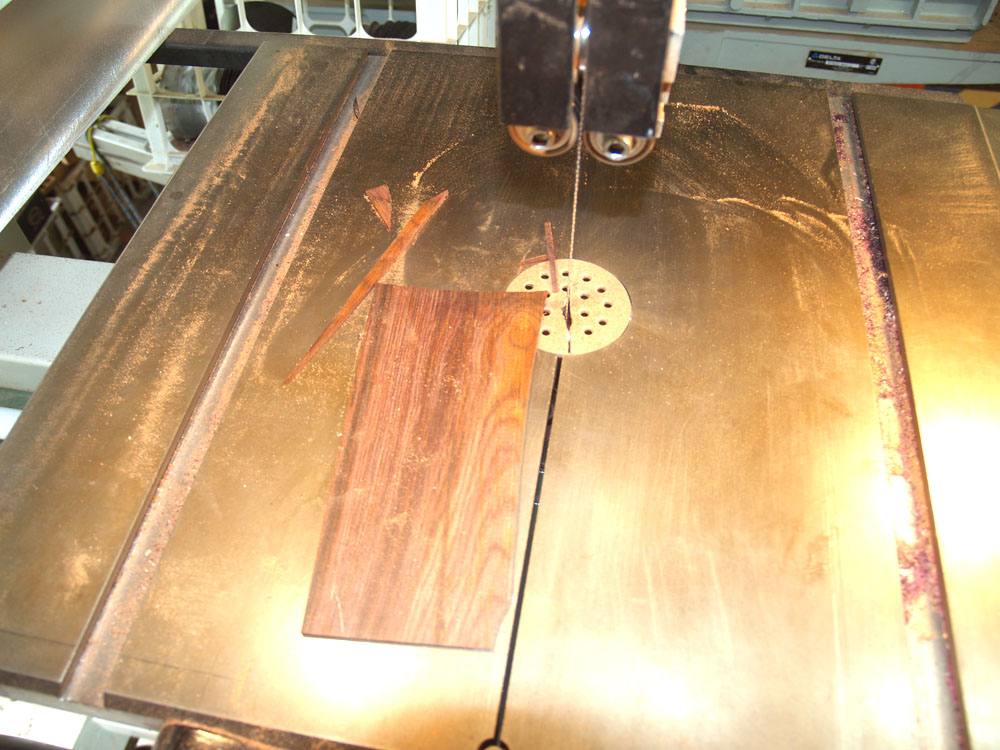
And the bandsaw to trim it to shape.
 ( 259 ) 17-Aug-2012
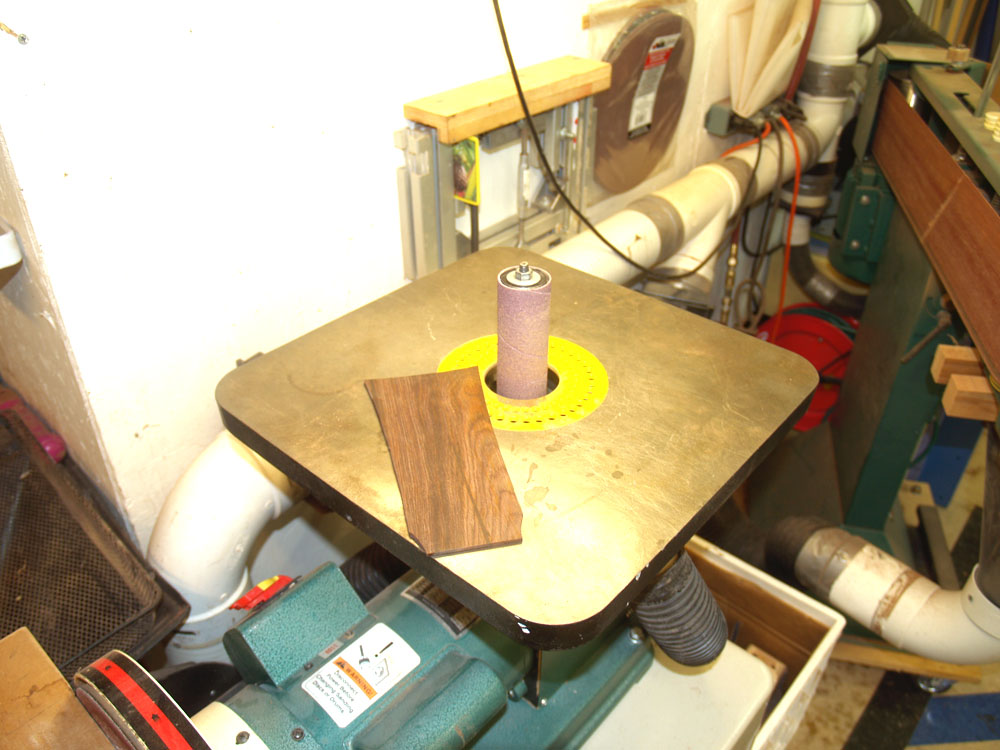
And the oscillating sander to fine tune it.
 ( 260 ) 17-Aug-2012
Here I am installing the binding and a b/w/b purfling strip on the headstock veneer.
 ( 261 ) 17-Aug-2012
The Snakewood binding being glued in place.
 ( 262 ) 17-Aug-2012
I use a few hand tools to the sand everything flush.
 ( 263 ) 17-Aug-2012
The end of the headstock veneer gets sanded to a 13 deg angle. This is the same angle as the headstock angle and will hold the bone nut in place without any gaps.
 ( 264 ) 17-Aug-2012
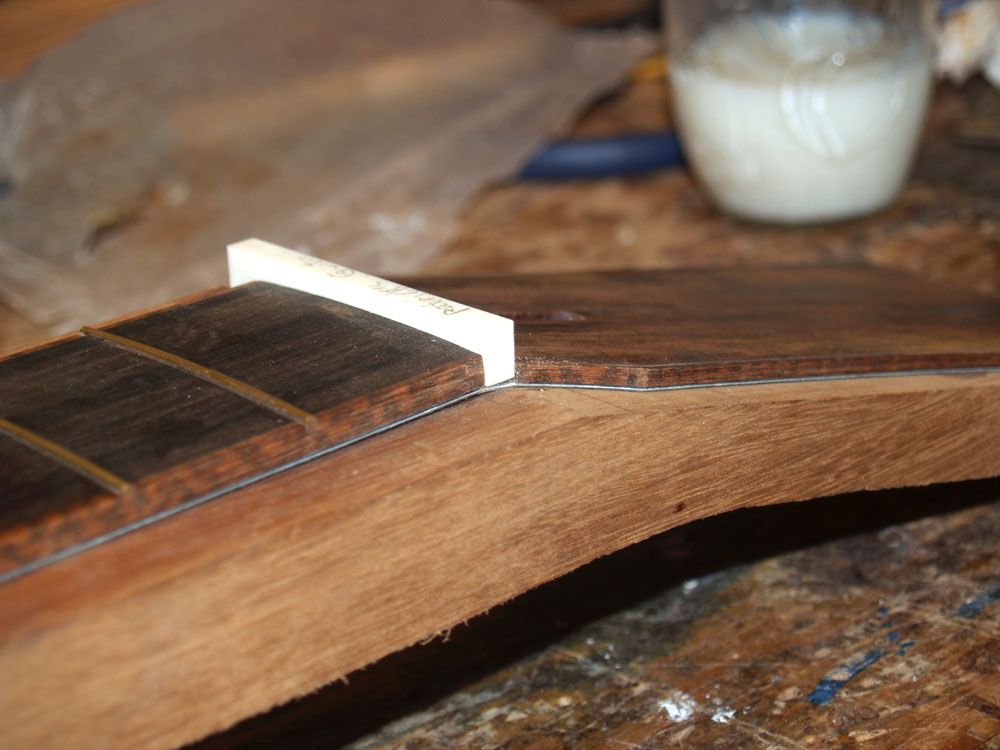
The bone nut held in place between the fretboard and the headstock.
 ( 265 ) 17-Aug-2012
I have prepared a black/white/black fiber sheet that will end up creating a pinstripe between the fretboard and the neck. Although this uses a lot of fiber sheeting, it results in a pinstripe that has no unsightly breaks in it as it circumscribes the neck and headstock.
 ( 266 ) 17-Aug-2012
Here I am gluing the fiber sheet to the fretboard.
 ( 267 ) 17-Aug-2012
I use a scraper to trim the sheets to the shape of the fretboard.
 ( 268 ) 17-Aug-2012
And here I am gluing the headstock veneer to the fiber sheets.
 ( 269 ) 17-Aug-2012
The bandsaw trims the sheet to shape.
 ( 270 ) 17-Aug-2012
And the scraper finishes the job.
 ( 271 ) 17-Aug-2012
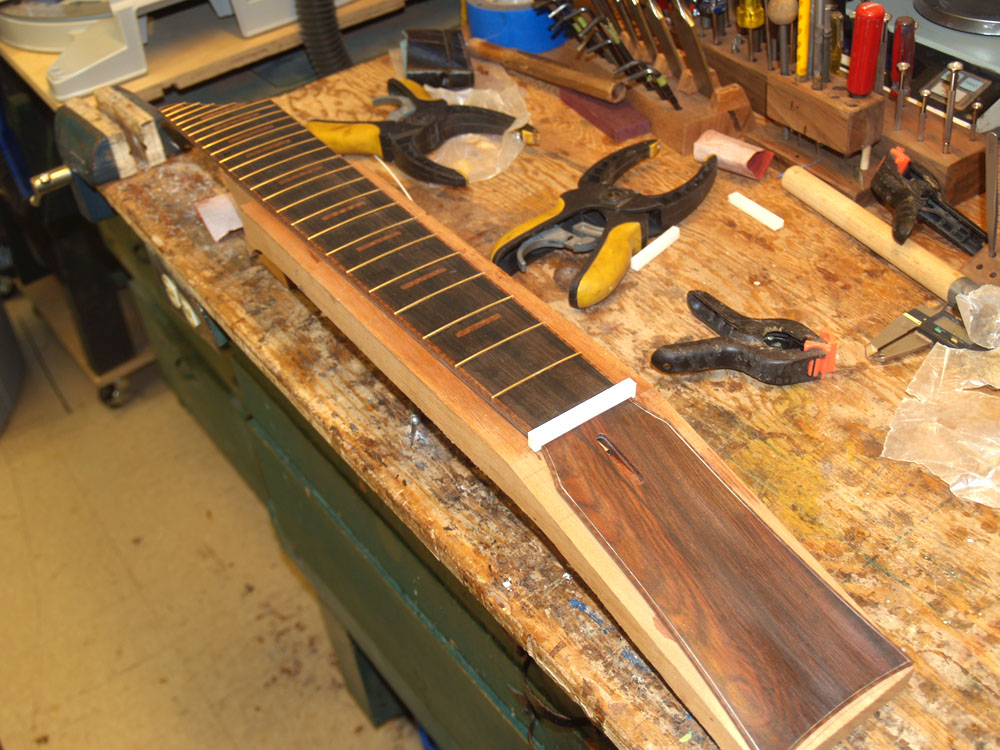
Now with the fretboard/headstock assembly ready I position it on the neck blank.
 ( 272 ) 17-Aug-2012
A look at the nut area.
 ( 273 ) 17-Aug-2012
Now I am ready to route the neck blank to its thickness dimension.
 ( 274 ) 17-Aug-2012
This safety planner (a misnamed tool in my opinion, although a very handy one) lets me trim the back side of the neck blank so it is parallel with the top side.
 ( 275 ) 17-Aug-2012
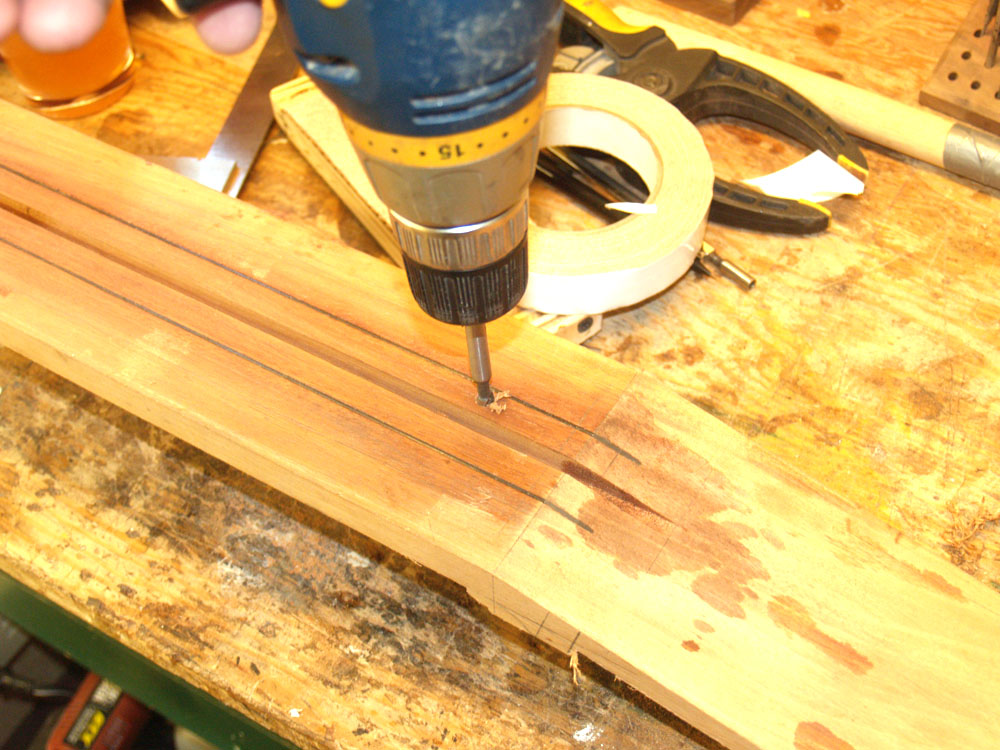
To position the fretboard assembly on the neck blank I us a couple of fiducial buttons. Here I am drilling a 1/4 inch hole in the fretboard blank.
 ( 276 ) 17-Aug-2012
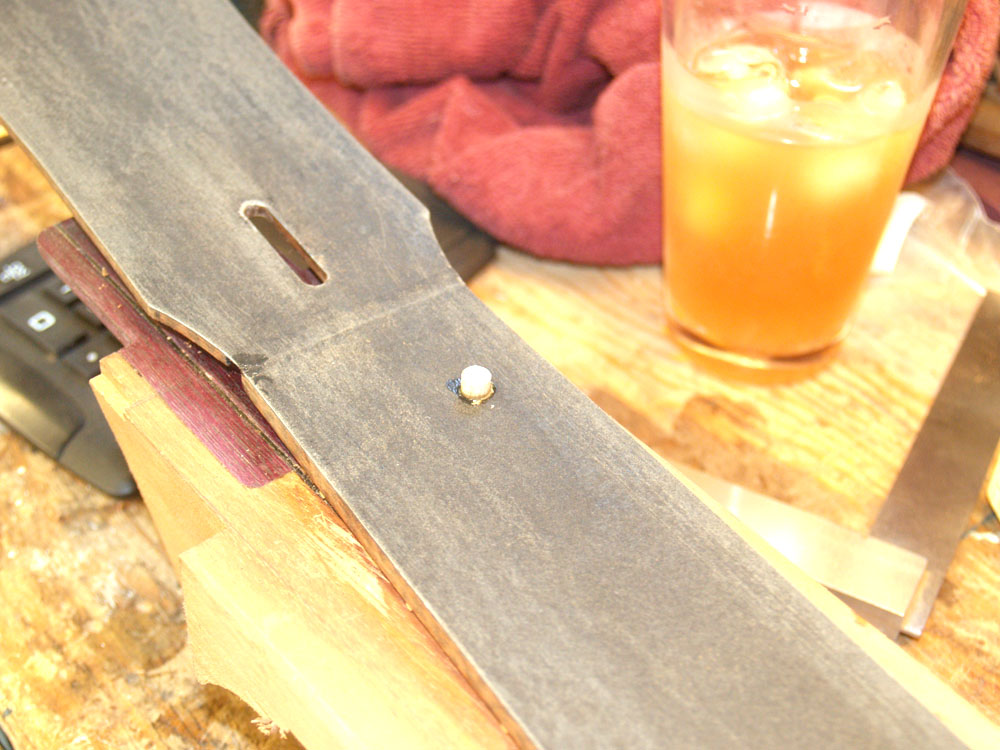
This button will prevent the fretboard from sliding around when I glue it down. The ice tea kept me cool on a hot day in the shop.
 ( 277 ) 17-Aug-2012
To prevent the glue from gumming up the truss rod I put a strip of Scotch tape over it.
 ( 278 ) 17-Aug-2012
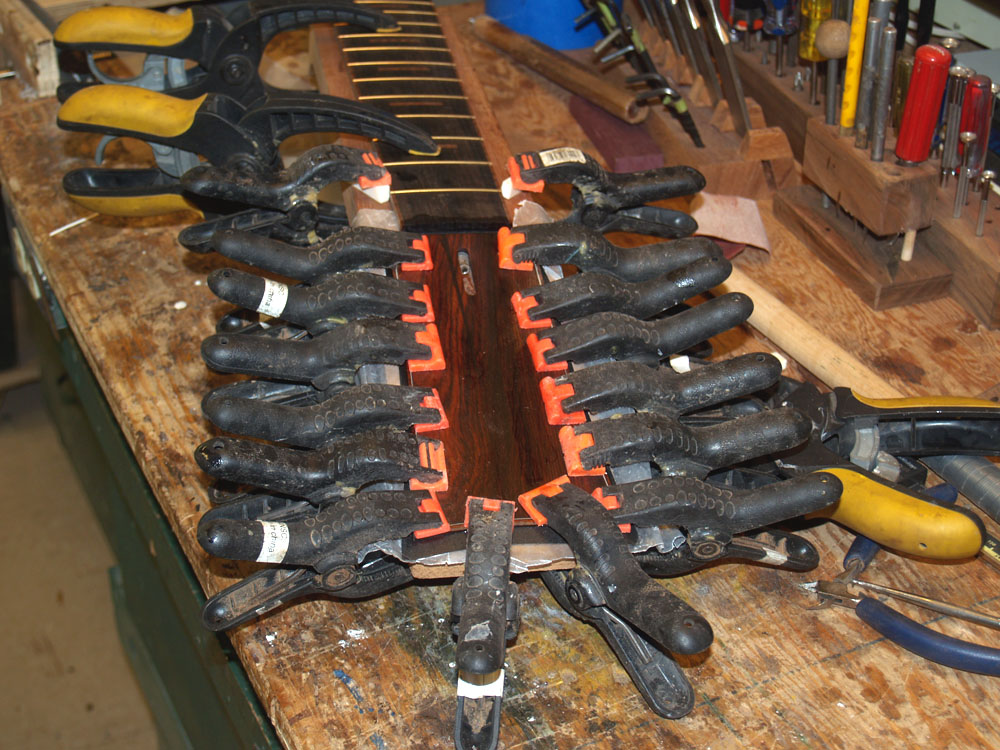
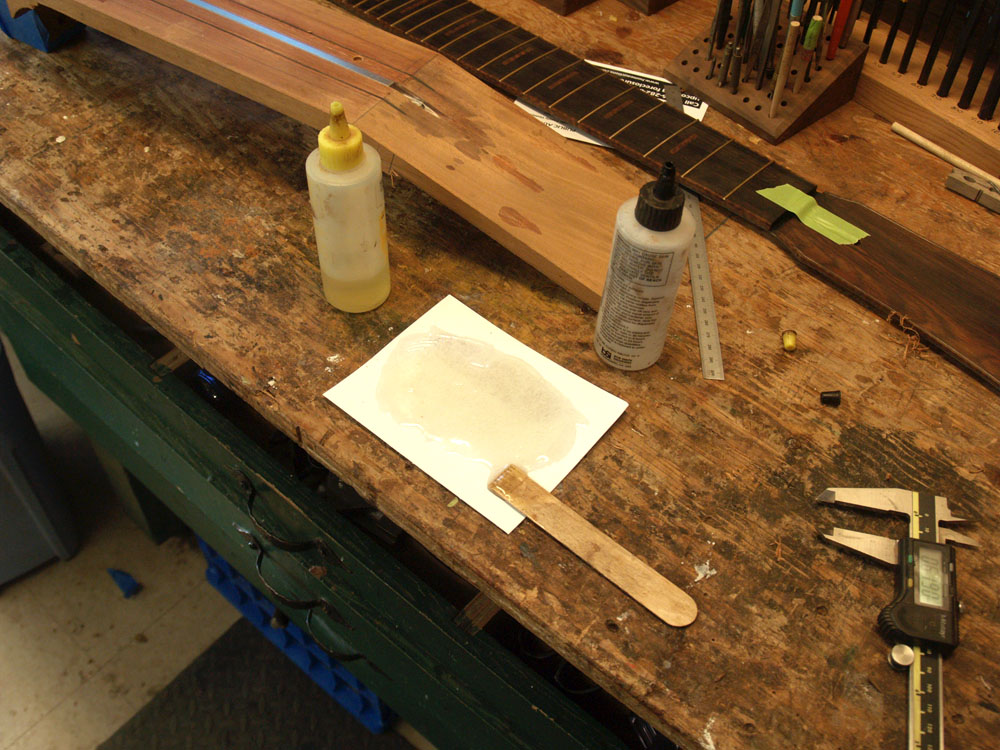
I use epoxy to glue the fretboard to the neck. The epoxy doesn't swell the wood as it cures which a water based evaporative glue would.
 ( 279 ) 17-Aug-2012
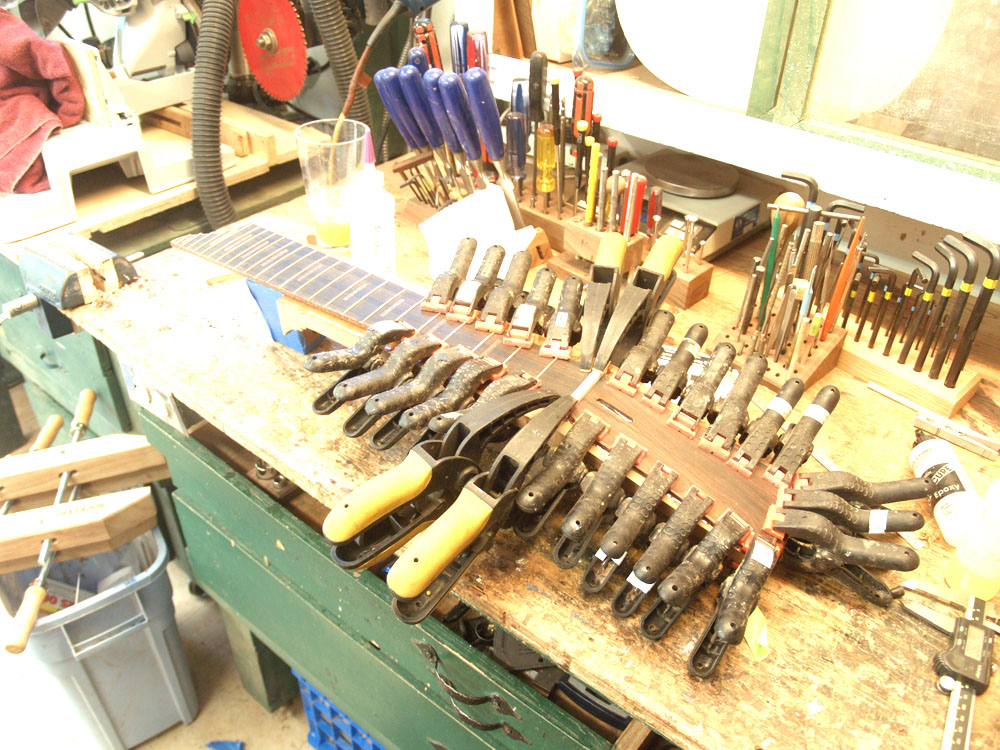
Lots of clamps presses the fretboard in place making sure there are no gaps between the fretboard and the neckblank.
 ( 280 ) 17-Aug-2012
Lots and lots of clamps.
 ( 281 ) 17-Aug-2012
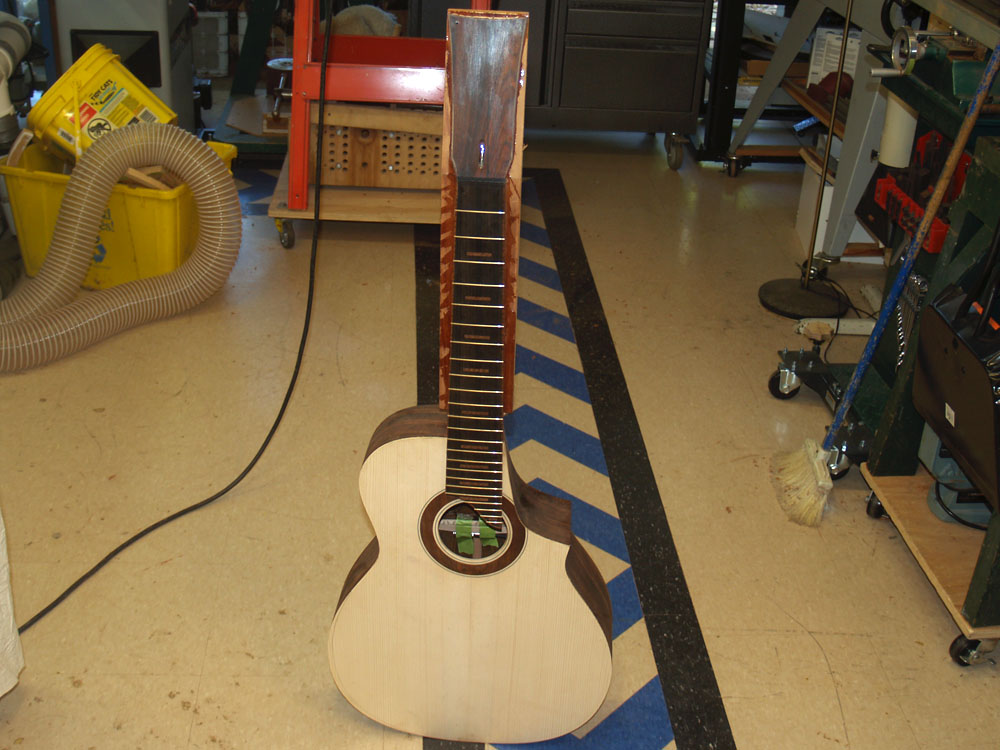
And finally a great day (one of many actually); the first time the neck is attached to the body. Looking like a guitar!
 ( 282 ) 17-Aug-2012
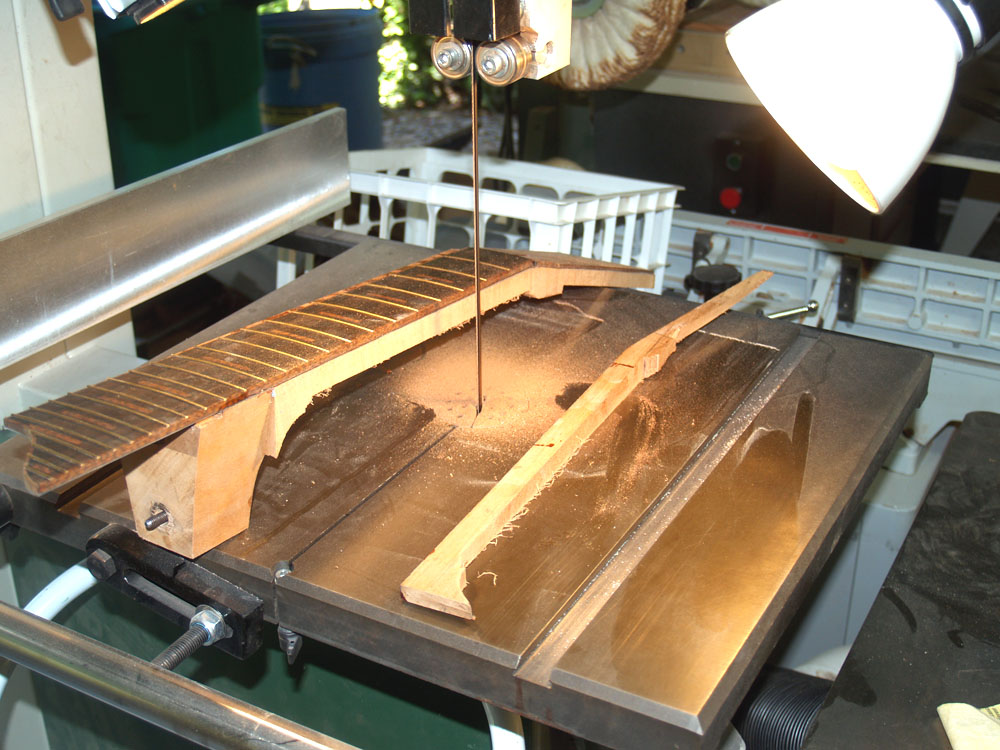
The bandsaw was used to trim away the excess on the neckblank.
 ( 283 ) 17-Aug-2012
I have a special support to help with the headstock.
 ( 284 ) 17-Aug-2012
And the oscillating sander trims the headstock to shape.
 ( 285 ) 17-Aug-2012
And a little fine tuning with the scraper.
 ( 286 ) 17-Aug-2012
After everything was glued up I decided to thin the headstock a bit with the safety planner.
 ( 287 ) 17-Aug-2012
Now I start to shape the neck. I use masking tape to mark where I don't want to sand and to give me a layer of sacrificial material if I should slip.
 ( 288 ) 17-Aug-2012
Here I am working on the volute.
 ( 289 ) 17-Aug-2012
The idler pulley on the belt sander does a lot of the heavy lifting.
 ( 290 ) 17-Aug-2012
I use this mounting plate to keep the neck square as I work on the heal.
 ( 291 ) 17-Aug-2012
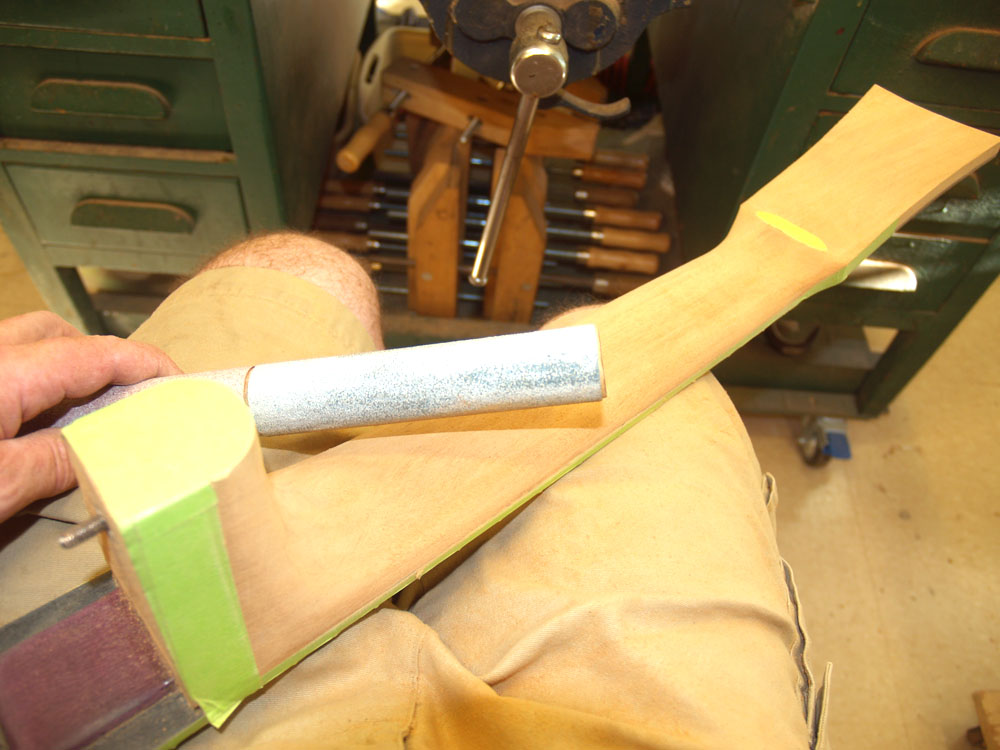
Sanding... checking... sanding.. sanding.. checking.
 ( 292 ) 17-Aug-2012
I have a variety of sanding blocks I use.
 ( 294 ) 17-Aug-2012
Once the neck is roughed out I use hand tools and go quite slow. I have found it is much easier to remove wood than it is to put it back. Making a neck is literally a case where you glue a couple of pieces of wood together and then whittle away everything that doesn't look like a guitar.
 ( 294 ) 17-Aug-2012
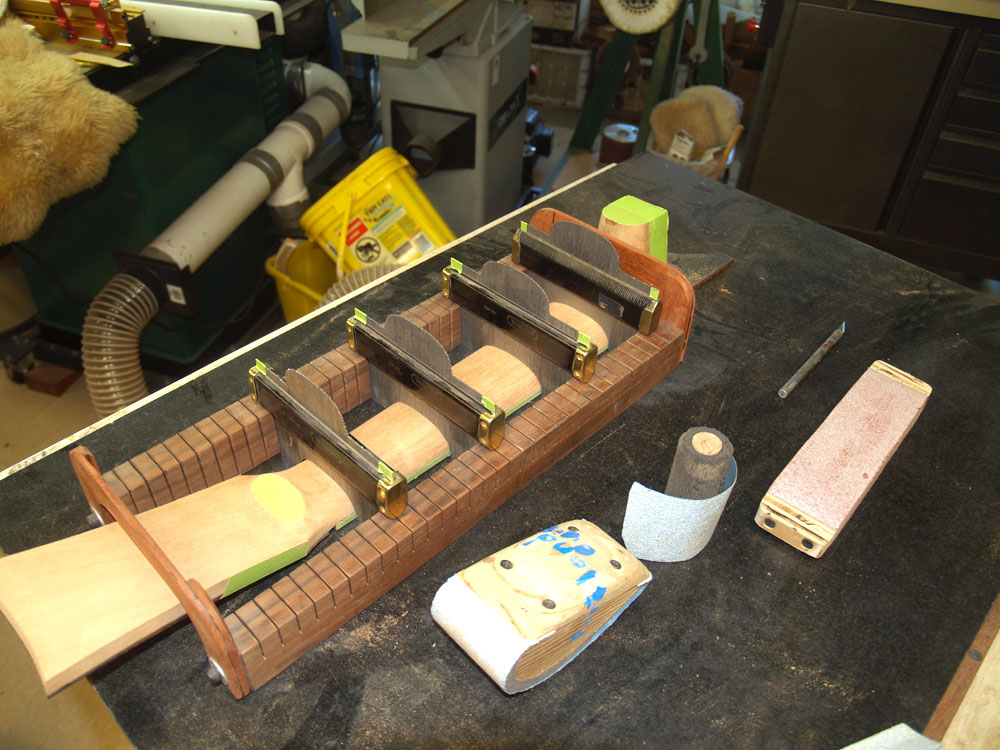
I have the special tool I created to help me check the shape of the neck as I work. This tool holds a set of contour gauges and allows me to repeatedly put them on the same spot. This way I can check my work and I can see where I need to sand next.
 ( 295 ) 17-Aug-2012
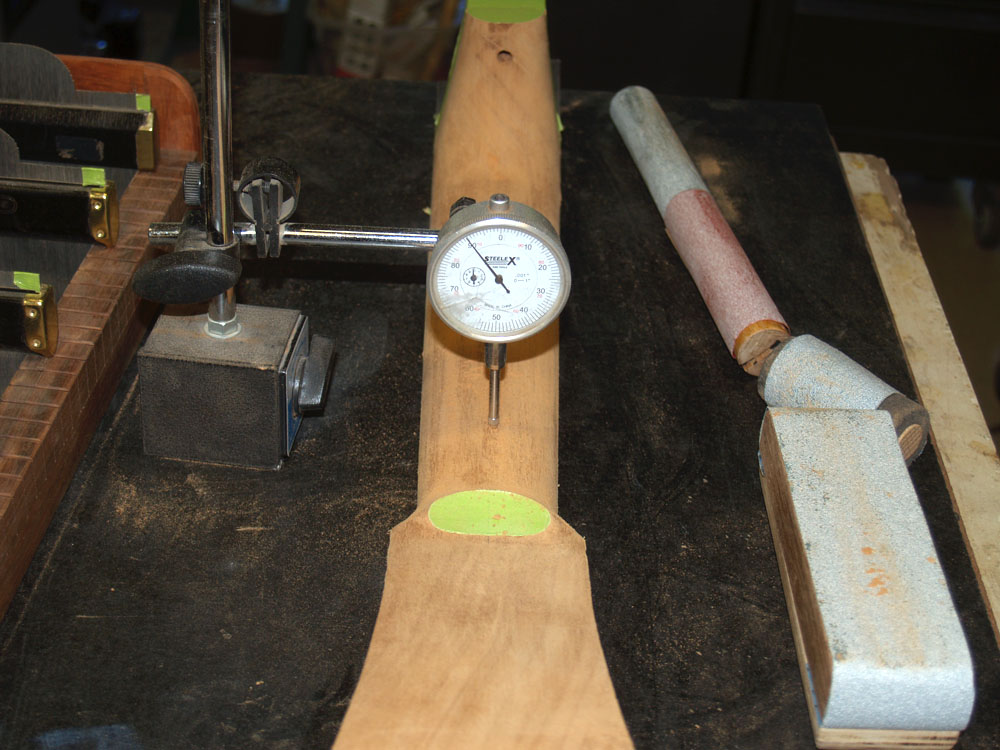
I also use a dial indicator to measure the profile of the neck. I want the neck to be dead on straight from the nut to the twelfth fret.
 ( 296 ) 17-Aug-2012
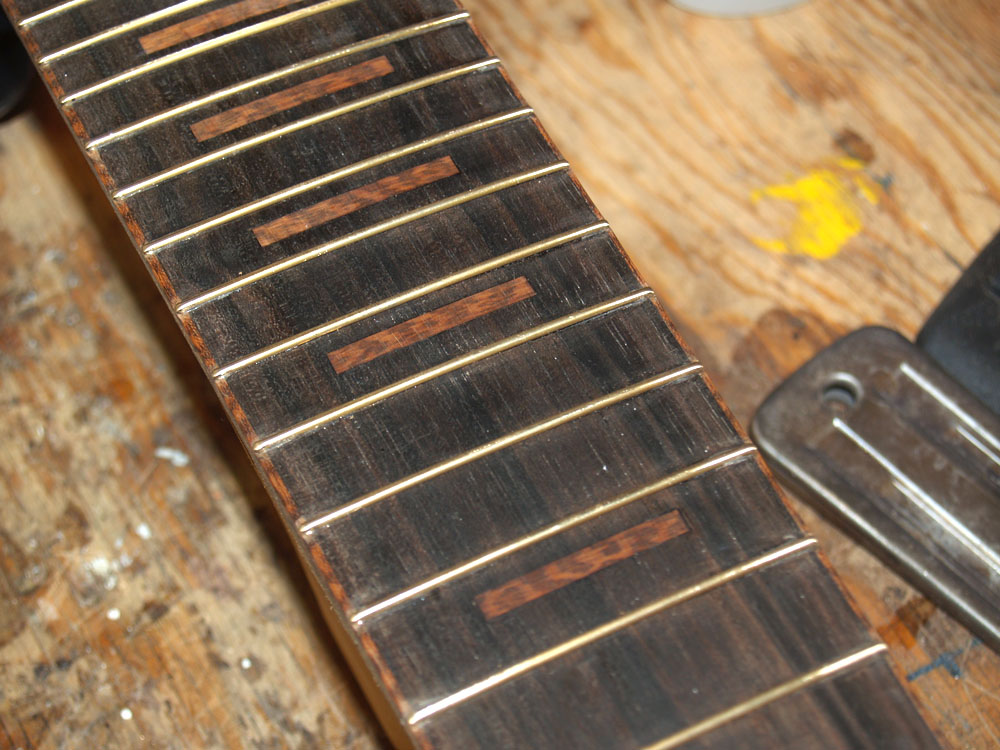
Here is a close up the the fretboard.
 ( 297 ) 17-Aug-2012
And the headstock. In deciding on how to apply the purfling and binding I set up a few design rules. When Snakewood is next to Cocobolo (two woods with similar color) I put a piece of b/w/b pinstriping between them. This creates a very nice contrast. When Snakewood is next to ebony I don't put anything.
 ( 298 ) 17-Aug-2012
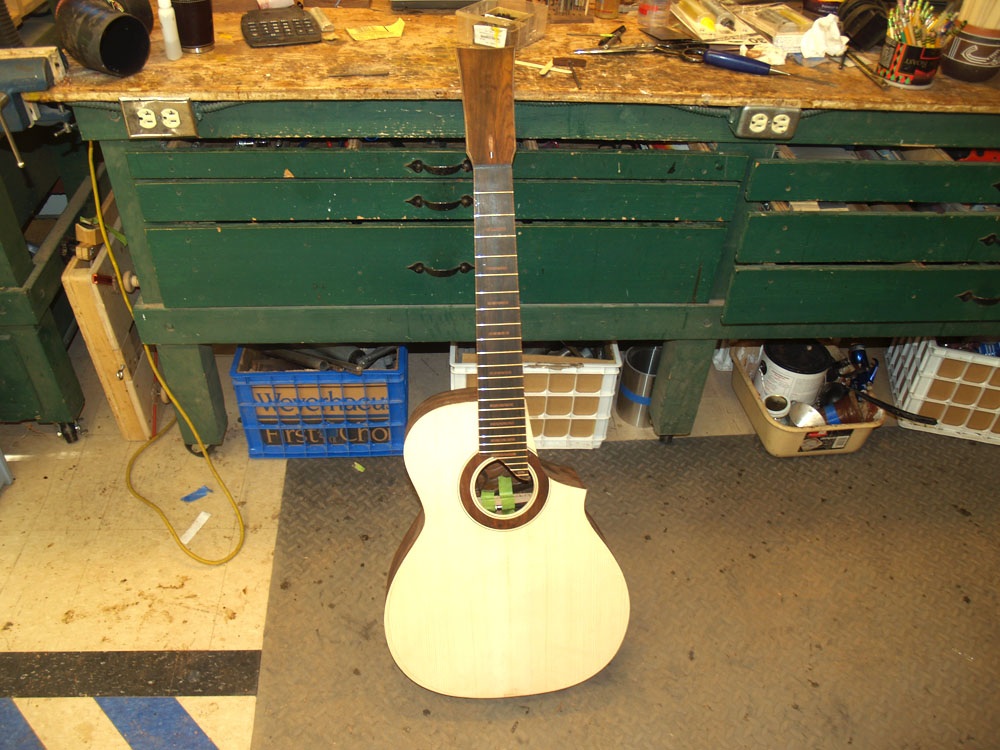
A look at the guitar with the neck attached.
 ( 299 ) 17-Aug-2012
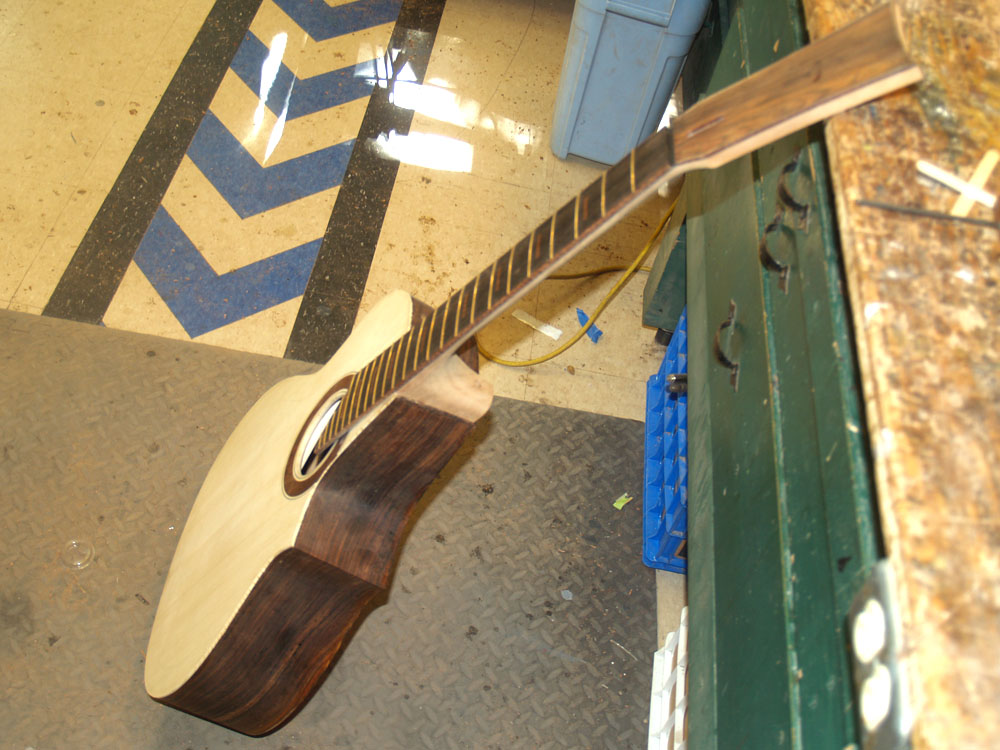
And another view. This cutaway really gives you access to the upper fretboard.
 ( 300 ) 17-Aug-2012
I have attached a piece of Snakewood to the volute... I think it just added a necessary finishing touch.
 ( 301 ) 17-Aug-2012
Another look at the volute.
 ( 302 ) 17-Aug-2012
And another.