Portland Guitar Co. | Portland Oregon | Contact Jay Dickinson-503.245.3276 | jay@portlandguitar.com
Portland Guitar Pretty Good Intonation (PGPG) System
Finished Build
Electro-Spanish Small Jumbo
Serial # ESJ 2.1.56
Body: Figured Walnut
Top: Sitka Spruce
Neck: Walnut
Binding: White
Fretboard: Indian Rosewood
Hardware: Gold
Pickups: Vintage Humbucking
Page 2
 ( 31 ) 21-Oct-2012
The next step in building the form is to cut out strips of wigglewood that I will glue to the outside edge of the form. This will help stablize the shape of the form and give me enough material in the sides to install 1/4-20 inserts.
 ( 32 ) 21-Oct-2012
I use lots of clamps to make sure I get a good even set.
 ( 33 ) 21-Oct-2012
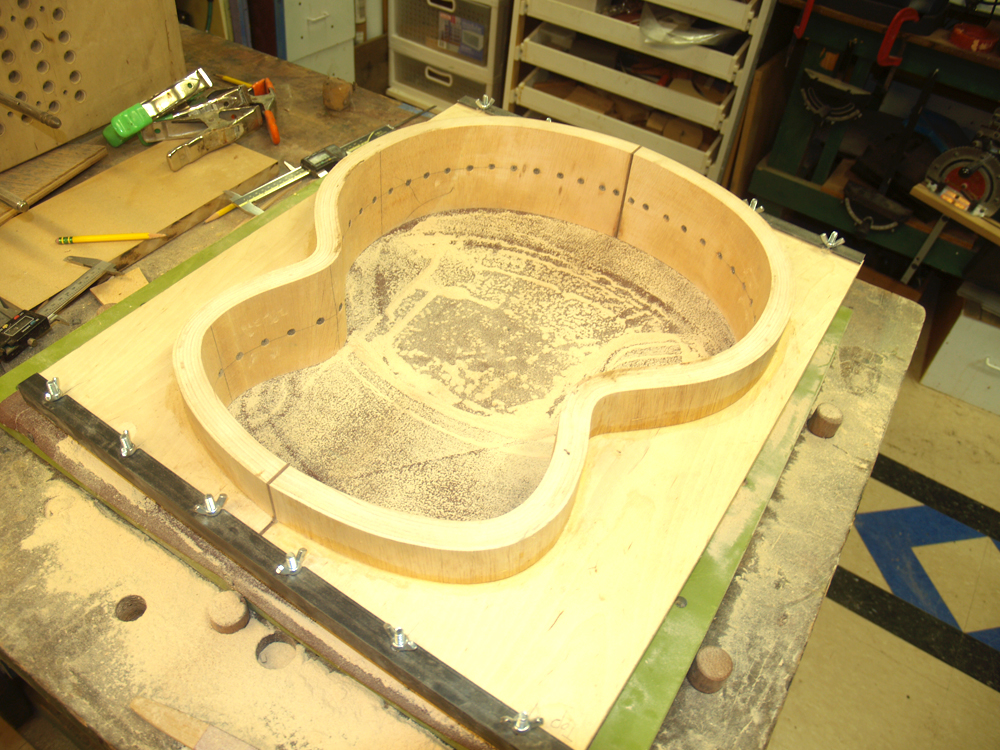
After the glue has set up I trim the ends of the strips and join the two halves together with the angle iron cross braces. I use the top and back dishes with sandpaper attached to sand the edges of the form to match the shape of the dish.
 ( 34 ) 21-Oct-2012
Lot of sawdust. Wigglewood is relatively soft and not too hard to sand.
 ( 35 ) 21-Oct-2012
With the forms now closer to being finished, I am going to turn my attention to bending the sides. Here I have put the two strips of book matched walnut for the sides into the heating blanket and buttoned everything together with truncated clothespins. The top sheet of spring steel is a new modification in my process. The spring steel prevents too sharp of a bend from happening and cracking the wood.
 ( 36 ) 21-Oct-2012
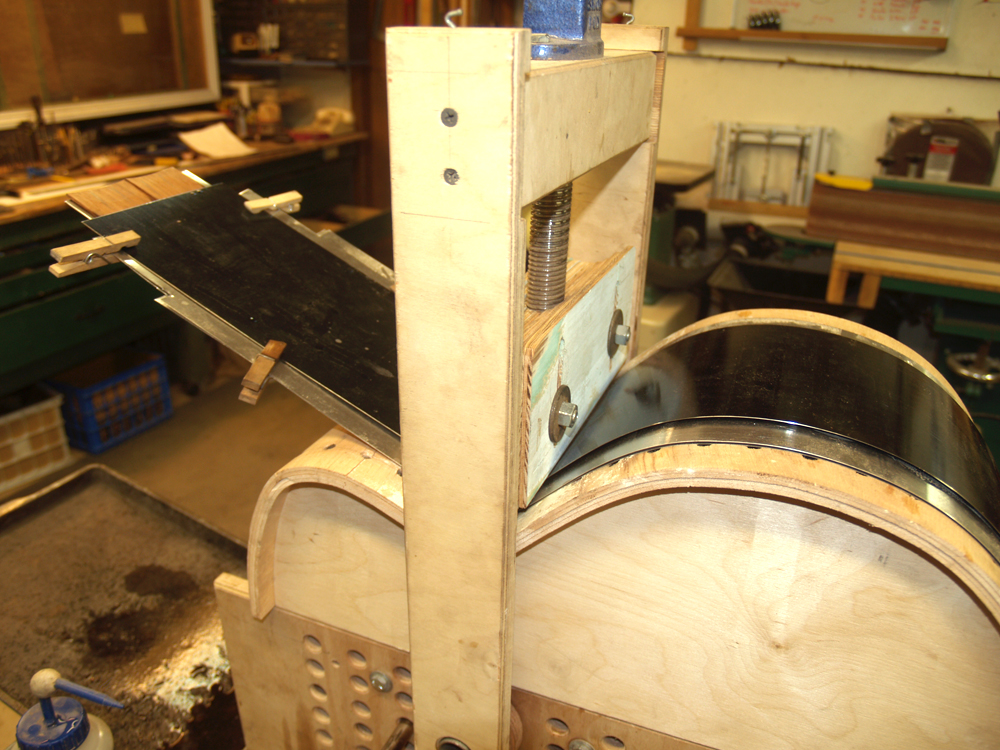
The heating blanket assembly is positioned in the bending machine and I turn on the heater.
 ( 37 ) 21-Oct-2012
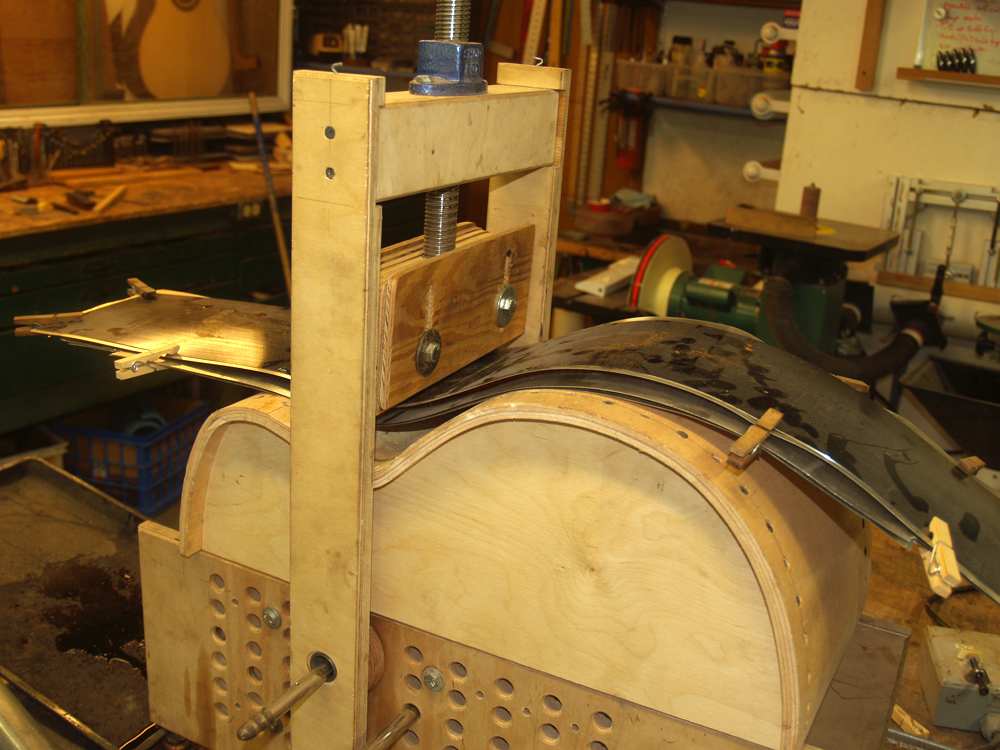
After it has been heated up the wood gets quite pliable. I press the waist into place with the central shoe.
 ( 38 ) 21-Oct-2012
The upper and lower bouts are pressed into place with the two rollers and springs.
 ( 39 ) 21-Oct-2012
After cooking the sides for some time and letting them cool down, the wood sets and takes on the shape of the form. These bent sides are pretty close to the final shape.
 ( 40 ) 21-Oct-2012
But the final shape is set by the side form. To prevent spring back I store the sides in their forms.
 ( 41 ) 21-Oct-2012
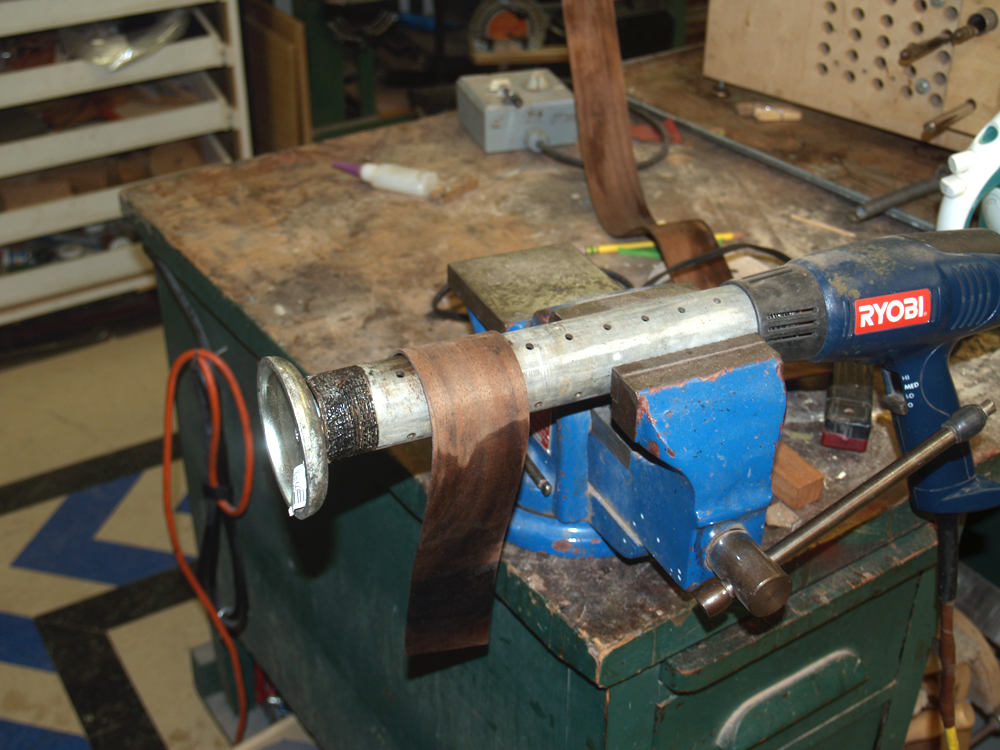
The cutaway section require a severe bend in the wood. To get the wood close to its shape I use a bending iron to heat the wood and give me a platen to work against.
 ( 42 ) 21-Oct-2012
After a bit of effort the cutaway blanks are close to shape.
 ( 43 ) 21-Oct-2012
I mount the cutaway inserts in the form and sand them to fit the dish.
 ( 44 ) 21-Oct-2012
After I mark the outline sides I use a special bandsaw platen to trim the side blanks to the near final shape.
 ( 45 ) 21-Oct-2012
To bend the kerfing it gets the same treatment as the sides. The kerfing is made from mahogany.
 ( 46 ) 21-Oct-2012
After the kerfing has cooled down they retain their shape more or less. The outside strip of the kerfing is quite thin, ~50 mil and is very flexible by itself.
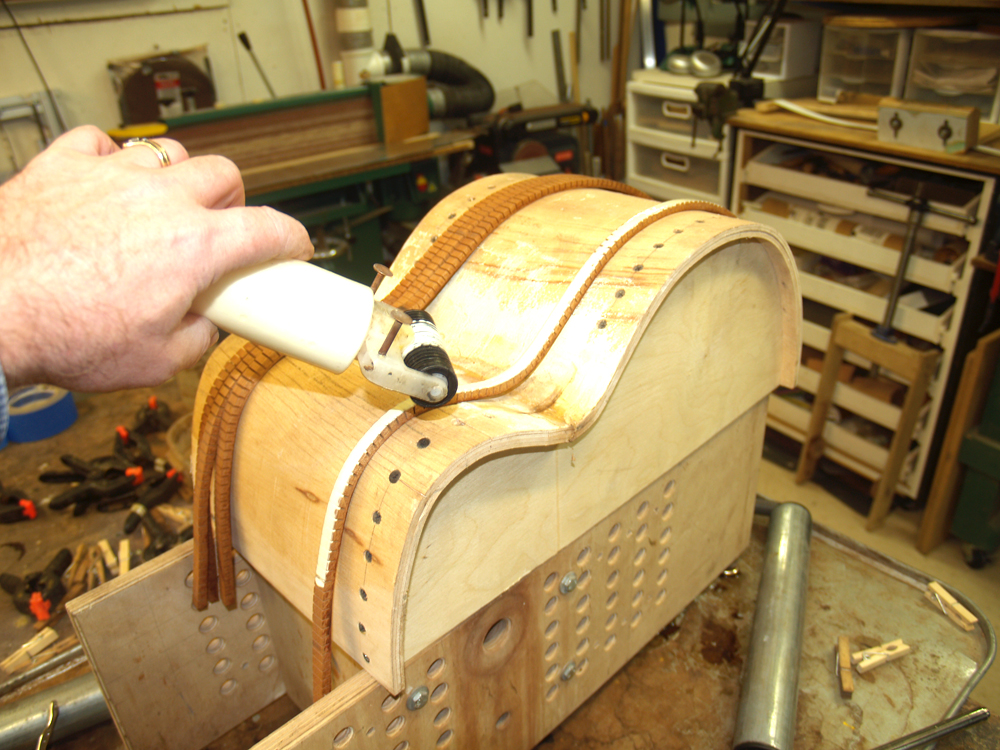 ( 47 ) 21-Oct-2012
I apply a bit of glue on the slitted side of the kerfing strip.
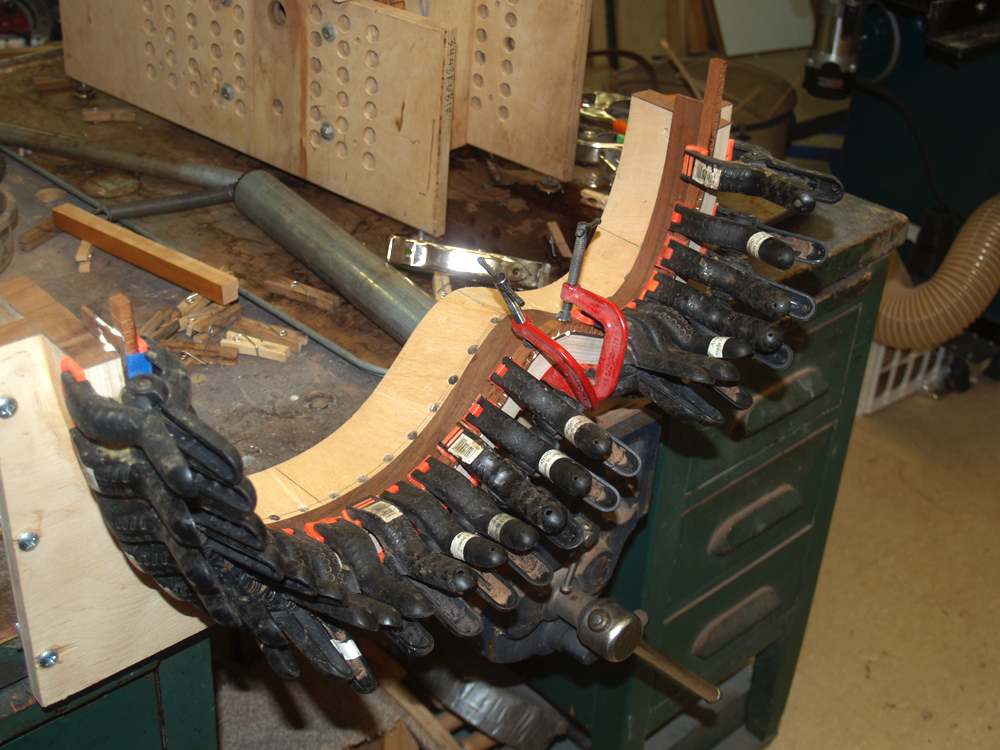 ( 48 ) 21-Oct-2012
And then I use lots of clamps again to press everything into the side form. This method helps to ensure that the final shape of the side matches the shape of the form, and since
I spent a fair amount of time making sure the side form has the shape I am after, the sides will have the right shape. (good theory and with a bit of care it works)
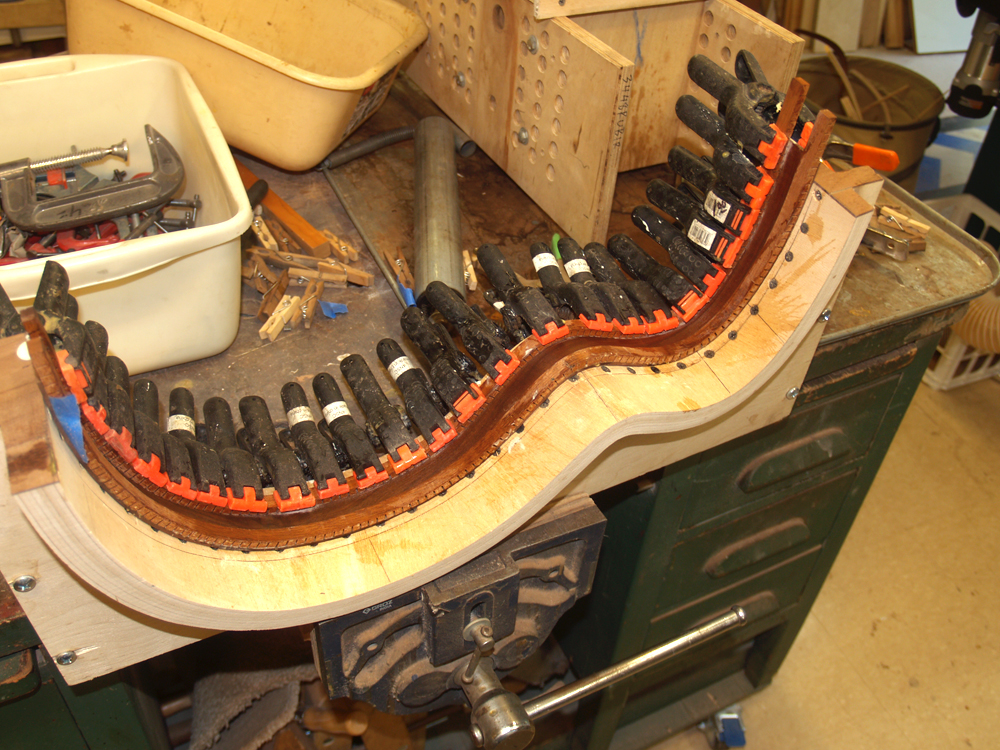 ( 49 ) 21-Oct-2012
One of the properties of the reverse kerfing that I use is that is prevents the wood from springing back. The outside strip of wood on the kerfing acts like a gunnel on a ships hull and even though it is thin and flexible on its own, when glued to the sides it makes a very strong structure. This has a similar construct as a piece of cardboard, two sheets separated by a webbing, and even though the elements are flimsy, the assembly is strong. There's a princilple of life in there somewhere I think.
 ( 50 ) 21-Oct-2012
After the glue has set I sand the inside surface with a pneumatic drum sander.
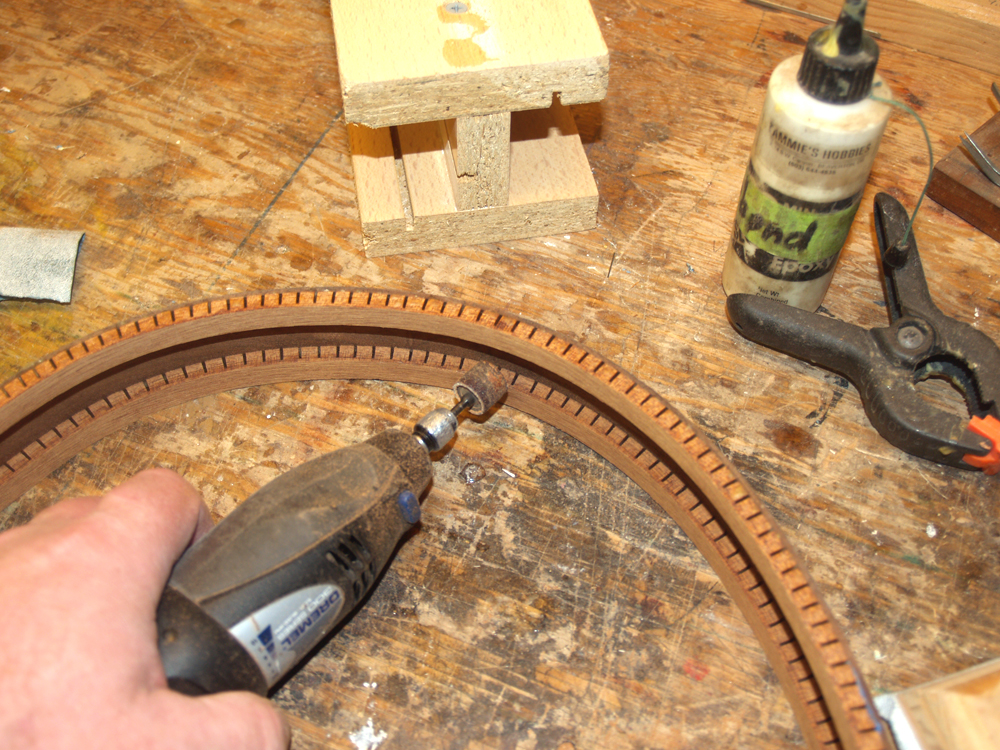 ( 51 ) 21-Oct-2012
And clean up and shape the top edge.
 ( 52 ) 21-Oct-2012
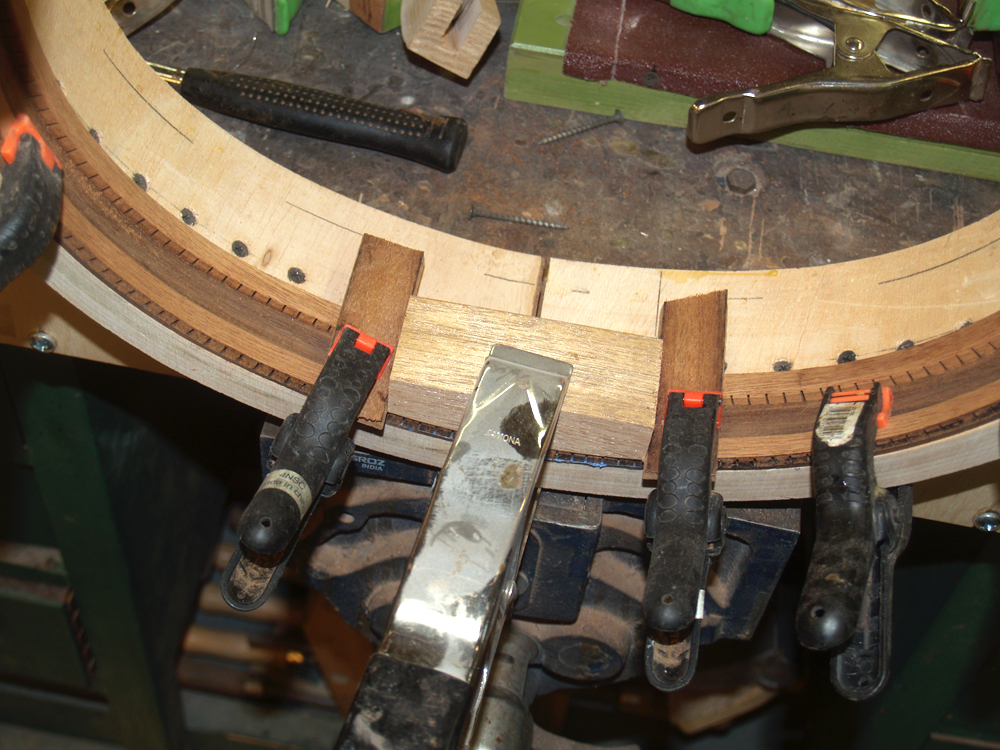
Here I am marking the section of kerfing that has to be removed for the mahogany end block.
 ( 53 ) 21-Oct-2012
After carefully measuring its position I trim off the section where the cutaway's tip will break.
 ( 54 ) 21-Oct-2012
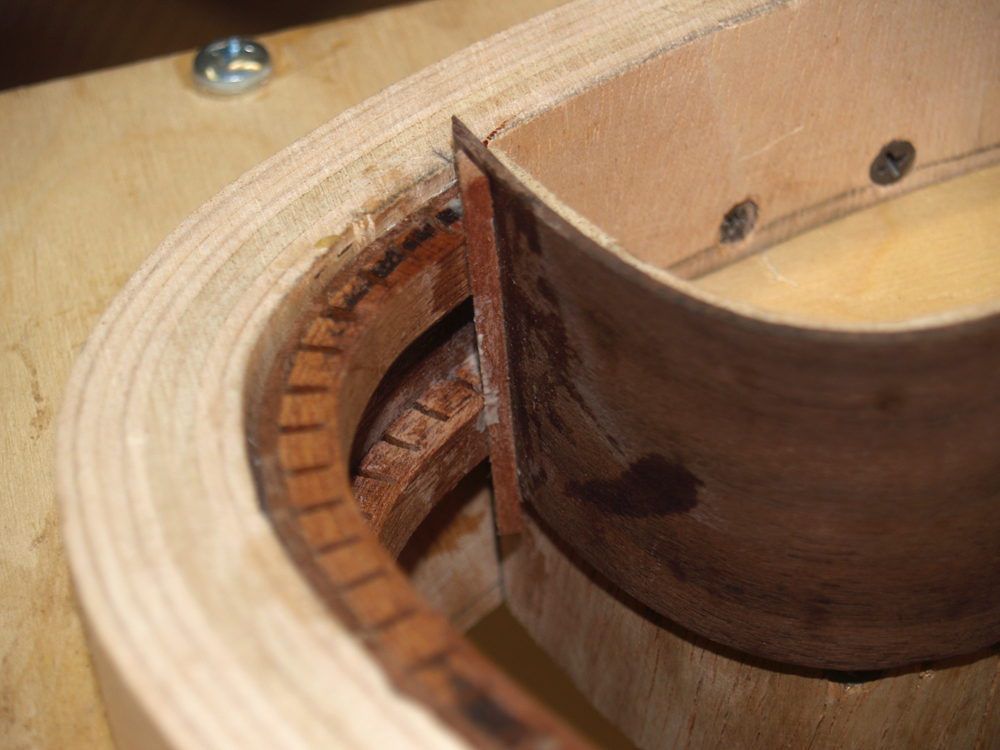
To set the cutaway blanks to shape I mount them on the insert forms and bake them in an oven for a little while.
 ( 55 ) 21-Oct-2012
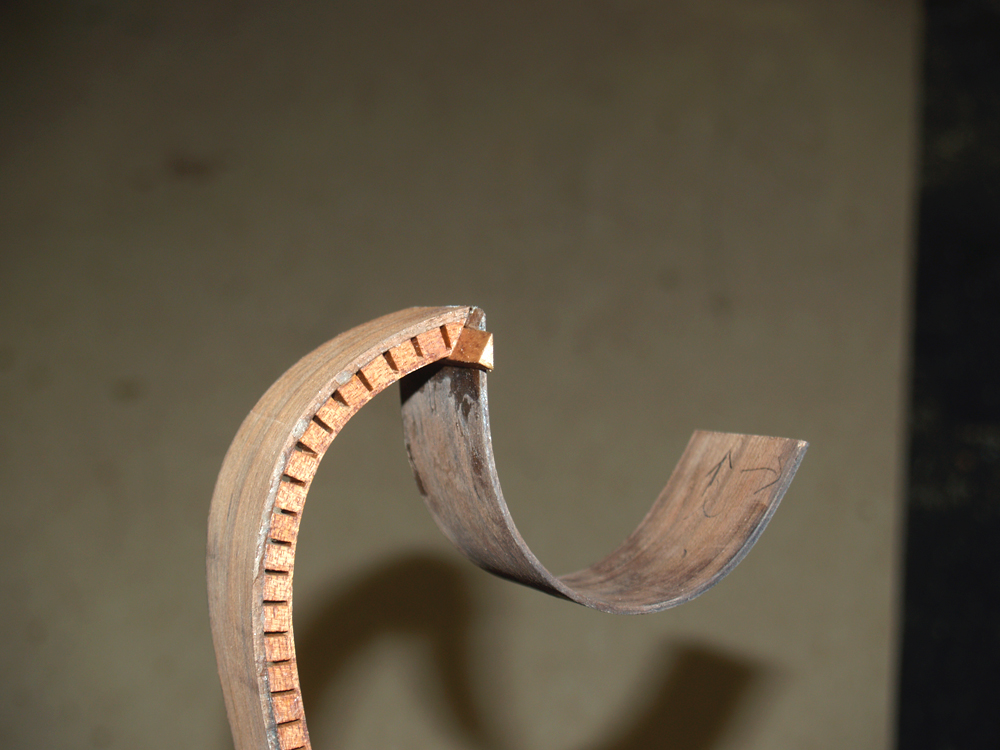
After the blanks have set I glue them to the truncated sides with a bit of glue and a reinforcing strip.
 ( 56 ) 21-Oct-2012
After the glue is set we have a funny shaped piece of wood.
 ( 57 ) 21-Oct-2012
A very funny shaped piece of wood.
 ( 58 ) 21-Oct-2012
Here I have mounted the sides in the form and am gluing the end block in place.
 ( 59 ) 21-Oct-2012
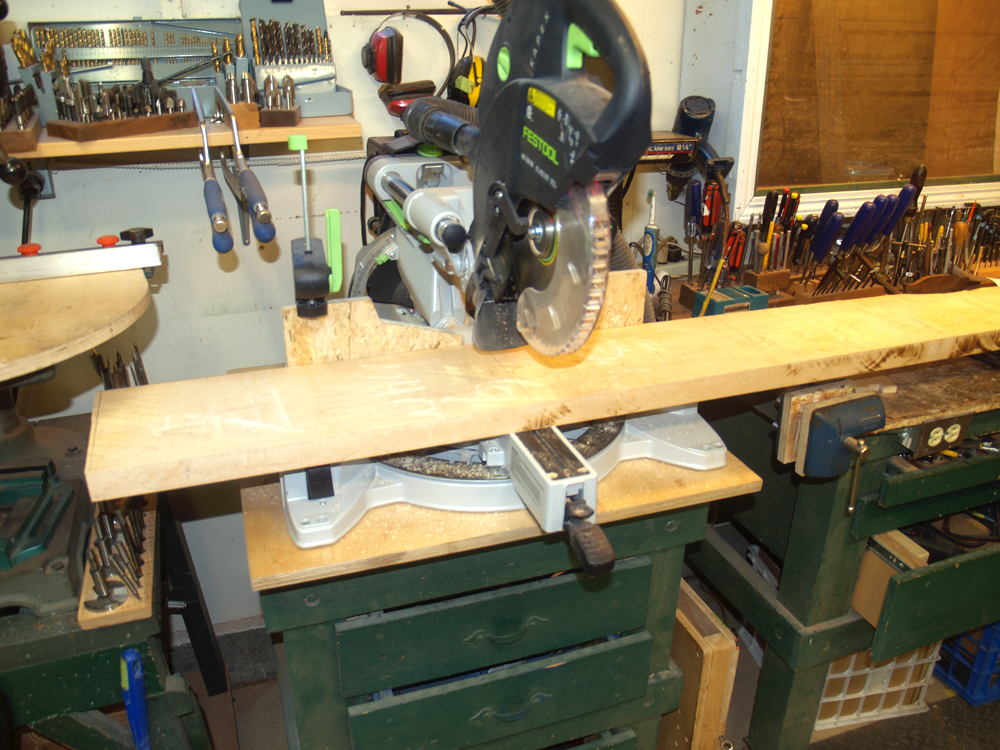
The design of this guitar has a solid block of maple running down the center. This block holds the sides together and provides a platform for the electronic hardware. Here I am cutting off the interior core blank from a board of maple.
 ( 60 ) 21-Oct-2012
I shape the front of the core blank to match the shape of the cutaway.
 ( 61 ) 21-Oct-2012
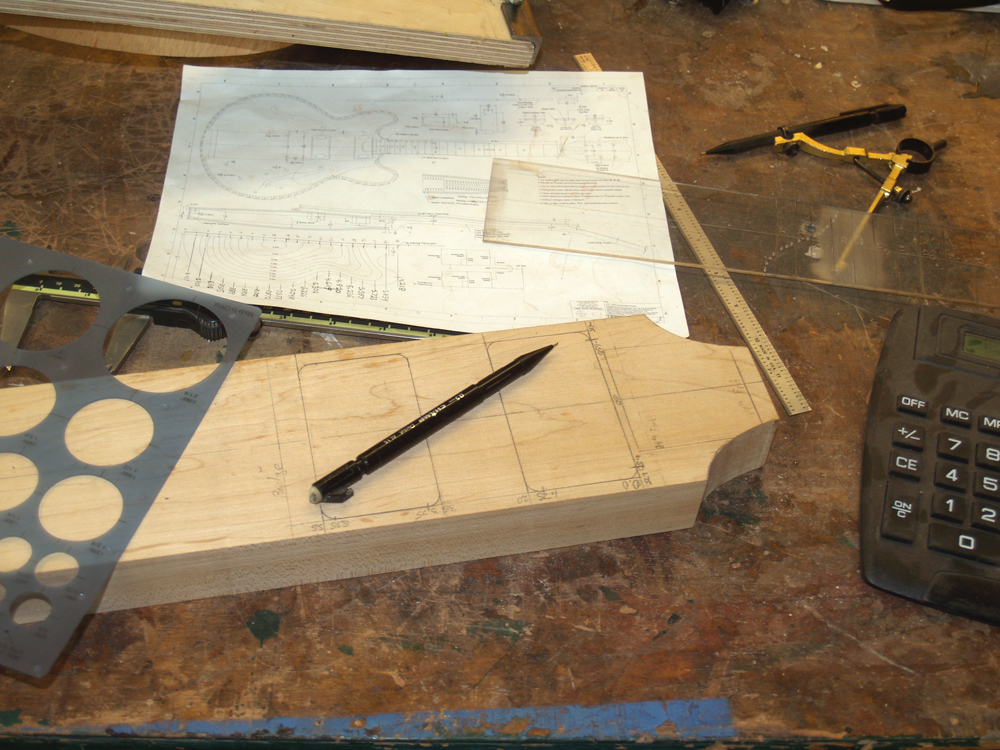
And then I carefully lay out the pickup and neck wells on the maple blank.
 ( 62 ) 21-Oct-2012
I use my milling machine and a 1/2 inch end mill to route out the wells.
 ( 63 ) 21-Oct-2012
Here I am routing out the neck well.
 ( 64 ) 21-Oct-2012
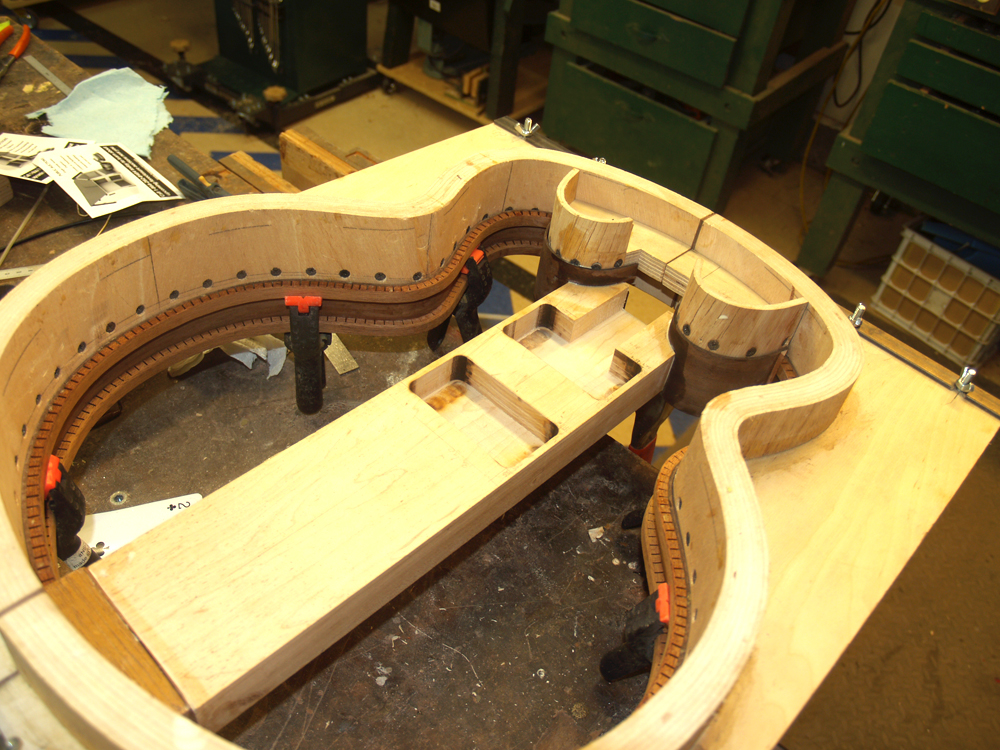
After cleaning up the edge fluff I dry fit the core into the rim.
 ( 65 ) 21-Oct-2012
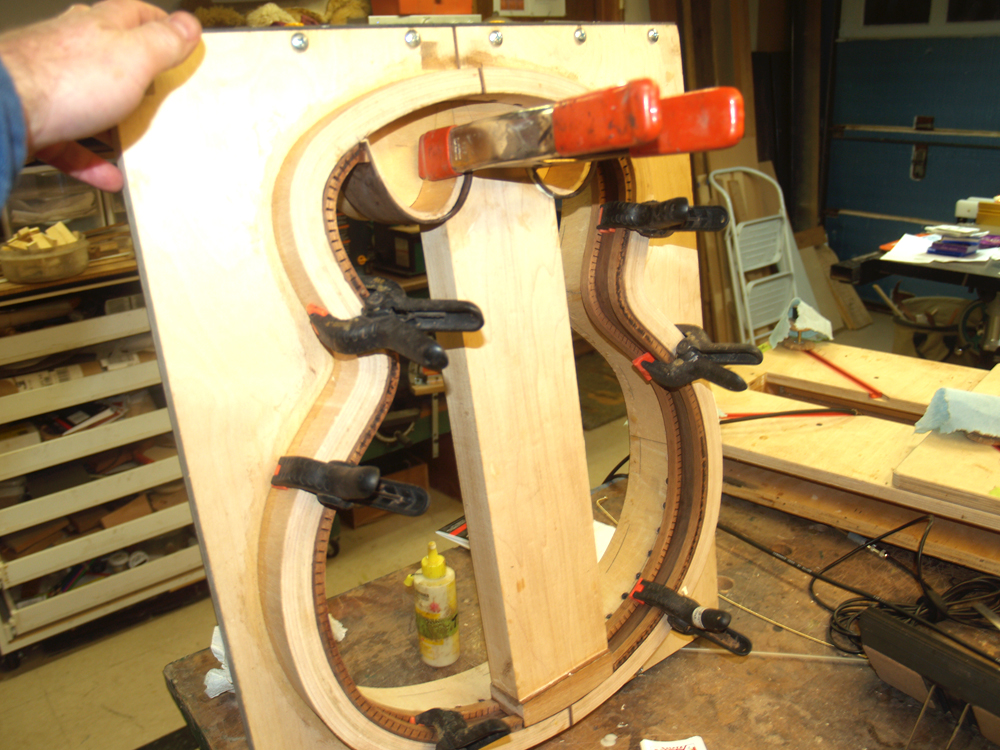
A bit of glue and I install the core.
 ( 66 ) 21-Oct-2012
The next morning I crack the mold and the assembled side pop out. It is starting to look like a guitar.
 ( 67 ) 21-Oct-2012
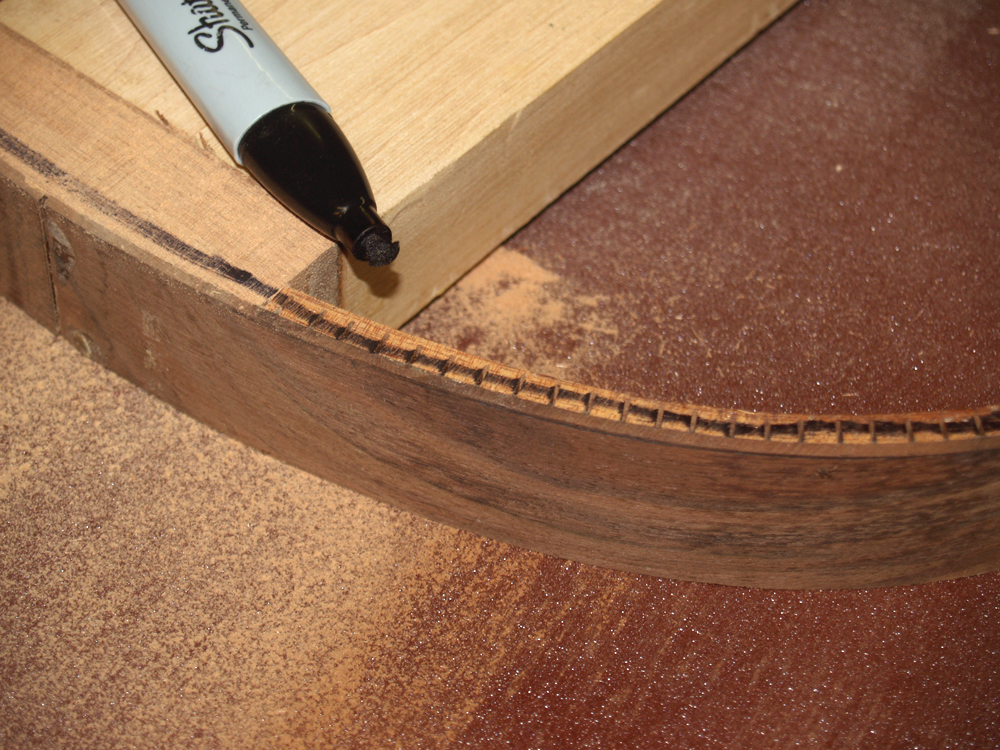
The edges of the rim need to be sanded to the shape of the dishes. I use a sharpie to mark the edges. When all of the magic marker is gone I know I am done.
 ( 68 ) 21-Oct-2012
I sand the bottom edges with a weigh pressing the rim into place. This method works better than using my own weight to press down because the bias of the wieght is easily controlled and doesn't wander.
 ( 69 ) 21-Oct-2012
The top edge is a flat plane, so I use my granite table top to sand it flat.
 ( 70 ) 21-Oct-2012
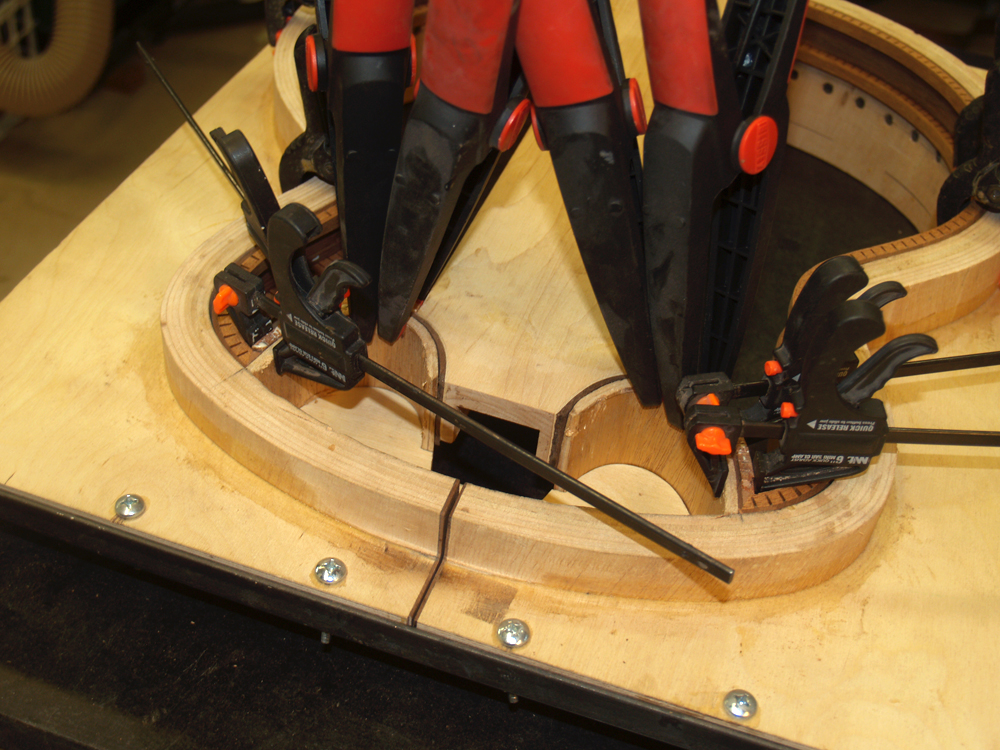
After using my iron to the heat and shape the cutaway kerfing I glue it into place with a variety of clamps. If you have just the right clamp it can make a big difference in the ease of the process. I am a sucker for a novel clamp.
 ( 71 ) 21-Oct-2012
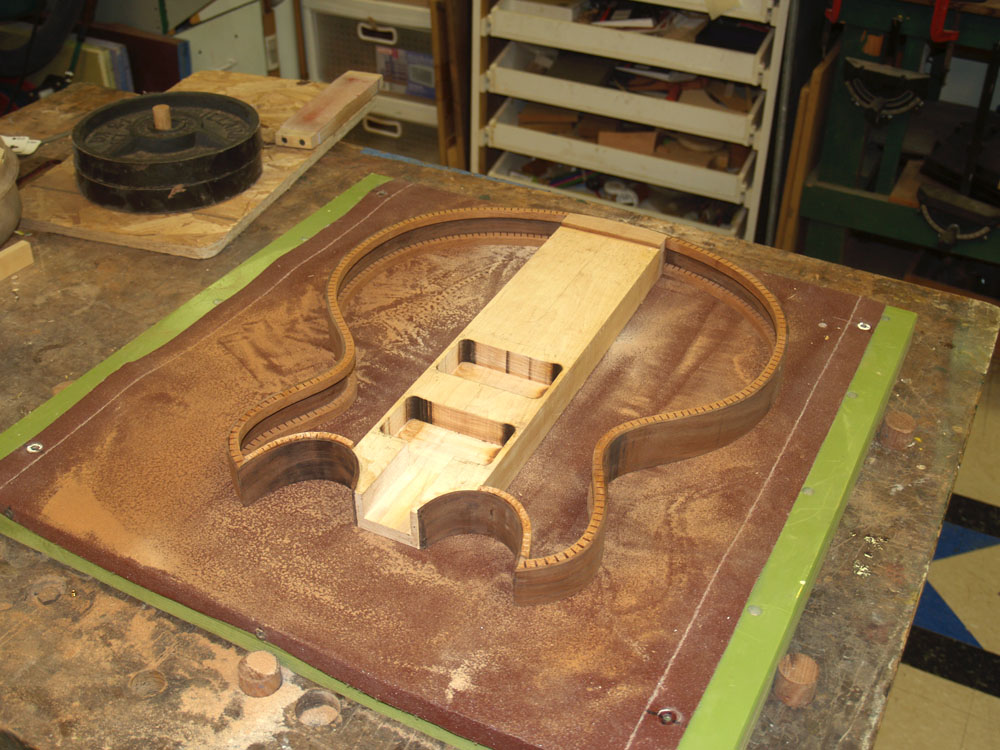
After the glue has dried overnight I sand off the edge standing proud.
 ( 72 ) 21-Oct-2012
And voila, ready for top and back.
 ( 31 ) 21-Oct-2012
 ( 32 ) 21-Oct-2012
 ( 33 ) 21-Oct-2012
 ( 34 ) 21-Oct-2012
 ( 35 ) 21-Oct-2012
 ( 36 ) 21-Oct-2012
 ( 37 ) 21-Oct-2012
 ( 38 ) 21-Oct-2012
 ( 39 ) 21-Oct-2012
 ( 40 ) 21-Oct-2012
 ( 41 ) 21-Oct-2012
 ( 42 ) 21-Oct-2012
 ( 43 ) 21-Oct-2012
 ( 44 ) 21-Oct-2012
 ( 45 ) 21-Oct-2012
 ( 46 ) 21-Oct-2012
 ( 47 ) 21-Oct-2012
 ( 48 ) 21-Oct-2012
 ( 49 ) 21-Oct-2012
 ( 50 ) 21-Oct-2012
 ( 51 ) 21-Oct-2012
 ( 52 ) 21-Oct-2012
 ( 53 ) 21-Oct-2012
 ( 54 ) 21-Oct-2012
 ( 55 ) 21-Oct-2012
 ( 56 ) 21-Oct-2012
 ( 57 ) 21-Oct-2012
 ( 58 ) 21-Oct-2012
 ( 59 ) 21-Oct-2012
 ( 60 ) 21-Oct-2012
 ( 61 ) 21-Oct-2012
 ( 62 ) 21-Oct-2012
 ( 63 ) 21-Oct-2012
 ( 64 ) 21-Oct-2012
 ( 65 ) 21-Oct-2012
 ( 66 ) 21-Oct-2012
 ( 67 ) 21-Oct-2012
 ( 68 ) 21-Oct-2012
 ( 69 ) 21-Oct-2012
 ( 70 ) 21-Oct-2012
 ( 71 ) 21-Oct-2012
 ( 72 ) 21-Oct-2012