|
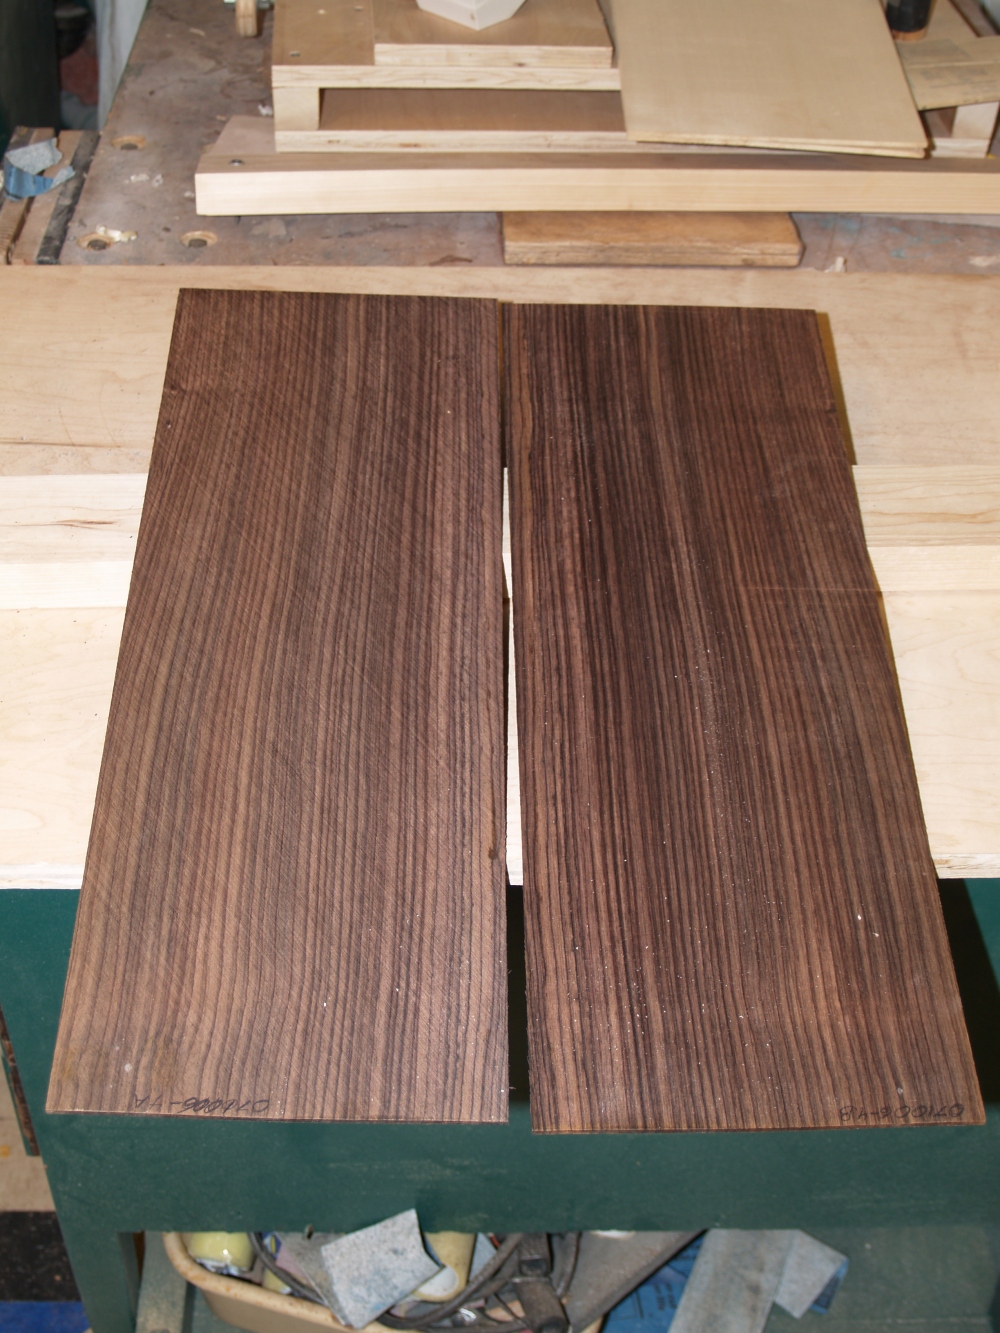
(1)
14-Sep-06
Two
beautiful Indian Rosewood back pieces ready to be joined. |
|
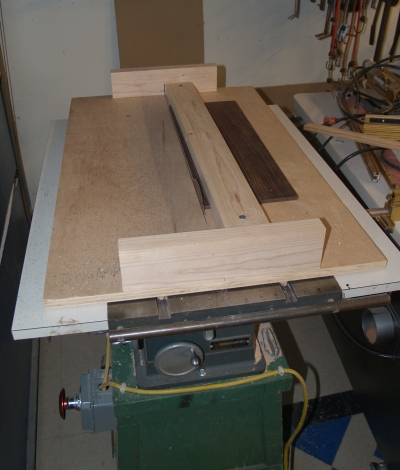
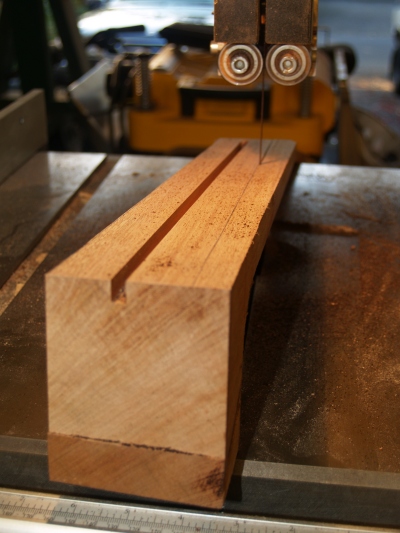
(2) 14-Sep-06
Using a tablesaw and sled to cut the back pieces. |
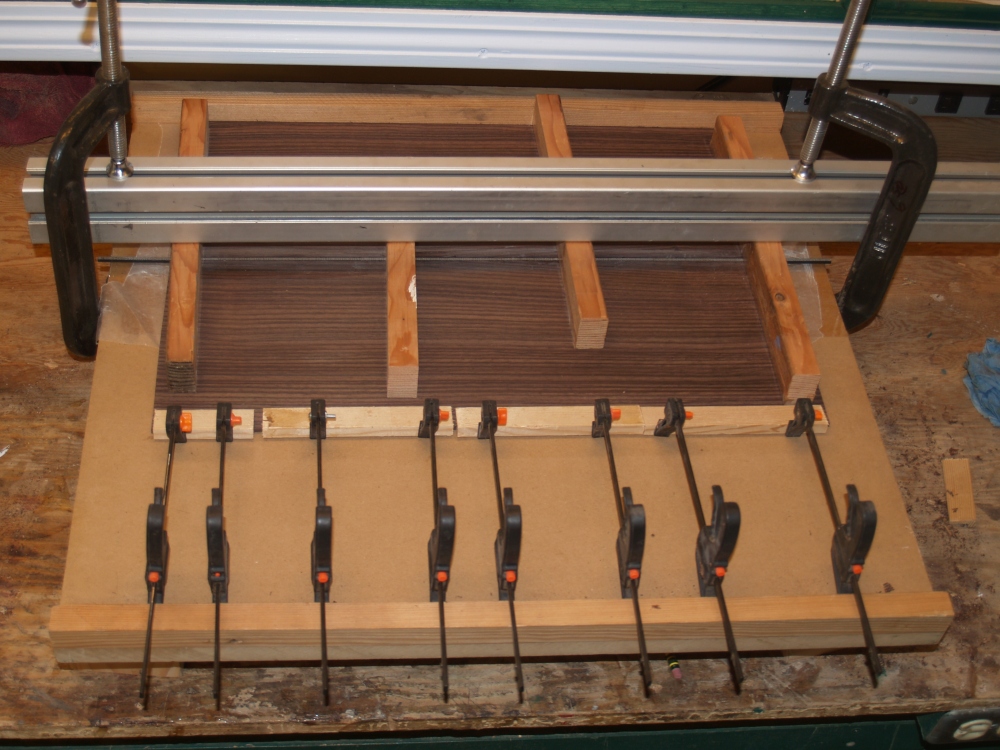 |
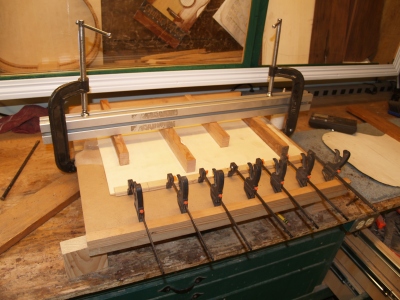
(3) 14-Sep-06
The back pieces with a
strip of purfling being squeezed in a press. |
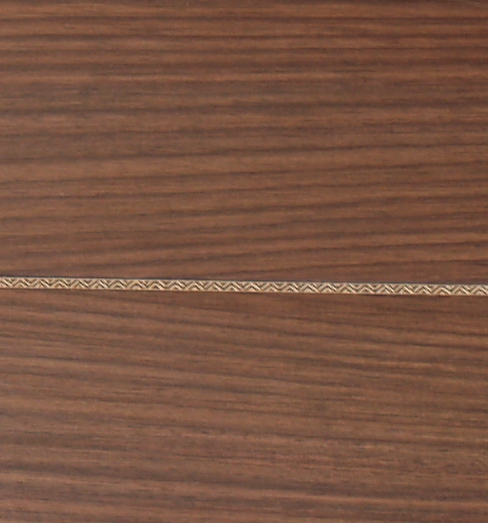 |
(4) 14-Sep-06
A closeup of the joined back. |
 |
(5) 14-Sep-06
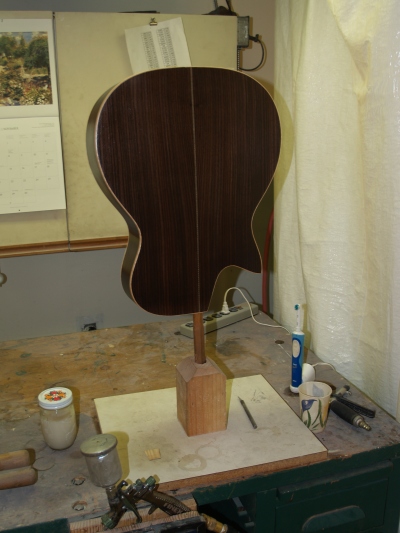
Joining the Englemann Spruce top pieces. |
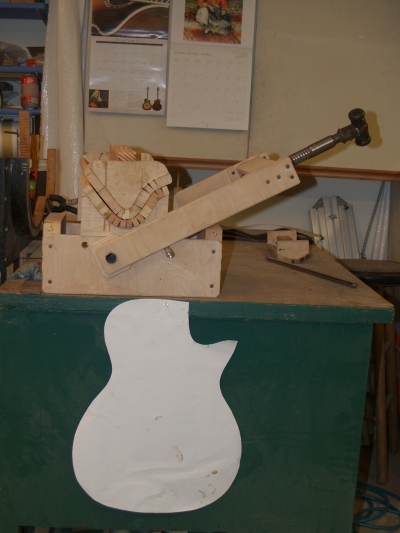 |
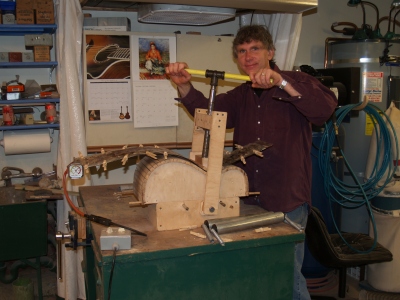
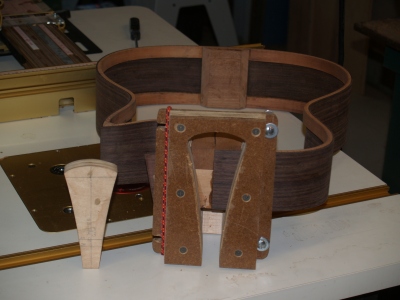
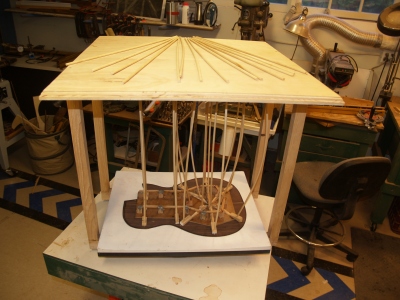
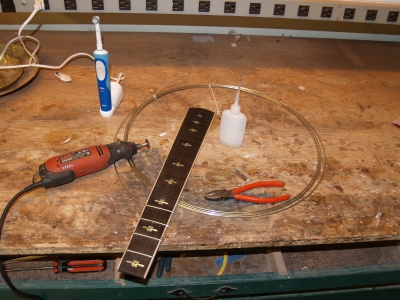
(6) 17-Sep-06
This is the first Cutaway Model I am building. My design
leverages from the standard model and incorporates an acute cut that
reflects my headstock design. To bend the sides I have built
a
mold that fits into the Universal Bendalator. More
on how
this works later. |
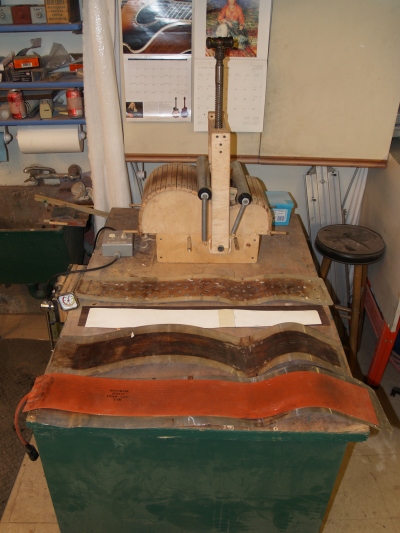 |
(7) 19-Sep-06
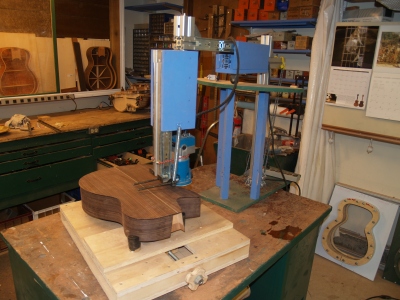
Bending the sides requires a press and a heating blanket (orange).
The side piece, under the white paper template, is placed
between
two sheets of aluminum flashing. |
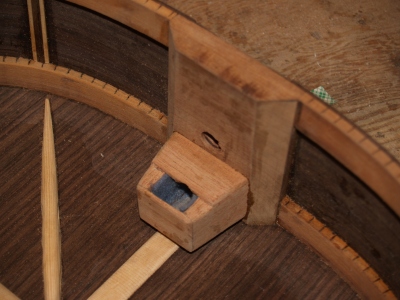
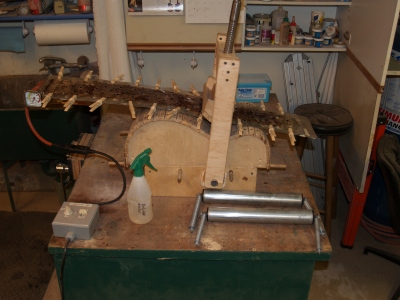 |
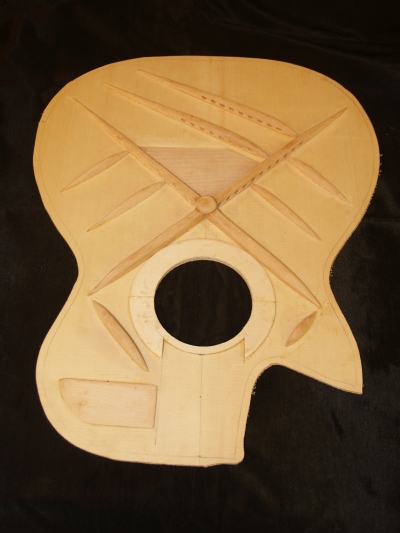
(8) 19-Sep-06
The sandwich is held together with clothes pins and placed in the press. |
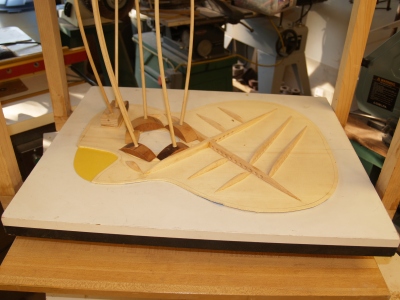
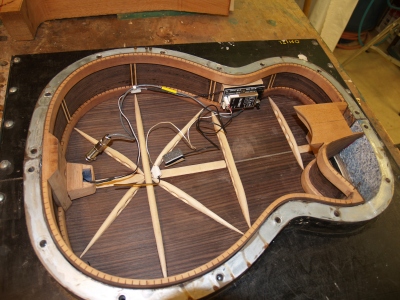
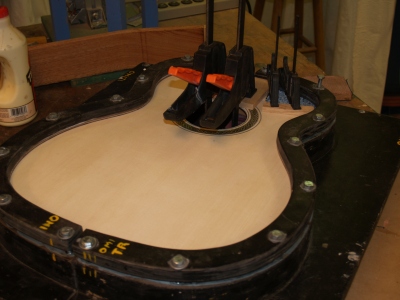
 |
(9) 19-Sep-06
A big screw is used to press the waist into shape. |
 |
(10) 19-Sep-06
Rollers with big springs are used to bend the lower and upper bouts. |
 |
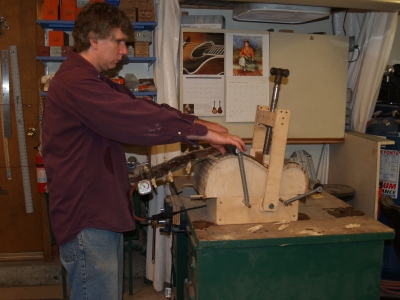
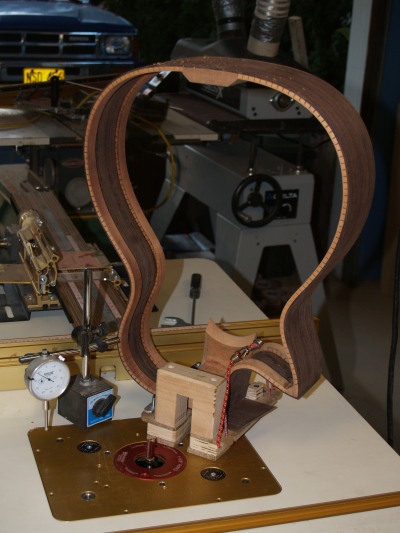
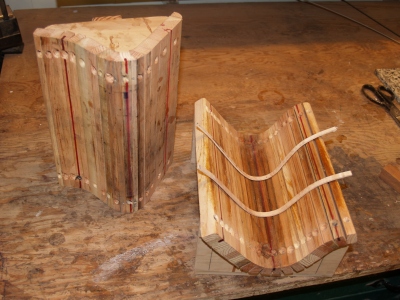
(11) 19-Sep-06
Shaping the side wall of the cutaway is a two step process.
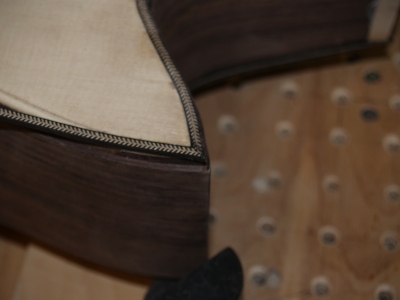
First, the cutaway piece is shaped in this press.
This
leaves the sidewall vertical. The piece is then placed in a
second press that forms the side to the shape of the heel of the neck. |
 |
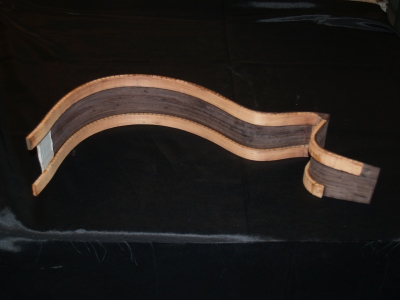
(12) 19-Sep-06
The final results of the sidewall cutaway. |
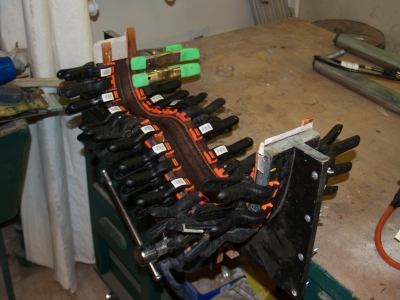 |
(13) 22-Sep-06
Installing the kerfing in the bass side sidewall. More
clamps
Scotty... I'm giving it all I've got captain, I'm not sure she'll take
any more.
|
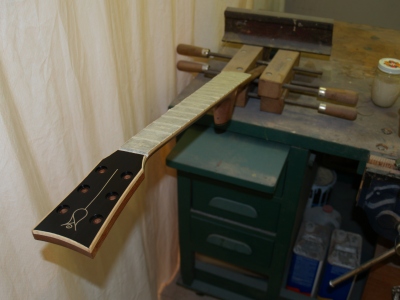
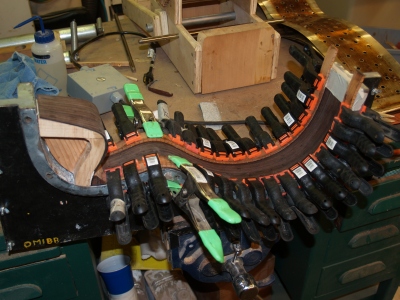 |
(14) 22-Sep-06
Installing the kerfing on the cutaway side. |
 |
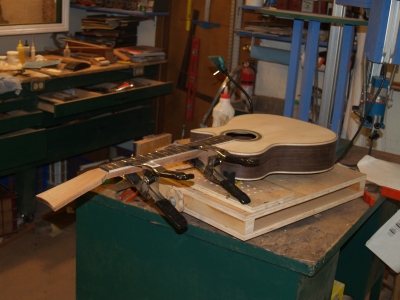
(15) 22-Sep-06
I use an inside kerfing construction that produces a gunnel.
This
yields a sidewall construction that is very strong, stiff, and holds it
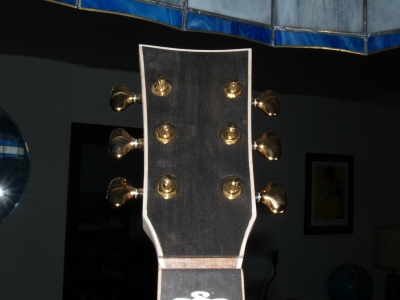
shape. |
 |
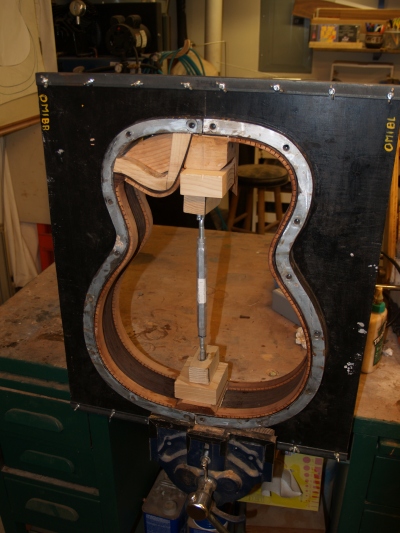
(16) 23-Sep-06
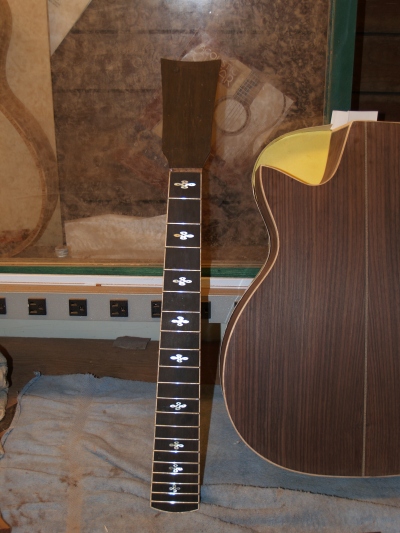
The heal block ready to be installed. Note the
complex
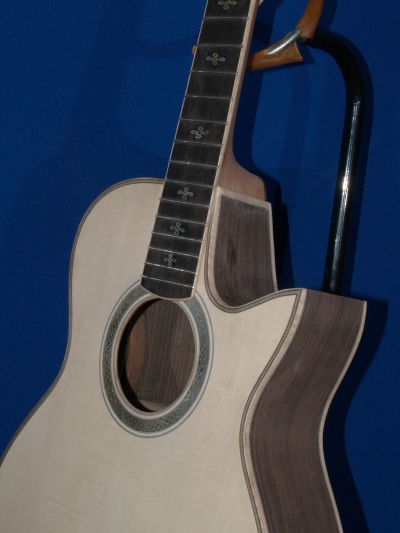
compound curve on the right side. This will allow the side of
the
guitar to lay nearly flush with the neck. I.e., no shelf at
the
transition point of the body to the neck. In reality there
will
be a small discontinuity at the transition point, but this will be kept
to a minimum. |
 |
(17) 23-Sep-06
The assembly of the sides. Many, many Newtons pushing the
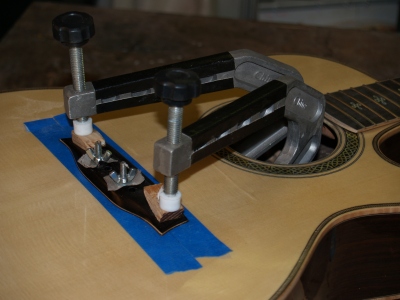
heal block and end block into place. |
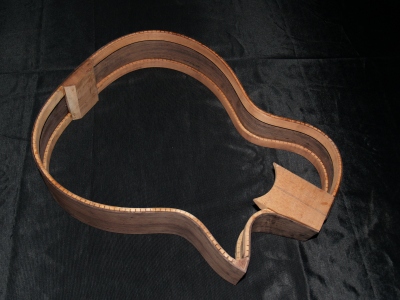 |
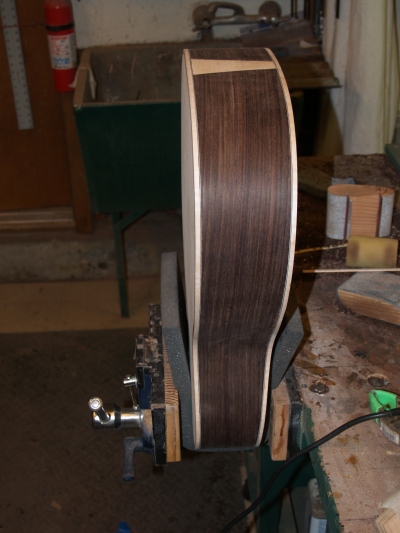
(18) 24-Sep-06
The sides assembled. Viola! |
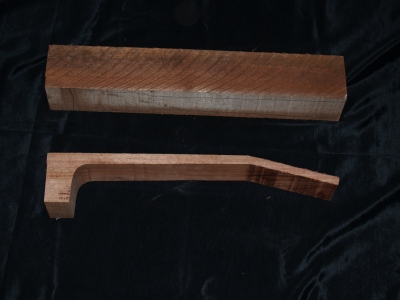 |
(19) 30-Sep-06
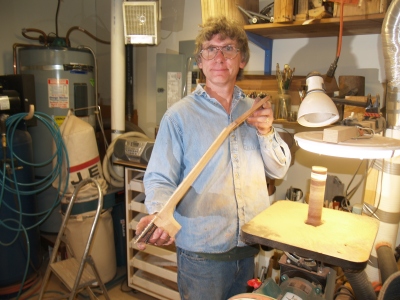
Cut a one piece neck blank from a big stick of mahogany. Two
neck blanks come from this piece. |
 |
(20) 30-Sep-06
Getting ready to cut the neck channel. An end on view of the
fixture and the neck template. |
 |
(21) 30-Sep-06
This operation is one of the more important cuts in the construction of
the guitar. The fit between the neck and the channel is
determined by the quality of this cut. I use a router table
and
carefully constructed jig to assure that the channel is precise and
accurate. |
 |
(22) 30-Sep-06
The neck channel successfully routed. |
 |
(23) 7-Oct-06
Laying out the back brace blanks, getting ready to trim and shape them. |
 |
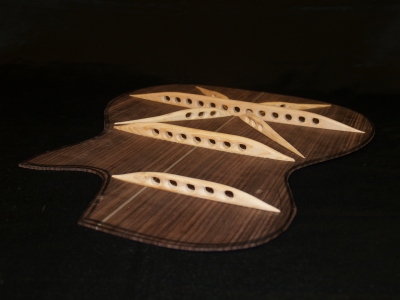
(24) 7-Oct-06
The back braces trimmed and shaped into the cool organic aircraft
braces that help define the sound of the instrument. This
brace
design draws on nature for its inspiration, following smooth optimized
shapes with a maximum of material where it matters to increase
stiffness and removing all material that adds unnecessary mass.
The masters in mechanical engineering paying dividends meets
the
old hippy artist. Each of these braces is like a small
sculpture. |
 |
(25) 7-Oct-06
The braces being glued onto the back in the 'go-box'. The
back
sits in a form that is in the same shape as the finished back, a
shallow bowl with a 14.25 foot radius. Many flexible sticks
pushing in all the right places. The braces are held in place
in
a fixture. Don't know why it is called a go-box, but it is. |
 |
(26) 7-Oct-06
The back braces glued on to the back. |
 |
(27) 7-Oct-06
The back being glued onto the sides.
Note the huge piece of black walnut the form is sitting on.
Future guitars. |
 |
(28) 7-Oct-06
The back and sides glued together. |
 |
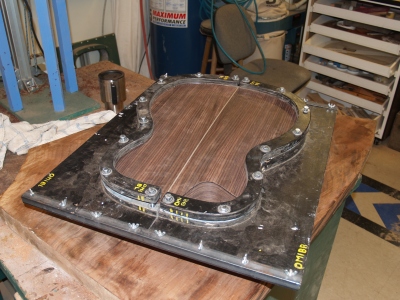
(29) 7-Oct-06
The excess from the back being trimmed off. This machine, of
my
own design, holds the router in a vertical position while allowing the
router to move up and down, in and out, from side to side, and rotate.
The instrument body is held in the clamping fixture which
sits on
a Lazy-Susan allowing the instrument to be rotated around.
Because the back is defined as a shallow bowl, this machine
allows me to trim and route the binding shelf parallel to the sides.
Note the guitars in the background. The one on the right is a
Brazilian Rosewood OM, and the one on the left is a Paduk Parlor.
Your sibling guitars. |
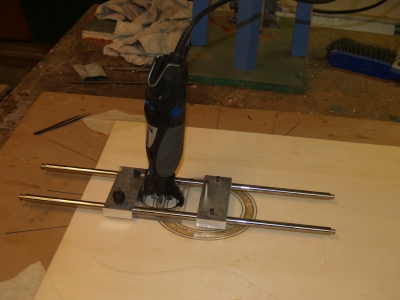 |
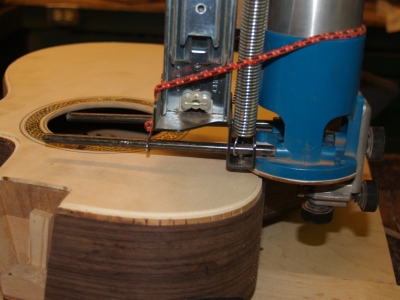
(30) 15-Oct-06
A circle router machine used to cut a channel to inset the rosette. |
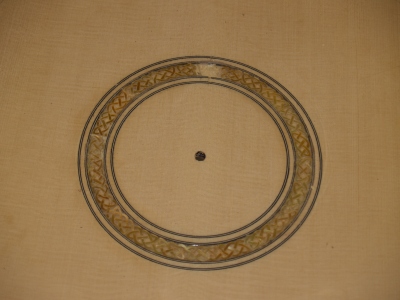 |
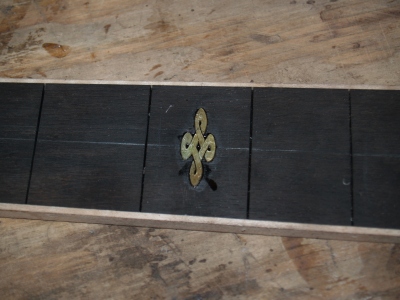
(31) 15-Oct-06
The Gold Mother of Pearl Celtic Knot rosette glued into the channel. |
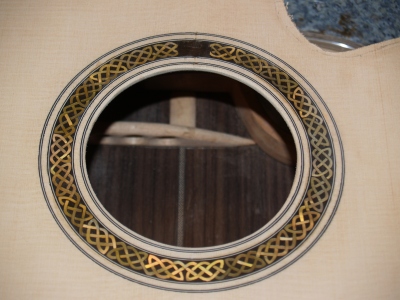 |
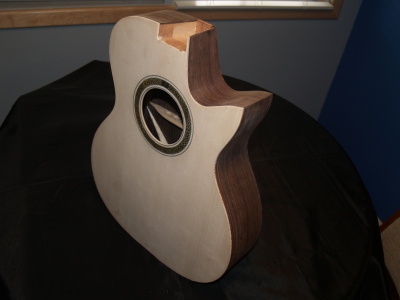
(32) 15-Oct-06
The spaces have been filled in with an epoxy paste and the
hole is cut out. |
 |
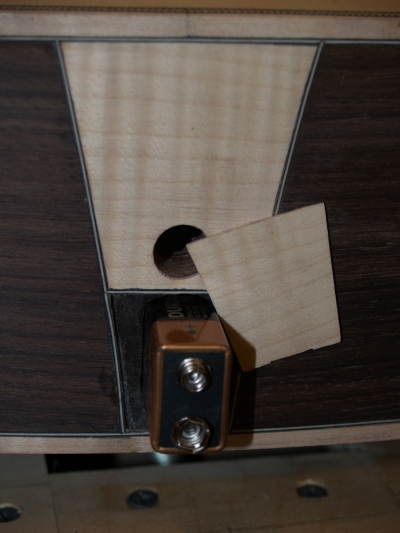
(33) 15-Oct-06
This guitar will have an electric pickup installed that requires a
battery for the preamp. The battery will be housed in this
pocket
that has an access door in the bottom of the guitar. |
 |
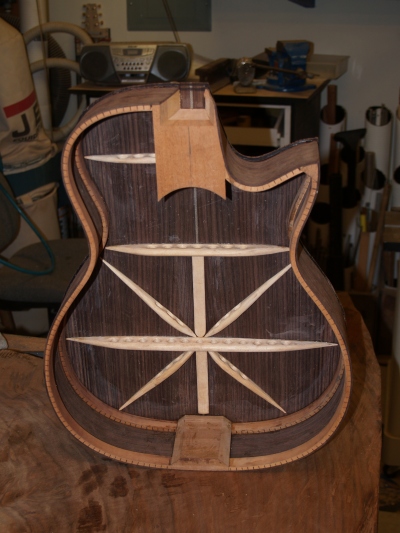
(34) 15-Oct-06
Some of the braces being glued onto the backside of the top of the
guitar. |
 |
(35) 15-Oct-06
The brace system for the top ready for a little bit of clean up.
The prettier it is the easier for the notes to get out. |
 |
(36) 20-Oct-06
The layout of the internal electronics, making sure everything fits.
This is pretty much the last chance to make sure everything
is
right before the top gets glued on. |
 |
(37) 20-Oct-06
The top getting glued on. This is a scary step because if
anything needs to be adjusted inside it has to be done through the
sound hole. Skinny arms help. |
 |
(38) 20-Oct-06
The top glued on and ready to be trimmed. |
 |
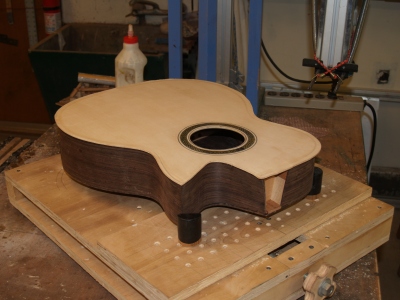
(39) 20-Oct-06
Ta da ... ohh that's pretty, all trimmed up and ready for the binding.. |
 |
(40) 20-Oct-06
Starting with a mahogany neck blank the channel for the truss rod is
routed out. |
 |
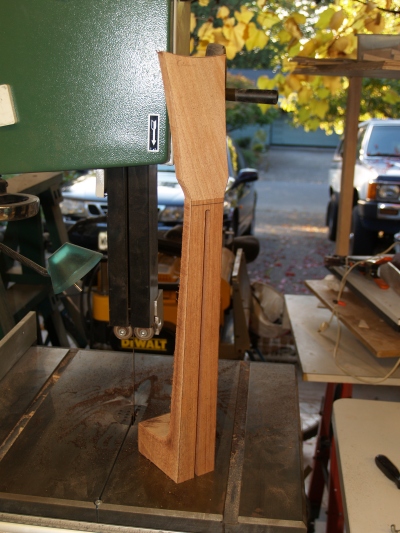
(41) 20-Oct-06
Using the bandsaw to trim the neck blank to shape. |
 |
(42) 20-Oct-06
And the result is a neck blank ready to be shaped. |
 |
(43) 24-Oct-06
Making the maple binding for the cut away. |
 |
(44) 24-Oct-06
Using the "Universal Bindalator" to route out the channel and shelf for
the binding and purfling. |
 |
(45) 24-Oct-06
Installing the herringbone purfling at the horn of the cutaway. |
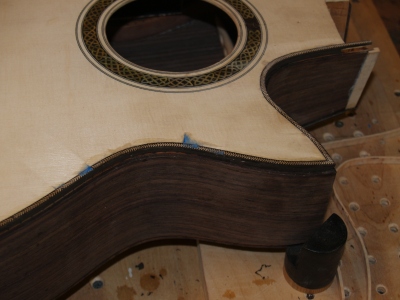 |
46) 24-Oct-06
Little bits of blue tape left behind in the binding process. |
 |
(47) 24-Oct-06
Does it make you nervous when I put your guitar in the vice? |
 |
(48) 24-Oct-06
A look at the end block detail. This is where you get access to to the
battery. |
 |
(49) 24-Oct-06
The hatch for the battery access is secured with four ceramic magnets. |
 |
(50) 24-Oct-06
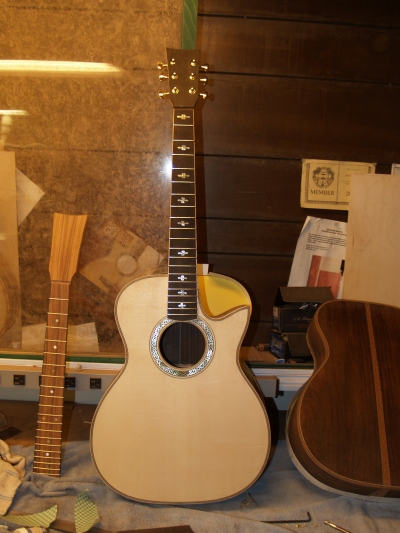
As more and more time and effort is applied to the guitar, the surfaces
become more valuable. To protect the top, in this case
Englemann
Spruce, which is relatively soft, the guitar gets a
yellow protective hat. Weird stuff happens in the
shop from
time to time and I want to keep the top safe and happy. |
 |
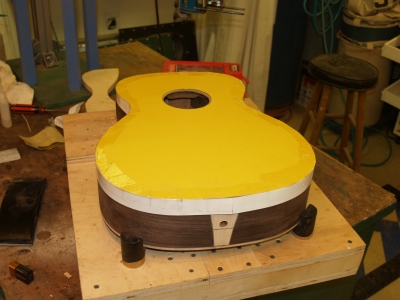
(51) 24-Oct-06
I love wood!
Using a raking light I look for and remove any bumps or valleys in the
top and back of the guitar. |
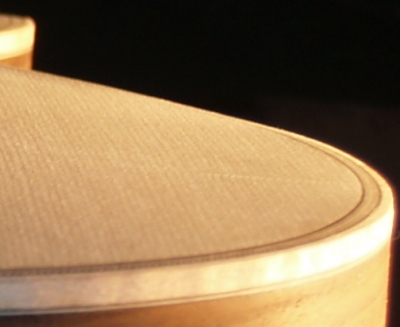 |
(52) 24-Oct-06
A close up look at the grain structure of the Englemann Spruce top and
the binding. Wood is an incredible material, both
structurally
and esthetically, it is never homogeneous, nor isotropic. It reveals a
spiritual character, and if we serve it well it will join us in a
symbiotic relationship that allows us to enjoy its visual and acoustic
character while preserving it for the generations. |
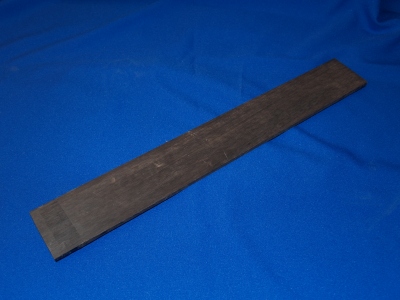 |
(53) 30-Oct-06
Starting with a nice piece of ebony... |
 |
(54) 30-Oct-06
I dimension it to the desired thickness. |
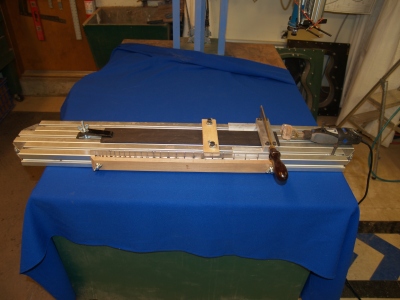 |
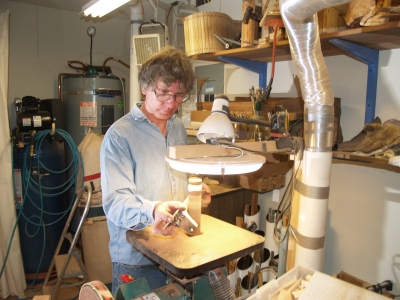
(55) 30-Oct-06
Using this machine if my own design that indexes a sled to the proper
positions I cut slots in the fret board for the fret wire. |
 |
(56) 30-Oct-06
Working on the inlay fret position markers markers after adding the
fret board trim. |
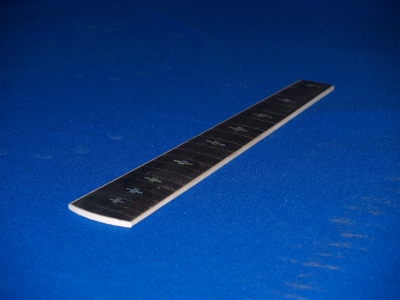 |
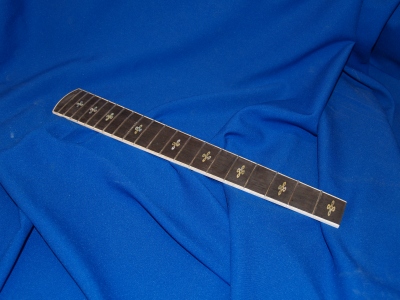
(57) 30-Oct-06
And in the end we get a nice looking fret board ready to be fretted. |
 |
(58) 30-Oct-06
These are some of the tools I use to install the fret wire.
What's that toothbrush used for? |
 |
(59) 30-Oct-06
A finished fret board. |
 |
(60) 30-Oct-06
A close up look at the neck attachment hardware.
|
 |
(61) 30-Oct-06
Checking to make sure everything fits just right. |
 |
(62) 30-Oct-06
Finally, it is starting to look like a guitar. |
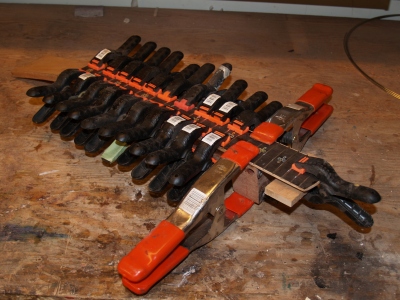 |
(63) 5-Nov-06
Gluing the fret board to the neck. Lots of clamps, glad I
went to
the store and bought some more. This step needs to
be done
just right. The bottom of the fretboard and the surface of
the
neck must be very flat and the of course the fret board must be
positioned with some degree accuracy, plus or minus 10 mils should do
it.
|
 |
(64.1) 5-Nov-06
The cutaway and its sibling guitar the Brazilian getting the head plate
glued on.
|
 |
(64.2) 5-Nov-06
The head plate trimmed to shape.
|
 |
(65) 5-Nov-06
This is a really fun part, shaping the neck.
|
 |
(66) 5-Nov-06
After lots of saw dust, the neck.
|
 |
(67) 5-Nov-06
Drilling the holes in the headstock and putting it altogether.
|
 |
(68) 5-Nov-06
Adding the trim to the headstock .
|
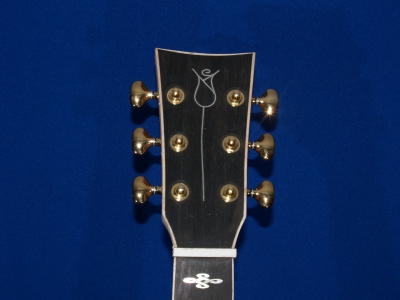 |
(69) 5-Nov-06
Installing the signature Portland Guitar Silver
Rose .
|
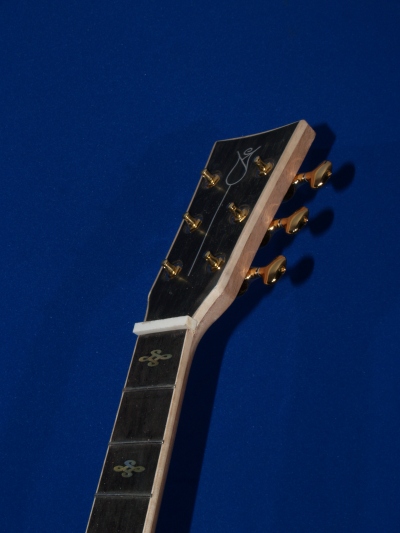 |
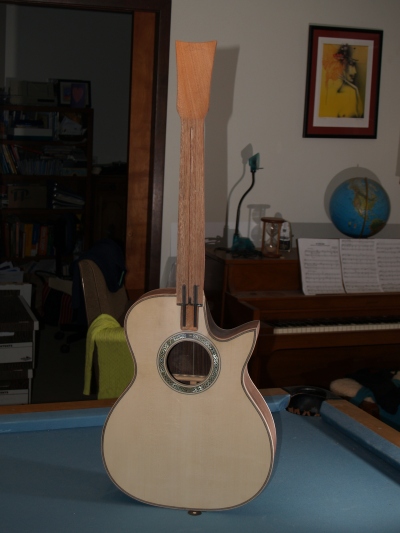
(70) 5-Nov-06
The headstock and upper neck, side view.
|
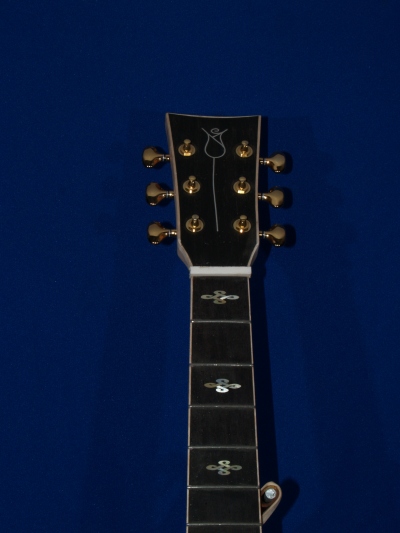 |
(71) 5-Nov-06
The headstock and upper neck.
|
 |
(72) 5-Nov-06
The upper body.
|
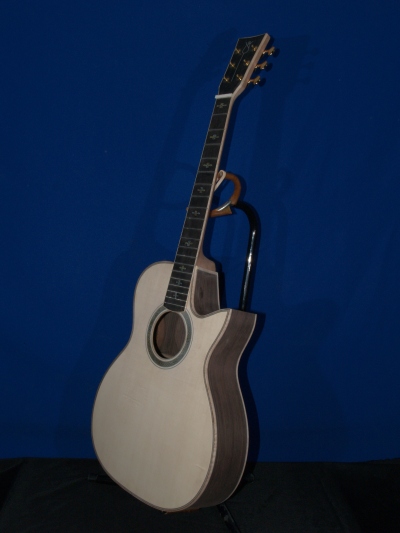 |
(73) 5-Nov-06
Side view.
|
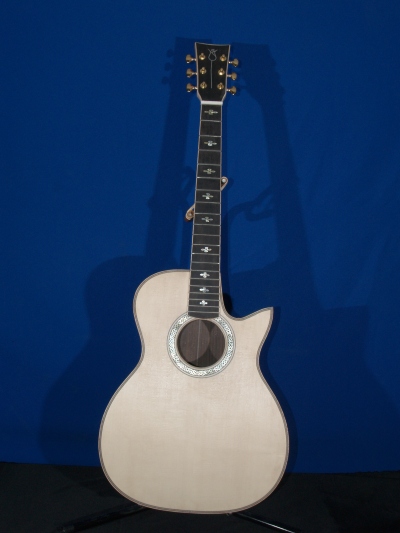 |
(74) 5-Nov-06
All of the major mechanical, structural and aesthetic components of the
guitar are complete. Now comes detailing and in a week or so,
finishing. After the finish is applied, cured and buffed to a
high polish the bridge is attached, the nut and saddle are shaped, the
contra rosette is installed, the pick guard is attached, the
electronics are installed, and then the strings are attached.
Until we get to the very end step we will not know what the
guitar will really sound like. Nonetheless, everything that I
have done, all of the measurements I have made, and the tap tone of the
sound box indicates that this is going to be a nice sounding guitar.
|
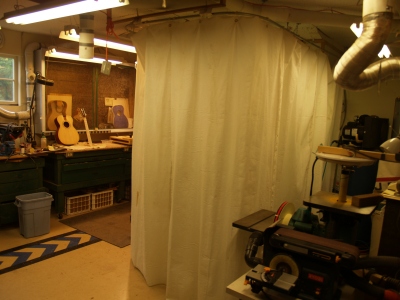 |
(76) 13-Nov-06
I have set up a paint booth in my shop by using a curtain. I
have
a two stage vent fan and a recirculating air filter inside the tent.
Before starting a spray job I thoroughly clean the shop and
blow
as much dust out the front door that I can. The small volume of the
tent and the air cleaning system I have set up keep the spray booth
relatively dust free. |
 |
(77) 13-Nov-06
Here is the interior of the spray booth with the guitar being sprayed.
What's that toothbrush doing there? |
 |
(78) 13-Nov-06
A closeup of the neck. The fret board is masked
off. Pieces of railroad track make excellent bits of heavy. |
 |
(79) 13-Nov-06
The body of the guitar set up like a lollipop |
 |
(80) 13-Nov-06
Here I am leveling the finish on the body. This part of the
finishing process involves spraying the finish on, filling in the low
spots and then sanding down the high spots until the surface
is
acceptably flat. After this the guitar will sit for a week
while
the finish cures some what. Then I start to put the shine on. |
 |
(81) 22-Nov-06
After leveling the lacquer, i.e., removing all of the high spots and
filling in all of the low spots, I sand the finish with successively
finner grits of sanding cloth. |
 |
(82) 22-Nov-06
After sanding the finish with a 12000 grit polishing cloth there is a
very fine haze that is removed with the polishing wheel. This
is
a very aggressive machine that will burn through the finish in a second
if you are not careful. A firm grip, with a light touch and a
steady hand are required. If I blow it, I get to go back and
start all over. I am very careful at this stage of the game. |
 |
(83) 22-Nov-06
After the finish is polished to a high gloss, I remove the finish where
the bridge will go and then the bridge is glued on. It is
very
important to get the bridge placement just right as this affects the
intonation of the guitar. This is one of those times where I
measure four times and glue once. Actually, I have a jig that
positions the bridge in just the right place. The bridge must
make intimate contact with the top of the guitar, so the bottom of the
bridge is sanded to the same contour as the top and when it is glued
down I clamp it down firmly. These long throat C-clamps are
made
just for this job. |
 |
(84) 22-Nov-06
And late in the evening after all of the glue gas set, I string the
guitar up for the first time and I get to play it. It sounds
like
a guitar. Over the next few days I will be playing it and
making
tweaks to the action to make it play as good as I can get it to play
and make sure everything is just right. The electronics have
been
installed and work quite well. This is always a very
satisfying
time, after all of the work put into it I finally get to hear how it
sounds. So far it is playing very well and to my ear it
sounds
really good. I hope Ron will be happy with it. The
pick
guard gets installed next and a few minor details later and it will be
done. |
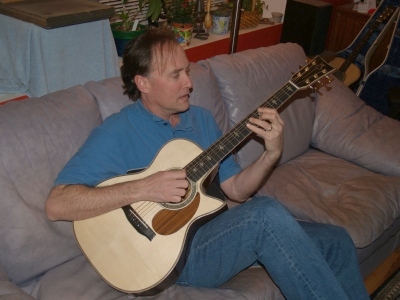 |
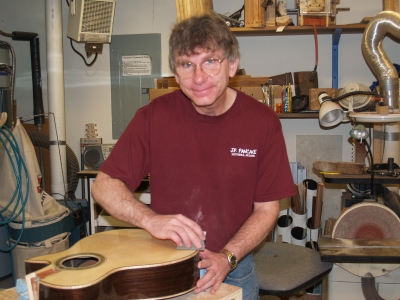
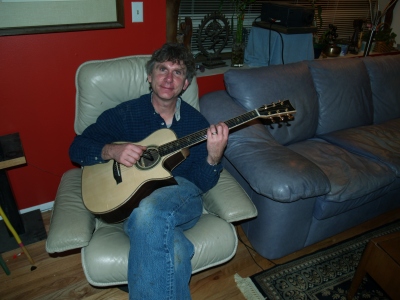
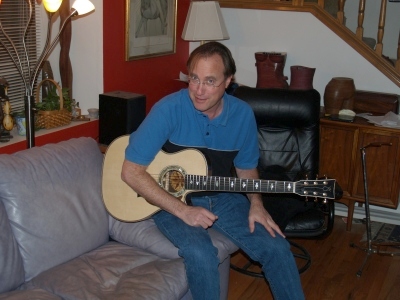
(85) 6-Nov-06
Ron and his new guitar. |
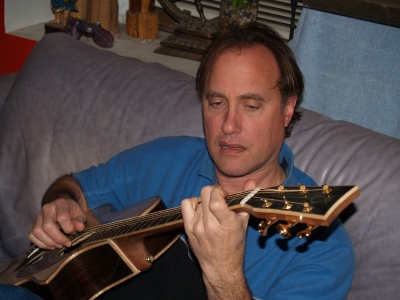
 |
(86) 6-Nov-06
Ron and his new guitar. |
 |
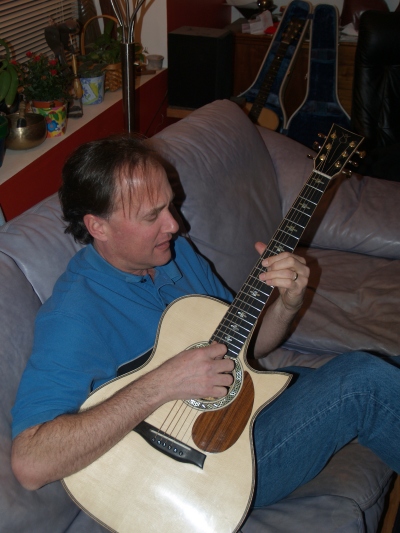
(87) 6-Nov-06
Ron and his new guitar. |
 |
(88) 6-Nov-06
Ron and his new guitar. |